git clone --depth 1  https://github.com/taranis-ai/taranis-ai
cd taranis-ai/docker/
Configuration
Copy env.sample to .env
cp env.sample .env
Open .env and change the defaults before exposing the instance on a network. More details about environment variables can be found in the docker README.
Redis and worker queues
Taranis AI uses Redis and RQ for worker queues, scheduled jobs, and frontend cache storage.
Variable
Used by
Purpose
REDIS_URL
core, frontend, workers
Redis connection URL for RQ queues and cache fallback.
REDIS_PASSWORD
core, frontend, workers
Redis password. Set this in production.
CACHE_REDIS_URL
core, frontend
Optional dedicated Redis URL for frontend cache and cache invalidation. Falls back to REDIS_URL.
CACHE_REDIS_PASSWORD
core, frontend
Optional dedicated cache Redis password. Falls back to REDIS_PASSWORD.
RQ_DEFAULT_JOB_TIMEOUT
core
Default RQ job timeout in seconds for queued worker tasks. Default: 180.
The Compose deployment wires Redis into core, frontend, collector, cron, and workers. If queued jobs are accepted but not processed, verify that Redis is reachable and at least one worker container is running.
See Background Jobs for Redis/RQ architecture, health checks, scheduled jobs, and upgrade notes.
LLM bot settings
The Compose deployment includes the optional llm-bot service for LLM-backed summaries, title generation, NER, clustering, and sentiment.
Variable
Purpose
BOT_API_KEY
Shared secret used by workers when calling bot services.
LLM_BASE_URL
Base URL of the upstream OpenAI-compatible API.
LLM_API_KEY
Upstream API key.
LLM_MODEL
Model name, unless the upstream provides a default.
LLM_TIMEOUT
Upstream request timeout in seconds.
LLM_BOT_PORT
Internal llm-bot port, default 8000.
See LLM Bot Service for endpoint mapping and bot configuration.
Analyst Chat
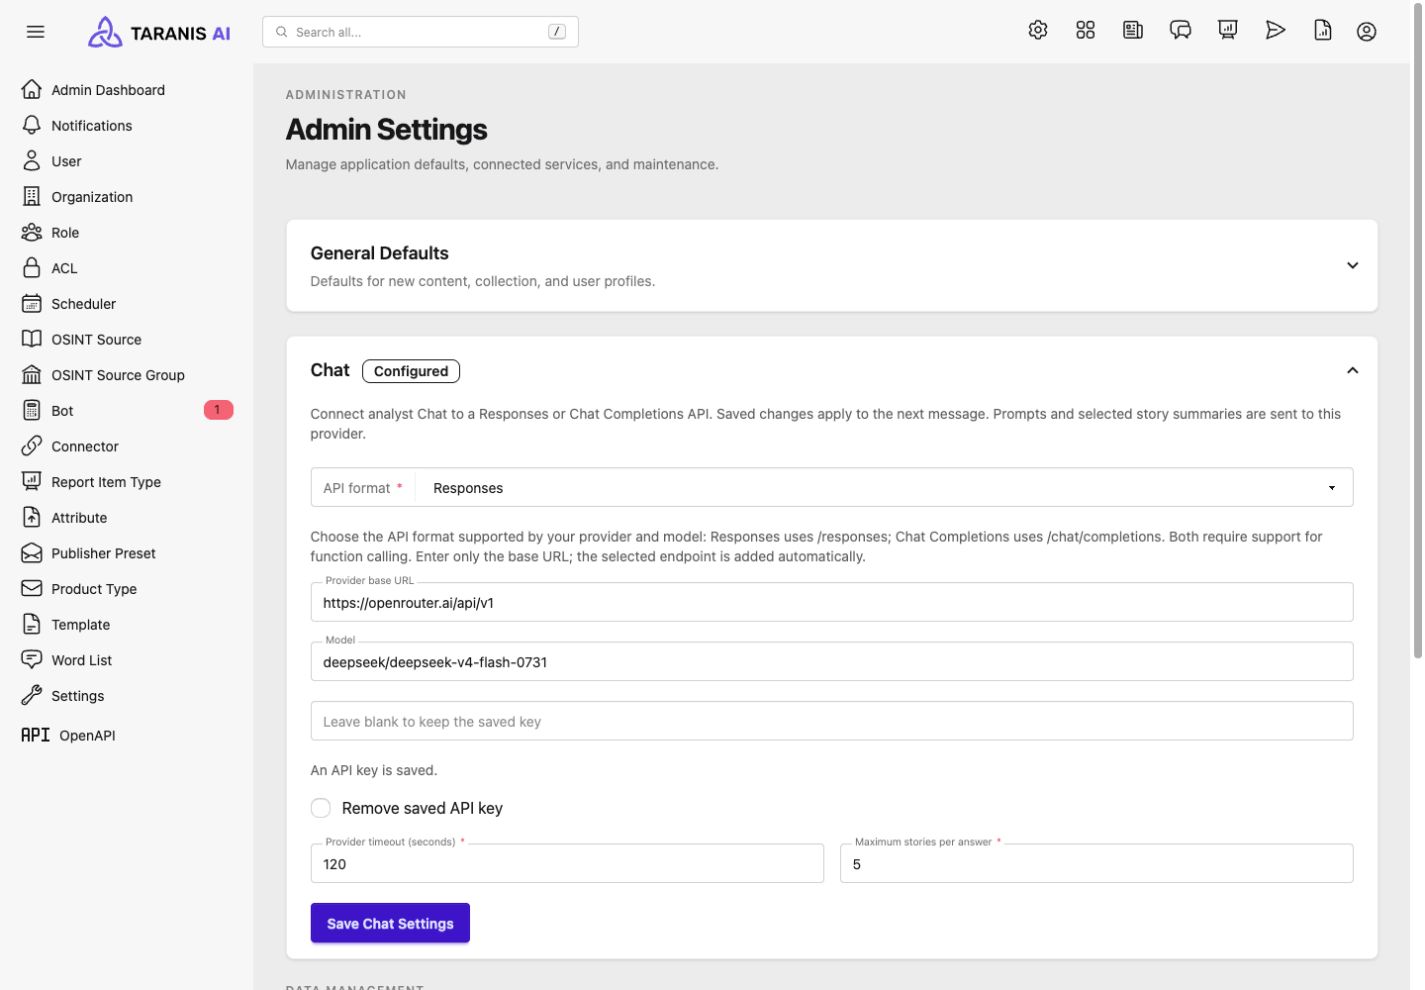
Optional Chat is disabled by default. Enable CHAT_ENABLED=true on core and frontend, then configure the provider in Admin Settings > Chat. Chat uses Redis and calls its provider directly from core, independently of llm-bot and workers.
See Chat deployment for setup, proxy timeouts, validation, and disabling the feature while preserving history.
Images and tags
Taranis AI images are tagged as follows:
Official release version number (e.g. 1.1.7)
Every official image release comes with an extra stable tag, in case pinning the release is not favourable (stable)
Latest tag for tracking the latest uploaded image, there is no guarantee this is an officially released image (latest)
The default credentials are user / user and admin / admin. Change them before production use.
The passwords for these two default users can be overridden by setting the environment variables PRE_SEED_PASSWORD_ADMIN or PRE_SEED_PASSWORD_USER before first launch.
Afterwards they are stored in the database in the user table.
For existing database-auth users, passwords and role assignments can be repaired with the operational CLI. See User Management.
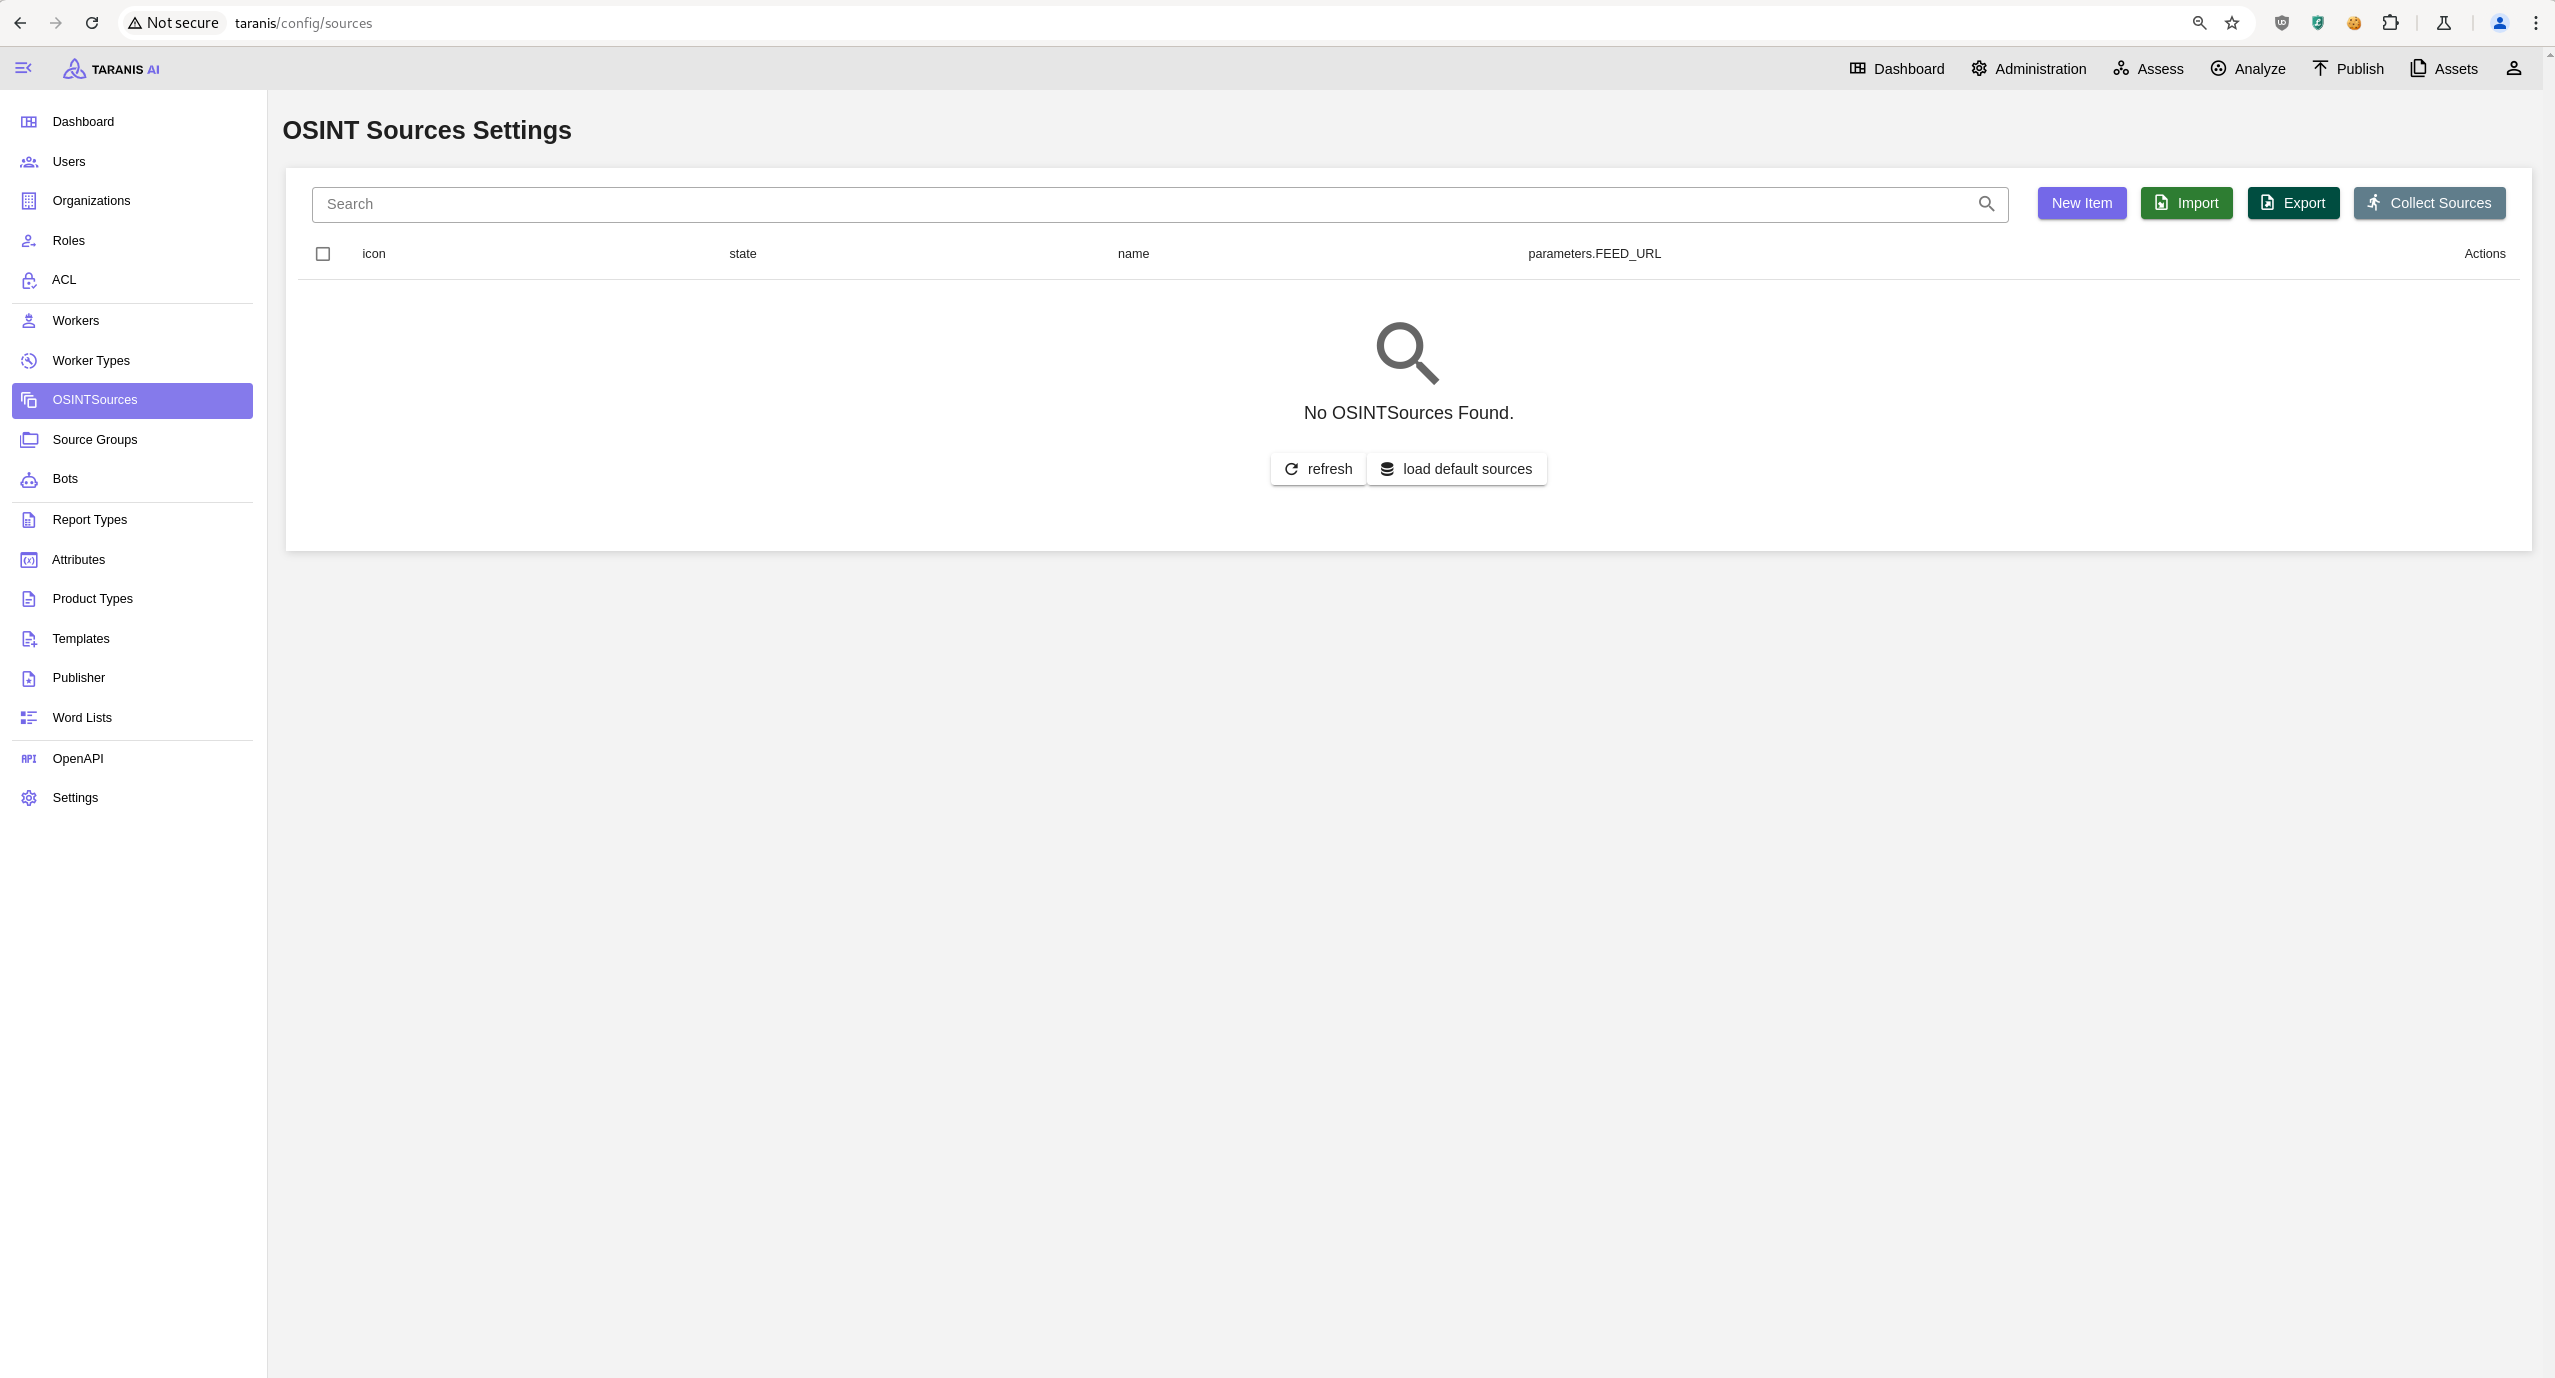
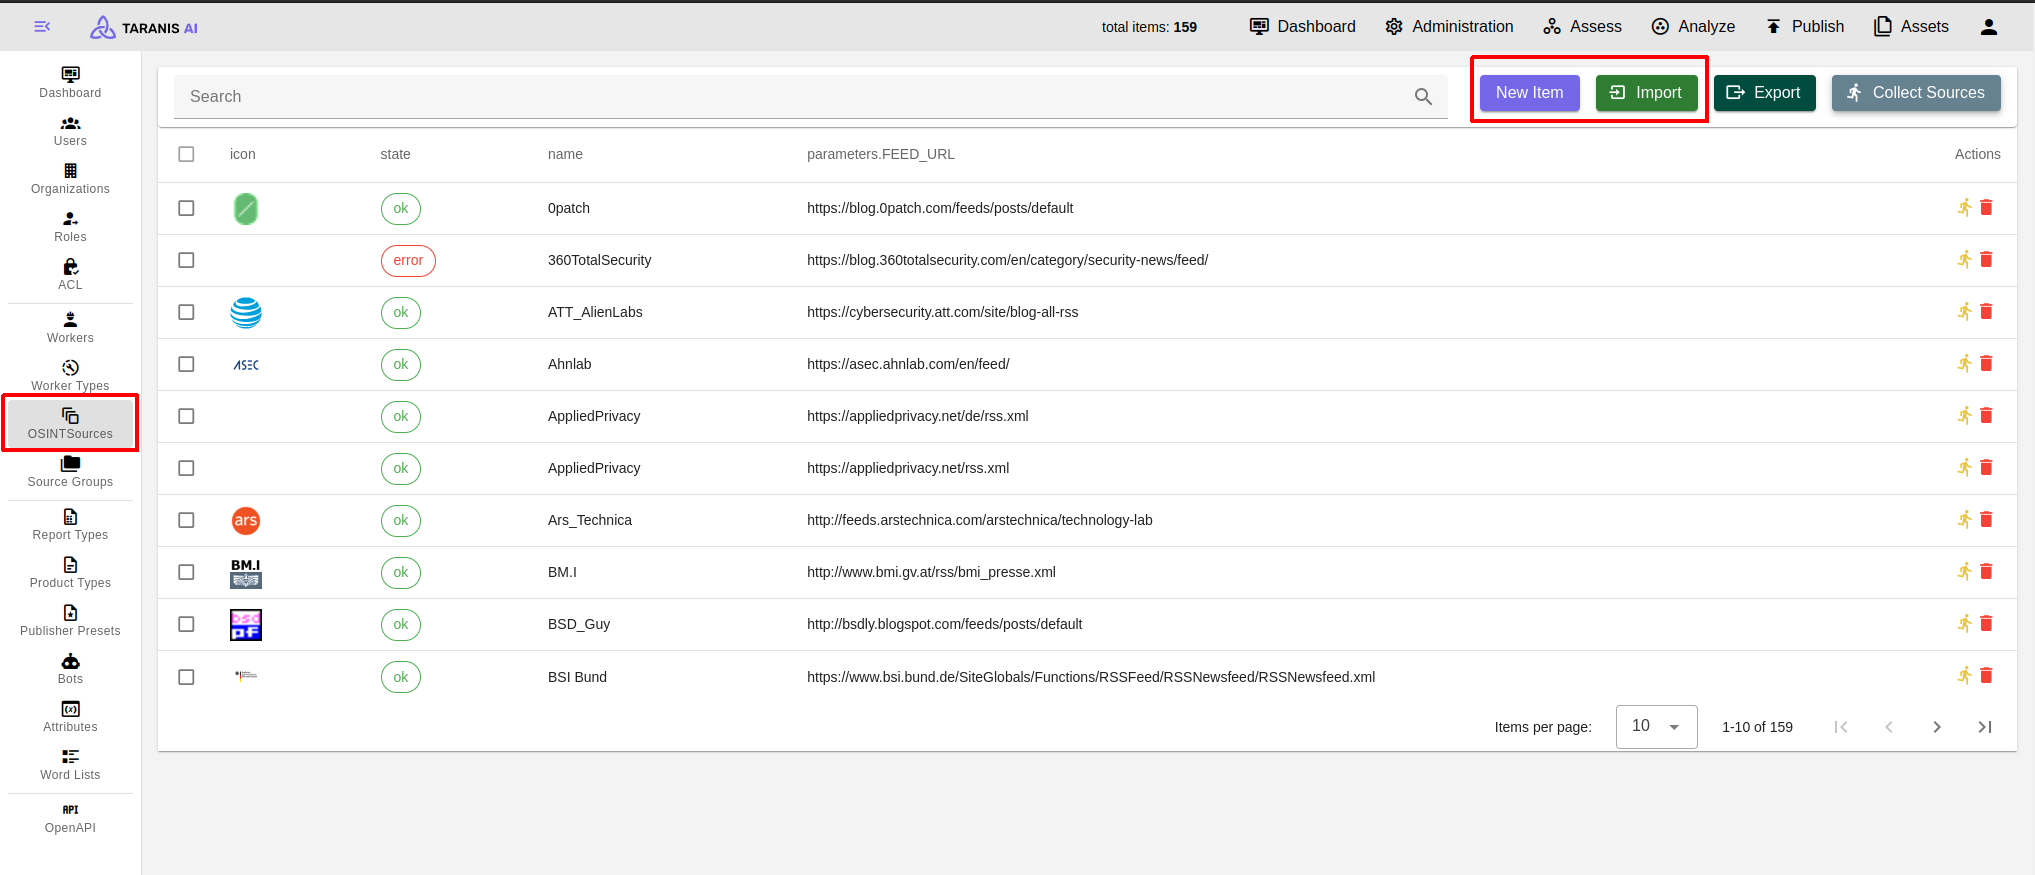
Open http://<url>:<TARANIS_PORT>/config/sources and click load default sources to import the default sources from: default_sources.json
Or import a source export via the Import.
1.2 - Kubernetes deployment
How to deploy Taranis AI on Kubernetes
Configuration
Clone via git
git clone --depth 1 https://github.com/taranis-ai/taranis-ai
cd taranis-ai/docker/
Copy env.sample to .env
cp env.sample .env
Open file .env and change defaults if needed. More details about environment variables can be found here.
Core Taranis AI services follow a stable and tested release process:
Tag
Description
Use Case
Stability
stable
Latest manually tested and verified release
Production deployments
✅ High
1.2.3 (semver)
Specific version (semantic versioning)
Pinned production deployments
✅ High
latest
Latest build from main branch
Development/testing only
⚠️ May contain bugs
Upgrade support
Only upgrades to the immediately following Taranis AI release are tested and supported. For a larger version gap, upgrade one release at a time and verify the deployment after every step.
Review the GitHub release notes before each upgrade. Follow Maintenance for the upgrade, verification, and rollback procedure.
For Bots
Bot containers follow a similar release process, with versions decoupled from the core Taranis AI services:
Tag
Description
Use Case
Stability
stable
Latest manually tested and verified release
Production deployments
✅ High
1.2.3 (semver)
Specific version (semantic versioning)
Pinned production deployments
✅ High
latest
Latest build from main branch
Development/testing only
⚠️ May contain bugs
1.4 - Requirements
System requirements for setting up Taranis AI
For the best experience using Taranis AI, we recommend that your system meet the following requirements:
System Requirements
Resource
Minimal (w/o bots)
Recommended
CPU
2 cores
12 cores
RAM
2 GB
16 GB
Storage
16 GB
40 GB
Note: The recommended requirements assume that all bots are active concurrently. You can estimate the requirements for running only some of the bots from this table:
Bot
CPUs
RAM
Storage
cybersec-classifier
2
2.0 GB
8.3 GB
NER
2
7.0 GB
8.38 GB
story-clustering
2
1.5 GB
6.8 GB
summary
2
1.5 GB
8.4 GB
sentiment-analysis
2
2.5 GB
8.12 GB
You can assume the number of CPUs and RAM to be cumulative, so for running two bots concurrently, sum up the required number of CPUs and RAM.
Reserve an additional 2 CPUs and 2 GB RAM for normal system operation.
Example: For running story-clustering and NER bots at the same time, your system should have 6 CPUs and 10.5 GB of RAM.
GPU Acceleration (Coming Soon)
GPU support for accelerating bot performance will be available soon.
Further details and configuration options will be provided once this feature is launched.
Recommended Setup
Display: Full HD (1920×1080) or higher
Supported Browsers:
Chromium
Mozilla Firefox
Microsoft Edge
1.5 - Background Jobs
Redis, RQ workers, scheduled jobs, and health checks.
Taranis AI uses Redis and RQ for background work. Collection, bots, presenters, publishers, connectors, and maintenance jobs are queued by core and processed by worker containers.
Services
Service
Purpose
redis
Queue broker, job state, scheduler state, and cache storage.
core
Creates jobs, stores scheduled job definitions, and exposes /api/health.
collector
Runs collector jobs from the collector queue.
workers
Runs bots, presenters, publishers, connectors, and miscellaneous jobs.
cron
Runs taranis-cron, reads Redis scheduler definitions, and enqueues due jobs.
Queues are split by worker category: collectors, bots, presenters, publishers, connectors, and misc.
Redis settings
Set a Redis password for production and keep Redis private to the Compose or Kubernetes network.
Variable
Purpose
REDIS_URL
Redis connection URL used by core, frontend, and workers.
REDIS_PASSWORD
Redis password.
CACHE_REDIS_URL
Optional dedicated Redis URL for frontend cache. Falls back to REDIS_URL.
CACHE_REDIS_PASSWORD
Optional dedicated cache password. Falls back to REDIS_PASSWORD.
RQ_DEFAULT_JOB_TIMEOUT
Default queued job timeout in seconds.
Do not publish the Redis port unless you have a controlled operational reason.
Health checks
Core exposes:
GET /api/health
The response reports database, seed_data, broker, and workers. If Redis is up but no workers are connected, queued jobs can be accepted but will not run until a worker starts.
When workers is down, check the collector, workers, and cron containers or deployments first, then inspect worker logs for bad WORKER_TYPES, invalid API keys, Redis authentication failures, or failed bot service calls.
Task failures
The task and Failed Jobs views report terminal RQ failures: unhandled task exceptions, job timeouts, and killed workhorse processes. Failed Jobs includes RQ’s exception detail when it is available.
A queued job without a worker, a late schedule, or a blocked queue is an operational liveness problem, not a recorded task failure. Check /api/health, the worker containers, and Redis connectivity before treating it as a failed task.
Scheduled jobs
Collectors and bots use cron-like schedules. Core stores managed schedule definitions in Redis, and the cron service reconciles those definitions with enabled sources and bots. Changing a collector or bot schedule does not require restarting the workers.
The worker admin views show queued, active, failed, and scheduled jobs. Use them before clearing queues so you know what work will be lost.
Upgrade note
Taranis AI 1.4.0 replaced Celery/RabbitMQ with Redis/RQ. There is no queue handover from Celery to RQ. Before upgrading an older deployment, let running Celery jobs finish, stop the old workers, then deploy the Redis, collector, workers, and cron services together.
1.6 - LLM Bot Service
Configure the optional LLM-backed bot service for summaries, titles, NER, clustering, and sentiment.
llm-bot is an optional HTTP service used by worker bots for LLM-backed analysis. The Compose deployment includes it as ghcr.io/taranis-ai/taranis-llm-bot:${TARANIS_BOT_TAG:-stable}.
It talks to an OpenAI-compatible Responses API and exposes endpoints for:
Endpoint
Purpose
/summarize
Generate a story summary.
/title
Generate a concise story title.
/ner
Extract named entities.
/cluster
Cluster related stories.
/sentiment
Analyze sentiment.
/ner-link
Extract entities and link them to candidates.
/link
Link supplied entities to candidates.
/health
Readiness check.
/info
Non-secret service capabilities and active config.
Compose configuration
Set these values in docker/.env:
Variable
Purpose
BOT_API_KEY
Shared secret used by workers when calling bot services.
LLM_BASE_URL
Base URL of the upstream OpenAI-compatible API.
LLM_API_KEY
Upstream API key.
LLM_MODEL
Model name, unless the upstream provides a default.
LLM_TIMEOUT
Upstream request timeout in seconds.
LLM_BOT_PORT
Internal service port, default 8000.
Advanced optional settings:
Variable
Purpose
LLM_REASONING_PROFILE
Prompt handling profile for models that emit reasoning text. Supported values include none, ministral, and gemma.
LLM_REASONING_EFFORT
Optional upstream reasoning effort value, for example low, medium, or high.
LLM_STRIP_REASONING_OUTPUT
Strip reasoning blocks before parsing model output.
LLM_PARSE_REASONING_AS_OUTPUT
Use structured reasoning text as fallback output when the provider emits no final message.
LOOKUP_BASE_URL
Optional lookup API used by entity linking.
LOOKUP_API_KEY
API key for the lookup API.
LOOKUP_DEFAULT_LANGUAGE
Default language for entity lookup.
LOOKUP_CANDIDATE_LIMIT
Number of lookup candidates considered per entity.
NER_LINKING_ENABLED
Enables linked NER output paths.
NER_LINKING_MODE
deterministic or llm.
SUMMARY_ROUTE_PATH
Override the summary route path. Default: /summarize.
NER_ROUTE_PATH
Override the NER route path. Default: /ner.
Keep LLM_API_KEY, BOT_API_KEY, and any provider credentials out of logs and shared files. The service should stay on the private application network; do not publish it directly to the internet.
Worker integration
The Compose deployment wires these worker endpoints to llm-bot by default:
Worker variable
Default endpoint
SUMMARY_API_ENDPOINT
http://llm-bot:8000/summarize
NLP_API_ENDPOINT
http://llm-bot:8000/ner
STORY_API_ENDPOINT
http://llm-bot:8000/cluster
Bot endpoint parameters saved in the admin UI take precedence over worker defaults. If an upgraded instance still has old standalone bot hostnames such as http://summary_bot:8000, http://nlp_bot:8000, or http://story_bot:8000, update those bot parameters to the llm-bot endpoints or clear the override.
For title generation, set TITLE_ENDPOINT on the Summary Bot to:
http://llm-bot:8000/title
For sentiment analysis, set the Sentiment Analysis Bot BOT_ENDPOINT to:
http://llm-bot:8000/sentiment
Each bot can override the default endpoint and timeout with its own parameters. See Bots for the user-facing bot settings.
Canonical llm-bot paths are accepted with or without a trailing slash.
Validation
Check service health from inside the application network:
curl http://llm-bot:8000/health
If API_KEY is configured on the service, protected task endpoints require:
Authorization: Bearer <BOT_API_KEY>
Use /info to confirm endpoint paths and non-secret feature settings. It reports whether lookup and linking are configured without exposing API keys.
1.7 - Chat deployment
Enable analyst Chat and verify its provider, Redis, and proxy requirements.
Analyst Chat is optional and disabled by default. It requires core, frontend, the application database, Redis, and a reachable provider supporting Responses or Chat Completions with function calling. Core calls the provider directly; Chat does not require llm-bot or workers.
Enable Chat
For the standard Compose deployment, set this in .env:
CHAT_ENABLED=true
The shipped Compose configuration passes this flag to both core and frontend. Custom deployments must enable it on both services. For Kubernetes, set CHAT_ENABLED: "true" in the deployment ConfigMap; for Helm, set config.chatEnabled: "true".
Use published application images containing Chat support. From the Compose deployment directory, pull the configured images and recreate the application services:
Check /api/health at your deployment URL and confirm database and Redis health in the Admin Dashboard. Then open Administration > Settings > Chat and configure the provider. Only CHAT_ENABLED is a deployment environment setting for Chat; the provider URL, API format, model, key, timeout, and Story limit are saved in Admin Settings.
Analysts need ASSESS_ACCESS. Verify a general answer, a Story search and its Assess link, and saved conversation history before making Chat available to analysts. A visible Chat navigation item alone does not confirm that the provider is working.
Runtime and proxy requirements
Redis coordinates concurrent requests. If it is unavailable, new messages fail with Chat is temporarily unavailable. Check Redis connectivity from core when this occurs.
With REALTIME_ENABLED=true and live updates connected, analysts receive progress stages and streamed answer text. Realtime is optional: the completed answer still arrives through the normal HTTP response.
A Chat turn has an overall 540-second deadline. The frontend waits up to 600 seconds for core. The shipped ingress allows 660 seconds between upstream reads for Chat requests. Configure custom or outer reverse proxies with a Chat response timeout of at least 660 seconds, including any application base path. Progress updates use a separate connection and do not keep the message POST alive.
Provider settings apply on the next message, but changing CHAT_ENABLED requires restarting or recreating core and frontend. Startup creates the Chat tables. Include conversations and provider settings in your database backup and access-control planning; see privacy and storage.
Disable or roll back
Set CHAT_ENABLED=false for both core and frontend and recreate those services. This removes Chat from navigation and disables the API while preserving conversations and settings. Re-enabling Chat restores access to saved history.
If rolling back application images, restore the previously deployed image tags and follow the same pull, recreate, and health-check steps. Older images ignore the Chat tables; disabling the feature does not require dropping them.
1.8 - Maintenance
Upgrade and maintenance tasks for Taranis AI.
Standard image upgrade
Use published images for deployment upgrades. Do not build application images on production hosts unless you are intentionally testing a custom build.
Only upgrades to the immediately following Taranis AI release are tested and supported. For a larger version gap, upgrade one release at a time and verify the deployment after every step.
cd taranis-ai/docker
docker compose pull
docker compose up -d
curl -fsS http://<url>:<TARANIS_PORT>/api/health
docker compose ps
For rollback, pin TARANIS_TAG and TARANIS_BOT_TAG to the previous known-good release in .env, pull, restart, and verify /api/health again.
Redis/RQ migration
Taranis AI 1.4.0 replaced Celery/RabbitMQ with Redis/RQ. There is no queue handover from old Celery workers to the new RQ workers.
Before upgrading an older deployment:
Let running and queued Celery jobs finish.
Stop old Celery/RabbitMQ services.
Deploy Redis plus the collector, workers, and cron services.
Verify /api/health reports database, seed data, broker, and workers as up.
Running Taranis AI deployment using the docker/compose.yml file.
Running database PostgreSQL of major version 14
Compose file (docker/compose.yml) is setup to use the image of PostgreSQL 17 (check your POSTGRES_TAG variable in the .env file)
Steps to upgrade
Go to directory: taranis-ai/docker
Ensure the script upgrade-database.sh is executable
Run the script: ./upgrade-database.sh
All containers should now be up and running again. Verify /api/health and review database logs before handing the instance back to users.
1.9 - Advanced monitoring
Use Sentry for more runtime insights
Prerequisites
Sentry instance available, either SaaS or self-hosted.
Follow this guide to have a Sentry project (and SENTRY_DSN) ready.
What is Sentry
Sentry is a monitoring tool that enables more insights about an application. Taranis AI takes advantage of this if you enable it at the start up.
What is there to monitor
Sentry can be used to monitor insights about GUI, Core and database. In Taranis AI: Issues, Traces, Profiles and Queries can be tracked.
Health and worker queues
The core service exposes /api/health for readiness and dependency checks. It reports the database, seed data, Redis broker, and worker status when those services are available.
Worker-backed actions such as collecting an OSINT source, running a bot, gathering a word list, rendering a product, or publishing a product can be queued even when no workers are connected. In that case the frontend shows a warning that the task was queued but may not be processed until a worker starts.
If this warning appears:
Verify Redis with the configured REDIS_URL and REDIS_PASSWORD.
Verify that the collector, cron, and workers containers or Kubernetes deployments are running.
Check the worker logs for failed startup, invalid WORKER_TYPES, or authentication errors against core.
Use the admin worker and queue views to inspect queued, active, failed, and scheduled jobs.
See Background Jobs for worker services, queues, scheduler behavior, and Redis/RQ upgrade notes.
Audit logging
Core audit logging is enabled by default. It writes structured JSON events to stdout for human-authenticated write requests and login attempts. Events contain request metadata such as the timestamp, path, status, user, and client IP; they never include request bodies, credentials, tokens, or other secrets.
Set AUDIT_LOG_ENABLED=false only when log collection is not appropriate for the deployment. Send the core container’s stdout to your normal log collector for retention and search.
How to enable Sentry in Taranis AI
To enable Sentry, set the SENTRY_DSN variables in the .env file before start of the application. More details about environment variables can be found here.
GUI monitoring
To gain insights about GUI, use the TARANIS_GUI_SENTRY_DSN variable and set it to your Sentry DSN address.
Core and database monitoring
To gain insights about Core and database, use the TARANIS_CORE_SENTRY_DSN variable and set it to your Sentry DSN address.
1.10 - TLS Configuration
Configure TLS encryption for Taranis AI using Granian ASGI server with SSL certificates and proper environment variables.
This guide explains how to configure TLS (Transport Layer Security) for Taranis AI using the Granian ASGI server. TLS provides encrypted communication between clients and the server, essential for secure deployments.
Key Environment Variables
The primary TLS configuration is handled through Granian environment variables:
Required TLS Variables
For a basic TLS setup, configure these environment variables:
# SSL Certificate file pathGRANIAN_SSL_CERTIFICATE=/path/to/your/certificate.pem
# SSL Private key file path GRANIAN_SSL_KEYFILE=/path/to/your/private_key.pem
# Turn off verification of self-signed certificates in Frontend and Worker serviceSSL_VERIFICATION=False
DISABLE_SSE=True
When enabling TLS, you must also update the core URL to use HTTPS:
# Update the core API URL to use HTTPSTARANIS_CORE_URL=https://your-domain.com/api
This variable affects multiple components:
Frontend service: Uses TARANIS_CORE_URL to communicate with the core API
Worker service: Uses TARANIS_CORE_URL for API communication (falls back to http://{TARANIS_CORE_HOST}{TARANIS_BASE_PATH}api if not set)
GUI service: Configured via TARANIS_CORE_API in config.json
Make sure, all variables are properly set in the compose file. The variable SSL_VERIFICATION can be set for the frontend and worker service.
Docker Compose Configuration
Important Configuration Notes
Certificate Mounting: Certificates mounted as read-only (./certs:/certs:ro)
SSL Verification: Self-signed certificates cause problems (SSL_VERIFICATION=False)
Health Checks: To work properly they need to be changed to https:// prefix. Moreover, the Certificate Authority needs to be added into the container’s trust store by mounting it under /usr/local/share/… Read more at docker.com.
Basic TLS Setup
Here’s an example Docker Compose configuration with TLS enabled:
services:core:image:ghcr.io/taranis-ai/taranis-core:latestenvironment:# TLS configuration (paths must match the mounted cert directory)- GRANIAN_SSL_CERTIFICATE=/certs/certificate.pem- GRANIAN_SSL_KEYFILE=/certs/private_key.pem- TARANIS_CORE_URL=https://your-domain.com/api- DB_URL=database- DB_DATABASE=taranis- DB_USER=taranis- DB_PASSWORD=supersecret- API_KEY=your-secure-api-key- JWT_SECRET_KEY=your-secure-jwt-secretvolumes:# Mount local certificate directory into the container- ./certs:/certs:ro- core_data:/app/datadepends_on:- database- rabbitmqports:- "8443:8080"networks:- taranis_networkhealthcheck:test:["CMD-SHELL","curl --fail https://localhost:8080/api/health || exit 1"]interval:90stimeout:30sretries:5start_period:40svolumes:core_data:networks:taranis_network:driver:bridge
Kubernetes Configuration
For Kubernetes deployments, configure TLS using ConfigMaps and Secrets:
Search across Stories, Reports, and Products from the global navigation bar.
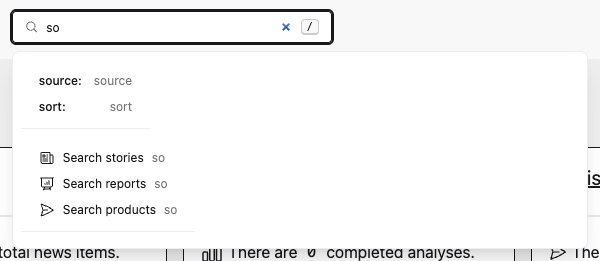
Omnisearch is the global search field in the top navigation. It is useful for quick lookup across the analyst workflow and for jumping directly into filtered list views.
Scope search
An unqualified search shows grouped results for Stories, Reports, and Products. Use a scope prefix to search only one area and open its list view directly:
story: ransomware
report: weekly
product: stix
Supported aliases:
Scope
Aliases
Stories
story:, stories:, assess:
Reports
report:, reports:, analyze:, analysis:
Products
product:, products:, publish:
report:true and report:false are reserved for Assess filtering. If you need to find a Report literally named true or false, use an unqualified global search.
Assess filter syntax
Omnisearch can translate Assess-style filter tokens into the Assess sidebar query parameters. Tokens can be combined with free text:
Quote values that contain spaces. Omnisearch suggestions are loaded only when the query needs them, so normal global searches do not require loading every Assess filter list.
Saved filters
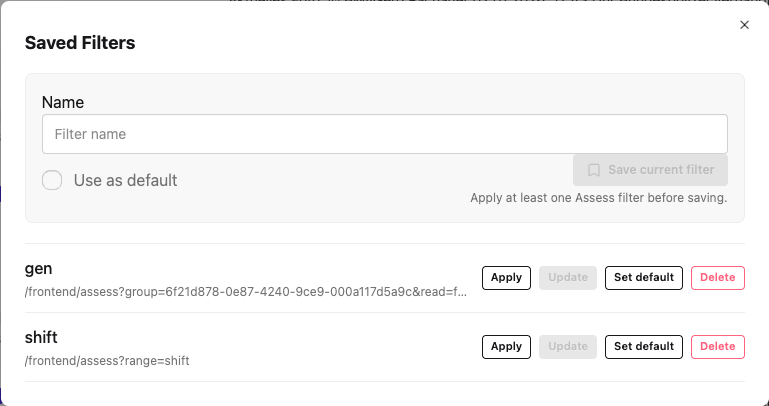
Assess sidebar filters can be saved per user. One saved filter can be marked as the default, which makes /assess open that filtered queue automatically. Use /assess?reset=true to bypass the default and show the unfiltered list.
Saved filters also appear as dashboard shortcuts, so common queues such as “Unread important stories” can be opened without rebuilding the filter each time. See Filter Lists and Saved Filters.
Assess is the analyst queue for collected Stories and News Items. It supports search, filtering, sorting, merging, bookmarks, report assignment, connector sharing, and review state changes.
Functionalities
Search
Use the Assess sidebar search for Story text search inside the current Assess view. Use the global Omnisearch field to search across Stories, Reports, and Products, or to open Assess with filter tokens such as:
For natural-language questions and summaries, use Chat when enabled. Search answers link back to Assess with the generated filters applied.
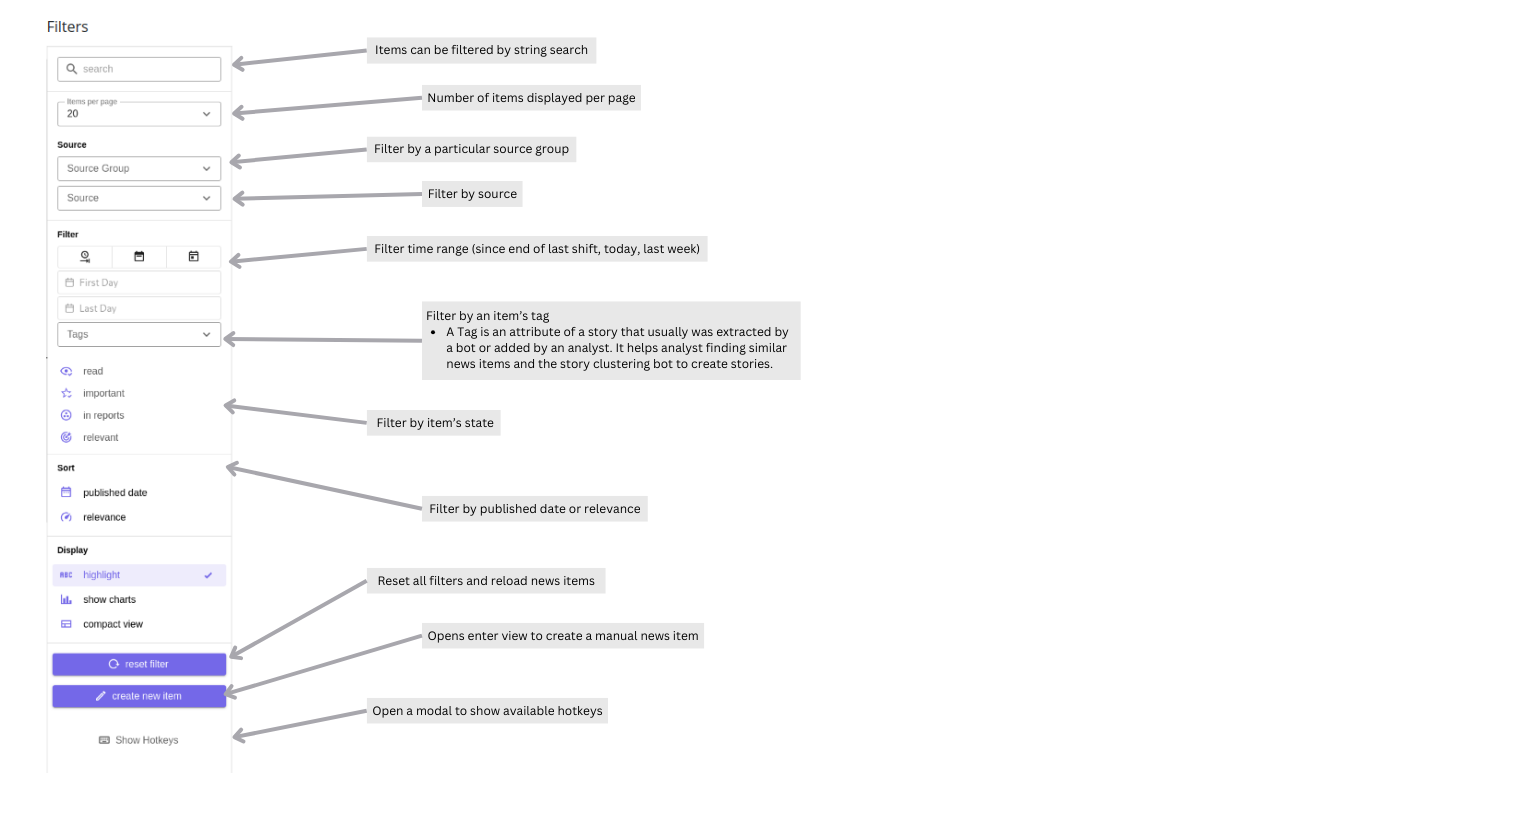
Filters
Details:
First Day: The Story’s creation date, typically matching the oldest News Item’s “published date.”
Last Day: The Story’s update date, usually reflecting the latest addition or change.
For manually created stories, the “updated” timestamp is essentially the creation time. As a result, filtering by Last day for a manually created story will not return it, even if an older “published date” is set.
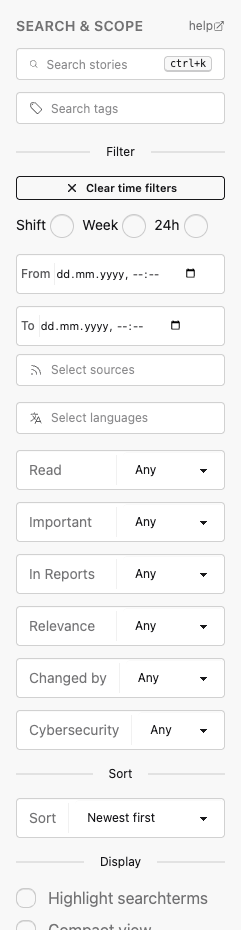
Assess filters include search text, source, source group, tag, language, read state, important state, report membership, relevance, cybersecurity classification, changed-by actor, date range, and sort order.
Users can save the current Assess filters from the Saved filters button. A saved filter can be marked as the default for the user profile. Dashboard shortcuts show saved Assess filters so frequently used queues can be opened directly. See Filter Lists and Saved Filters.
Items
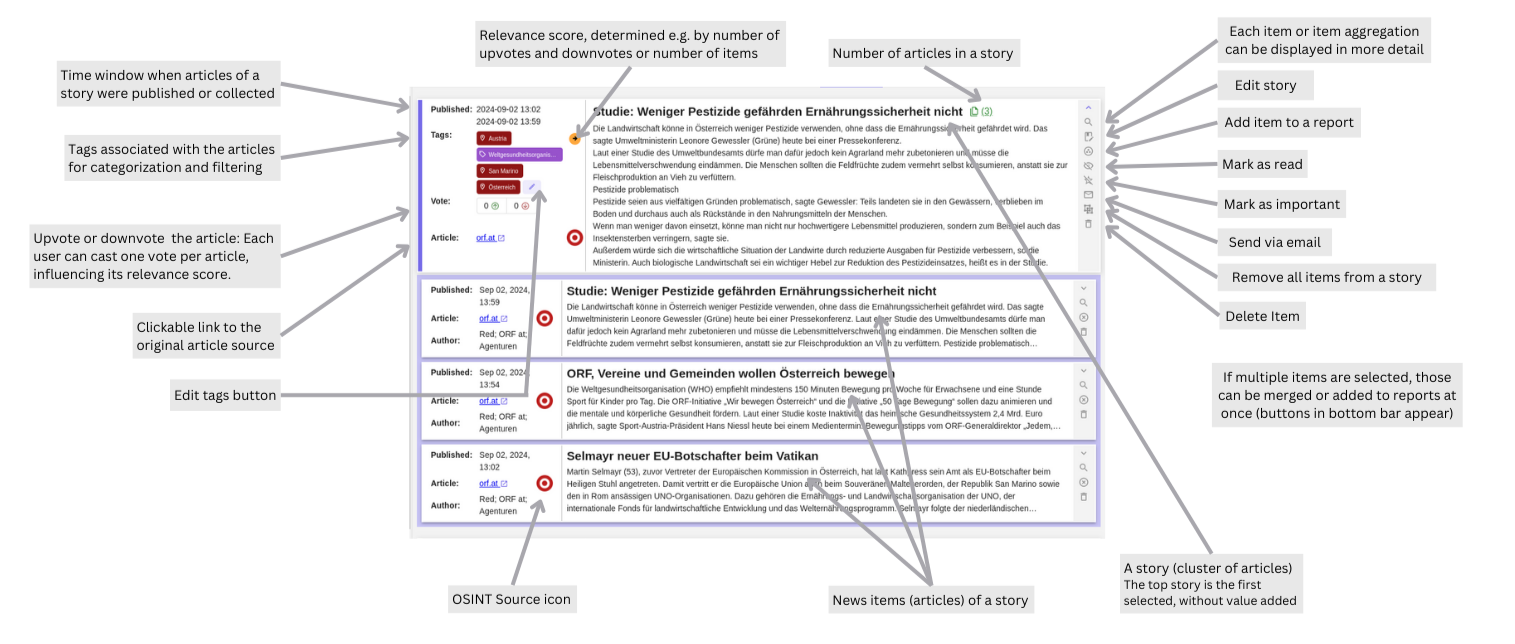
News items collected by Collectors become visible in Assess. They can be grouped into Stories automatically by Bots or manually by analysts.
Detail view:
Relevance of item/aggregate can be changed with “up/down” buttons
Charts:
Each item displays a chart if data has been aggregated in the last 7 days.
Line and bar chart display the same data, which is the accumulation of items per day.
The y-axis of the line chart can be adapted and is the same for all charts in the current items list. Therefore, charts can be compared properly.
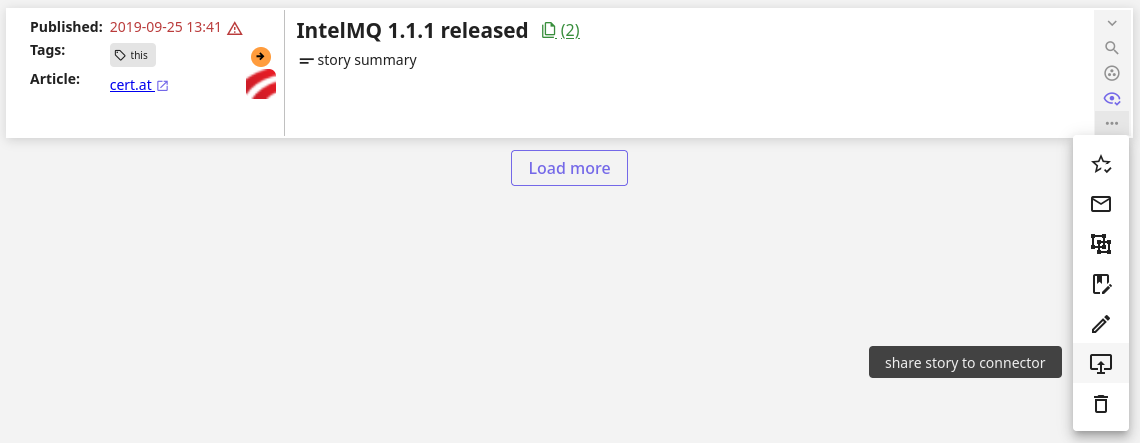
Story actions include marking read/unread, marking important, sharing to connectors, ungrouping, version history, deleting, editing, adding to reports, and bookmarking. Bulk actions are available after selecting stories; visible shortcuts include Shift+R for adding to a report and Shift+B for bookmarking.
Story import and export
Use Share → Export to JSON to transfer an individual Story or a selection of Stories. Import either an Assess or Admin export through Create manual news item → Create from file or Admin → Settings → Import Stories. Both import screens accept complete Stories, including exports with metadata.
Stories are the primary transfer format. Existing standalone News Item JSON can also be imported; each item receives a new parent Story. Transfers do not restore all instance state and do not merge or overwrite existing content. See Story import and export for formats, permissions, and limitations.
Version history
Stories keep a revision history. Use Version History from the Story actions menu to inspect saved revisions and compare the changes between adjacent revisions. Revision diffs are intended for audit and troubleshooting; they do not currently provide rollback.
Bookmarks
Bookmark collections are private per user. A story can be bookmarked from its action menu, or selected stories can be added to an existing or new collection from the Assess toolbar. If a user bookmarks a single story before creating any collections, Taranis AI creates a default collection named Bookmarks.
The Assess page shows up to six bookmark collections in a compact bar. Use All bookmarks to open the full bookmark page, rename or delete collections, reorder them, and remove stories from a collection. Removing a story from a bookmark collection does not delete the story from Assess. See Bookmarks.
Story Edit Advanced View
The Story Edit view can expose AI assisted actions when advanced story options are enabled in user settings. Available actions include generating a summary and title, and running sentiment analysis. When sentiment attributes are present, the advanced view shows the story sentiment status.
3.1 - MISP Auto-Update
Automatically synchronize Stories to MISP events
MISP Auto-Update pushes Story changes to a selected MISP connector after five minutes without further changes. It is experimental.
Open a Story for editing and select the Advanced layout.
Under MISP auto-update, select a MISP connector and enable auto-update.
Save the Story.
The initial push, and every later eligible change, is scheduled five minutes after the last change. Changing the connector reschedules the push; disabling auto-update cancels it.
Behavior
An unsent Story creates a MISP event on its first automatic push.
Existing events are updated only when owned by your organization. Auto-update skips unowned events.
External MISP proposals block automatic updates. The Story editor displays a link to the event; resolve the proposals, then change the Story to schedule another push. A successful automatic push clears the warning.
Share to Connector can still push manually, including when auto-update is blocked.
Enabled Stories show a badge on their cards. Inbound MISP and conflict-resolution changes do not trigger auto-update.
What is synchronized
Story title, description, comments, summary, tags, attributes, links, and event report.
Added and removed news items. Changes to an already-synced news item do not update its MISP object.
Story edits, news-item and tag changes, report membership changes, and Story-modifying bot operations schedule an update.
Troubleshooting
If no update occurs, confirm auto-update is enabled, the connector works with a manual push, your organization owns the existing event, and no proposal warning is shown. For a proposal warning, resolve the proposals and make another Story change.
Use dynamic Assess filter lists and save reusable queues.
Assess filter lists are the dynamic option lists behind the sidebar filters. They are built from the current data in Taranis AI and include Sources, Source Groups, Tags, and Languages.
Filter lists are not manually maintained lists. The core API exposes them through /api/assess/filter-lists, and the frontend may cache them per user. Assessment changes invalidate the cached filter lists so new Sources, Tags, and Languages become available without a restart.
Use the sidebar to combine:
Search text and Tags.
Time presets or exact date ranges.
Sources and Source Groups.
Languages.
Read, Important, In Reports, and Relevance state.
Changed by, Cybersecurity status, and Sort order.
Saved filters
Saved filters store the current Assess sidebar state in the user’s profile. They are private to the user and are useful for recurring queues such as shift review, unread important Stories, or language-specific monitoring.
Open Saved filters from the Assess sidebar. Saving requires at least one active filter. Saving with an existing saved-filter name updates it; saving duplicate filter criteria under another name is rejected.
One saved filter can be marked as the default. When a default exists, opening /assess without query parameters opens that queue automatically. Use /assess?reset=true to bypass the default and open the unfiltered Assess list.
Saved filters also appear as Dashboard shortcuts. Dashboard cards can be applied directly or deleted from the Dashboard.
3.3 - Bookmarks
Save private Story collections for follow-up work.
Bookmarks let each user keep private collections of Stories without changing the Stories themselves. They are useful for follow-up queues, handovers, and temporary research sets.
From Assess
Use the Story action menu to bookmark one Story. If the user has no bookmark collections yet, Taranis AI creates a default collection named Bookmarks.
For bulk work, select Stories in Assess and use Bookmark in the toolbar. The dialog can add selected Stories to an existing collection or create a new collection.
The Assess list shows up to six bookmark collections in the bookmark bar. Use All bookmarks to open the full bookmarks page.
Bookmarks page
The bookmarks page supports:
Creating a new collection.
Opening a collection.
Renaming a collection.
Dragging collections to reorder them.
Deleting a collection.
Deleting a bookmark collection only removes the collection. It does not delete the Stories from Assess.
Inside a collection, select Stories and use Remove selected to remove them from that collection. Story access still follows the user’s normal permissions and TLP visibility.
3.4 - Story import and export
Share Stories between Taranis AI instances and import existing News Item JSON.
Stories are the primary unit for importing and exporting content. Export a Story to transfer its grouped News Items together. Standalone News Items are a secondary import format for existing JSON from an API or another integration; a separate News Item export workflow is not supported or required.
Choose a workflow
Goal
Workflow
Result
Share selected Stories
Assess → select Stories → Share → Export to JSON
Selected Stories with their News Items and metadata. The same action is available on an individual Story.
Transfer content across an instance or date range
Admin → Settings → Export Stories
An instance-wide export, optionally restricted by Story creation date, with a choice of minimal content or metadata.
Import a Story export as an analyst
Assess → Create manual news item → Create from file
Imports complete Stories, despite the manual News Item page title.
Import a Story export from Settings
Admin → Settings → Import Stories
Uses the same importer as Assess.
Add an individual article
Assess → Create manual news item
Enter content manually or use Create from URL. Use Create from file when you already have News Item JSON.
Export selected Stories in Assess
Open Share on a Story, or select multiple Stories and use the bulk sharing action. Choose Export to JSON.
The download includes Story and News Item attributes and News Item tags. Its JSON envelope is { "total_count": ..., "items": [...] }.
Export requires Assess access (ASSESS_ACCESS), read access to every linked source, and access to the TLP levels of both the Stories and their News Items. Read-only source access is sufficient. If any selected Story is missing or inaccessible, the whole export fails without downloading a partial file. Reload Assess and retry with an accessible selection.
Export Stories in Admin Settings
Open Settings → Export Stories and choose:
All Stories: Story IDs and creation dates, plus News Item IDs, titles, and content. Other metadata is omitted; imported Story titles are derived from their News Items.
All Stories With Metadata: Story content and metadata, including Story attributes and detailed News Items with attributes and tags.
Both downloads are JSON arrays. Both can be imported through either import screen without manually removing metadata to make the format compatible.
Admin export requires ADMIN_OPERATIONS and covers the instance without the content ACL filtering used by Assess exports. Use Assess export when you only want to share selected accessible Stories.
From and To filter the Story’s creation time, with inclusive bounds. Enter dates in your profile timezone, shown beside the form; Taranis converts each boundary to UTC using the applicable daylight-saving offset. Blank bounds are optional. From alone ends at the current time. Future dates, reversed ranges, and local times skipped or repeated during a daylight-saving transition are rejected.
Import through Assess or Settings
Upload the JSON file using Create from file in Assess or Import Stories in Settings. Both entry points use the same import behavior and require ASSESS_CREATE at the API. Access to the Settings screen does not define a separate import format.
Input file
Assess Create from file
Settings Import Stories
Assess Story export
Supported
Supported
Admin minimal Story export
Supported
Supported
Admin Story export with metadata
Supported
Supported
Single Story object or array of Stories
Supported
Supported
Single News Item object or array of News Items
Supported
Supported
Do not mix Story objects and standalone News Item objects in the same array. Successful imports from Create from file return you to Assess.
Standalone News Items
Use this secondary format when an integration supplies individual News Items instead of grouped Stories. For example:
{"title":"Example article","content":"Article text supplied by an integration.","source":"Example publication","link":"https://example.com/article"}
Each imported standalone News Item receives a new parent Story so it appears in Assess. An exported story_id is ignored in this case; importing individual items does not recreate their former grouping or add them to an existing Story. Import a complete Story when you need to preserve its grouping.
Transfer limits
No merging or overwriting: exported IDs are retained. An existing ID or duplicate News Item hash causes the entire import to fail. Invalid batches also roll back completely. Re-importing an export into an instance that still contains that content is not an update workflow.
Sources are not created by a Story import: a source reference that exists in the destination can be retained; a missing reference falls back to the manual source. Minimal exports omit source references and therefore use the manual source.
Metadata depends on the export: minimal Admin exports omit tags, attributes, links, and other metadata. Assess and Admin metadata exports retain supported metadata, but are not full copies of the originating instance.
These are content transfers, not backups: bookmarks, individual user votes, report relationships, and local ordering settings are not restored. Import creates a new revision record rather than restoring the original revision history.
Review the imported content and its destination source before continuing your normal Assess workflow.
4 - Chat
Ask questions about collected Stories, summarize search results, and continue your investigation in Assess.
Chat is an optional analyst workspace for exploring Stories in natural language. Ask for matching Stories, counts, or summaries, then open the results in Assess to review the underlying material. You can also ask general knowledge questions.
Chat must be enabled and configured by an administrator. Analysts need the ASSESS_ACCESS permission. Story searches respect the same source access controls and TLP restrictions as Assess.
Start a conversation
Select Chat in the top navigation.
Choose New Chat to start a separate conversation.
Type a question and select Send, or press Enter. Use Shift+Enter for a new line. Messages can contain up to 4,000 characters.
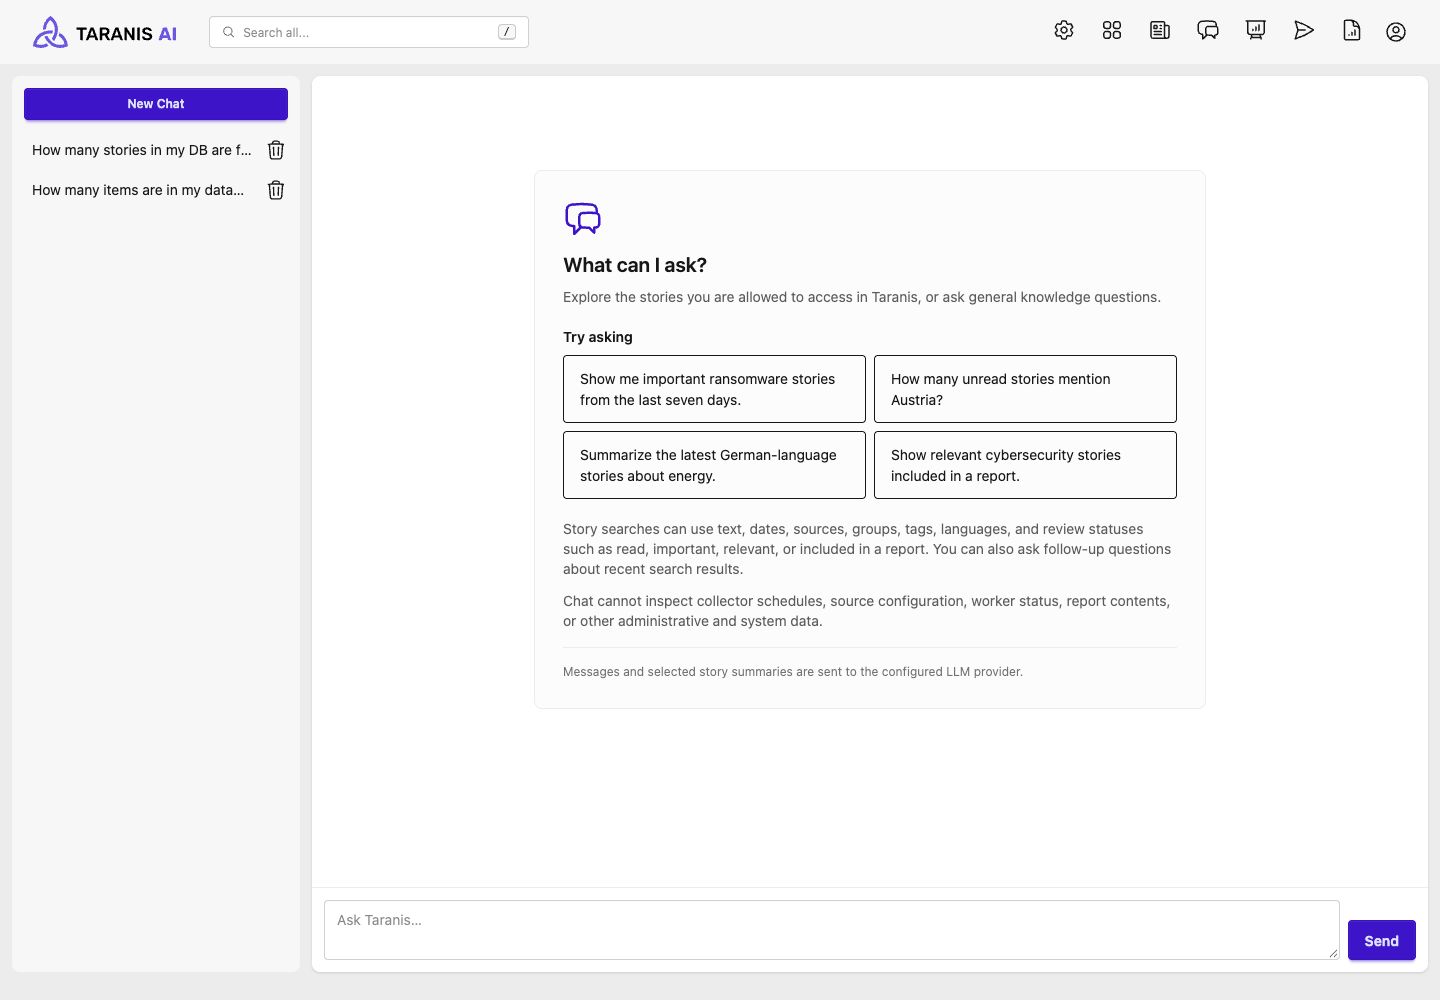
Alternatively, select a starter prompt under Try asking. Selecting a prompt sends it immediately.
If you see Chat is not configured yet, ask an administrator to complete Admin Settings > Chat before sending a message.
What to ask
Describe the subject and any filters you need. For example:
“Show me important ransomware stories from the last seven days.”
“How many unread stories mention Austria?”
“Summarize the latest German-language stories about energy.”
“Show relevant cybersecurity stories included in a report.”
Story searches support text, dates, sources, source groups, tags, languages, read/unread state, importance, relevance, report membership, cybersecurity classification, and Stories changed by you. You can request an order such as newest first. Relative dates use your profile timezone; specify dates when you need a precise period.
Follow up in the same conversation to refine a search or ask about a recent result, such as “Tell me more about the second result.” Up to the latest 10 saved messages are included as conversation context, so restate older details when needed.
Chat can filter Stories by whether they are included in a Report, but it cannot inspect Report contents, collector schedules, source configuration, worker status, or other administrative and system data. Use the corresponding application pages for those tasks.
Review answers in Assess
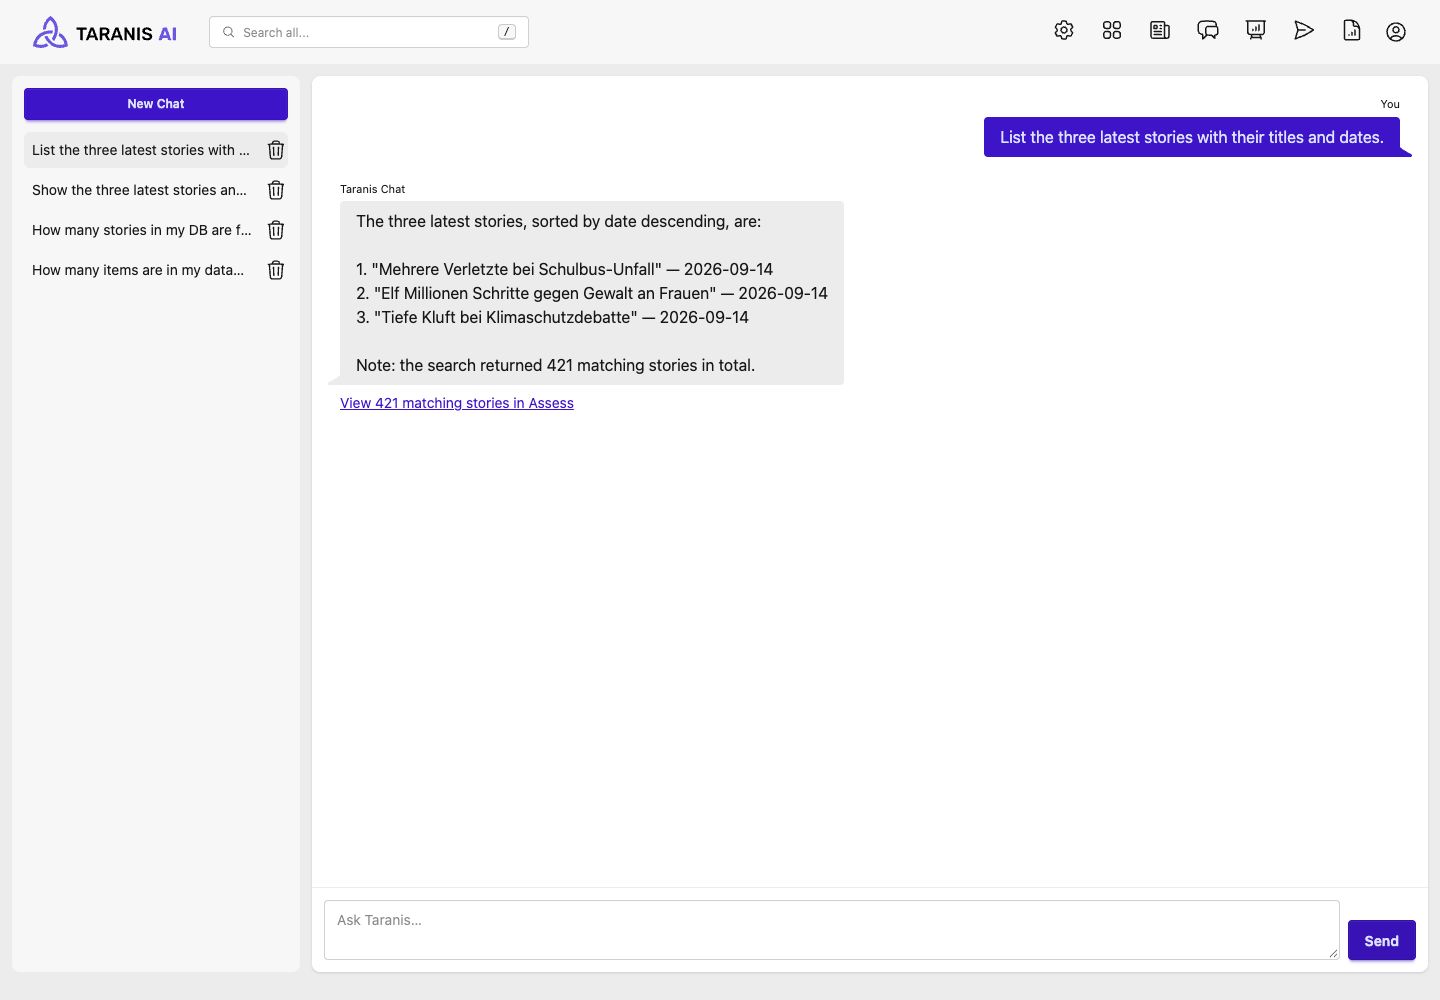
For a Story search, Chat searches the accessible collection and uses a limited number of Story summaries to compose its answer. The default is 5 Stories per answer, configurable by an administrator from 1 to 20. A count of matching Stories can therefore be larger than the number summarized.
Select View N matching stories in Assess below a search answer to open the generated filters and inspect the results. This opens the current matching collection; its count can change as Stories or permissions change. Review the filters and original Stories before relying on an answer, especially when summaries contain too little detail to answer the question.
The example lists three recent Stories while the Assess link opens the full matching collection. If the selected Stories have no summary text, Chat can still list their titles and dates, but it may be unable to summarize their content.
General knowledge answers do not have an Assess results link. If a Story search finds no matches, Chat reports that outcome; try broader wording, a longer date range, or fewer filters.
When live updates are available, progress moves through Planning…, Searching stories… for searches, and Writing answer…. Chat still returns the completed answer when live updates are unavailable. Wait for the current response before sending another message in the same conversation.
Conversation history and privacy
Successful conversations appear in the left sidebar, titled from the first message and ordered by recent activity. Select one to reopen it. Conversations are private to their owner within the application and persist until deleted. Use the trash button beside a conversation and confirm Delete this chat conversation? to remove it and its messages.
Your messages, recent conversation context, accessible filter information, and selected Story summaries are sent to the configured LLM provider. Check your organization’s provider and data-handling policy before entering sensitive information. Deleting a conversation in Taranis does not control the provider’s retention. See provider privacy and storage.
If a message fails
Failed turns do not save a partial question-and-answer pair. The message remains in the input so you can retry after the problem is resolved.
Message or symptom
What to do
Chat is missing from navigation
Ask an administrator to check that Chat is enabled and your role has ASSESS_ACCESS.
Chat is not configured yet
Ask an administrator to configure the provider in Admin Settings > Chat.
Another response is already being generated for this chat
Let the existing response finish, including requests started in another tab.
Chat provider timed out or Chat provider request failed
Ask an administrator to check provider connectivity, API format, model, credentials, and timeout.
Chat is temporarily unavailable
Ask an administrator to check Redis availability.
Deployment checks and proxy requirements are covered in Chat deployment.
5 - Analyze
Analyze displays a list of all report items. They can be created, edited, deleted and filtered.
Analyze is where analysts create and maintain Reports. Report fields are defined by administrator-managed Report Types, and Reports can collect Stories from Assess before they are rendered into Products.
Functionalities
CRUD
Create: Reports can be created for any available Report Type.
Read & Update: Reports can be opened, edited, completed, and connected to Stories from Assess.
Clone: Existing Reports can be cloned when a new report should start from the same structure.
Delete: One or multiple Reports can be deleted at once.
Reports can be set to Completed or Incomplete from the report edit view. Products that include incomplete Reports show a warning before manual publishing.
Report editor
The report editor supports split and stacked layouts. The Report Type is selected when the Report is created; after creation, its configured attributes are shown in the editor.
Reports can contain multiple Stories. Stories added from Assess appear in the report editor and can be removed before the report is rendered.
Product handoff
Use Publish in the report editor to open an existing Product or create a new Product prefilled with the current Report. Product rendering and external delivery happen in Publish.
Version history
Reports keep a revision history. Use Version History from the report editor to inspect saved revisions and compare adjacent revisions. Revision diffs are for audit and troubleshooting; they do not currently provide rollback.
Filter
Search: Items can be filtered by string search
Display: Number of items displayed per page
Offset: Number that defines first item displayed
Filter: Filter time range (creation date)
Completed/Incomplete: Filter by report status
Report Type: Filter by Report Type
Screenshots
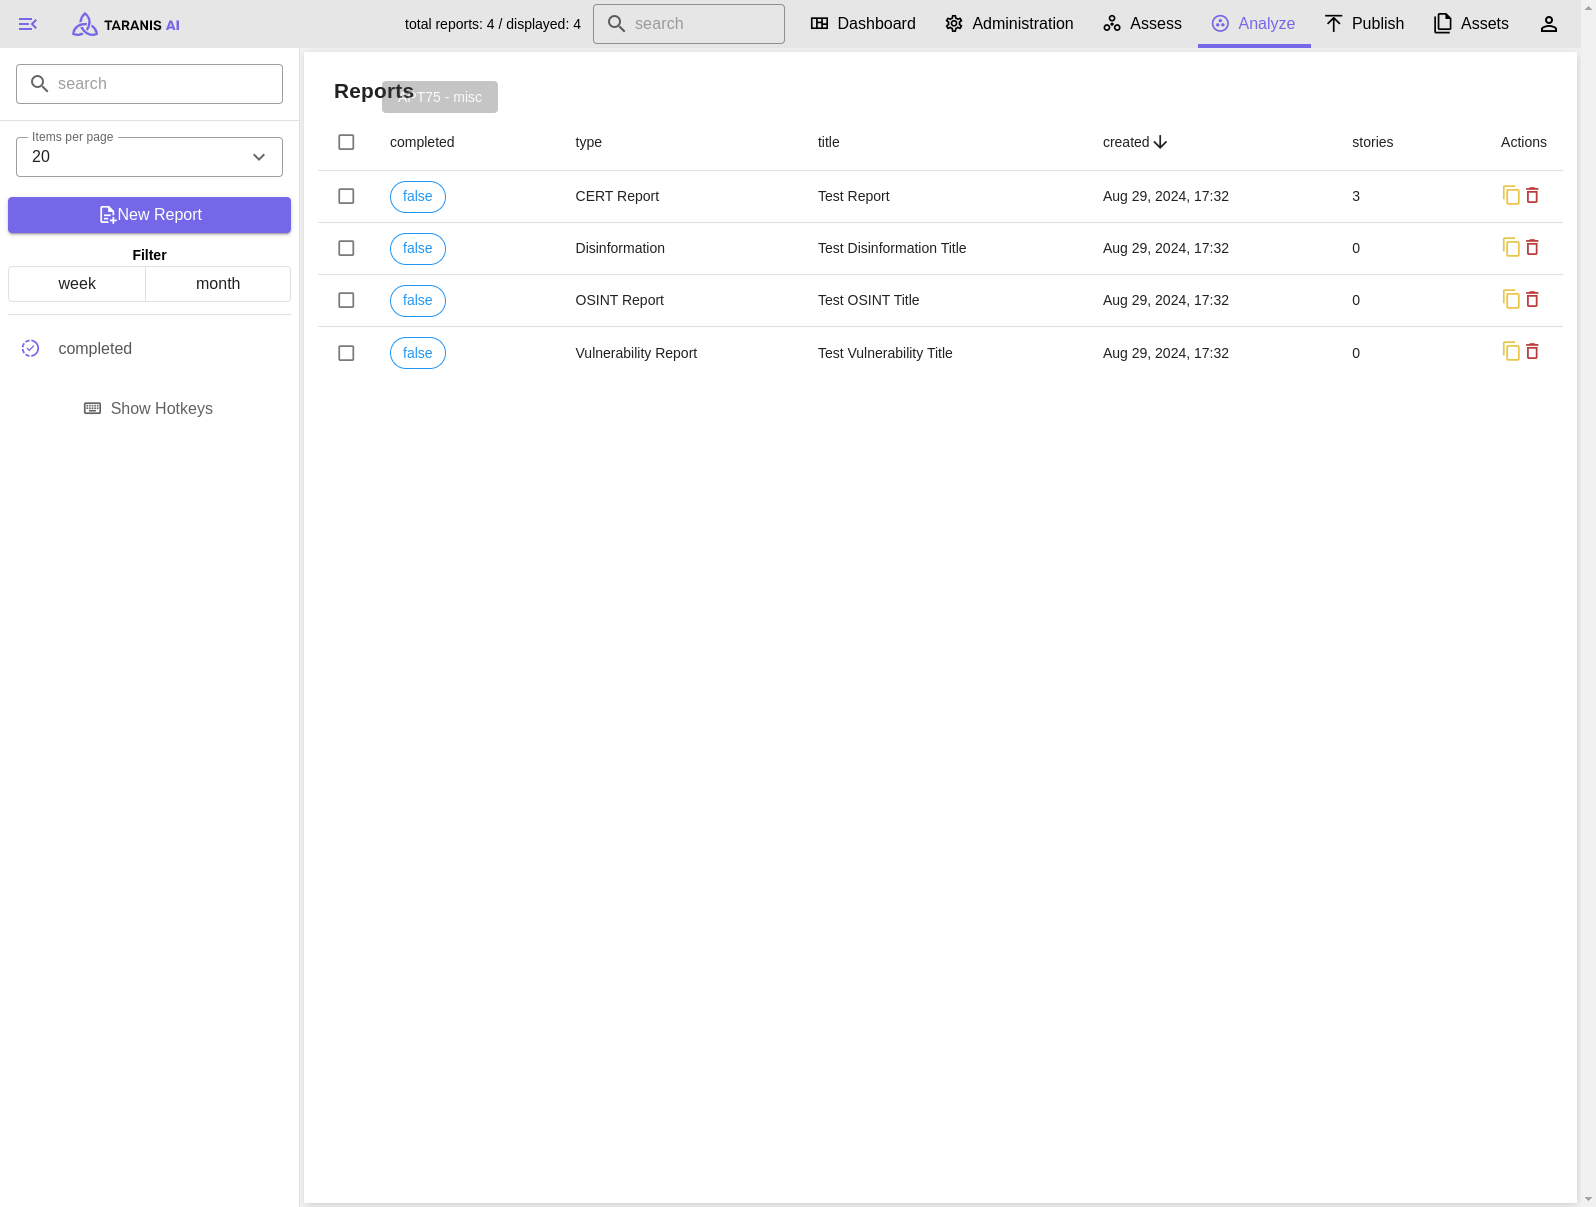
Incomplete reports created today
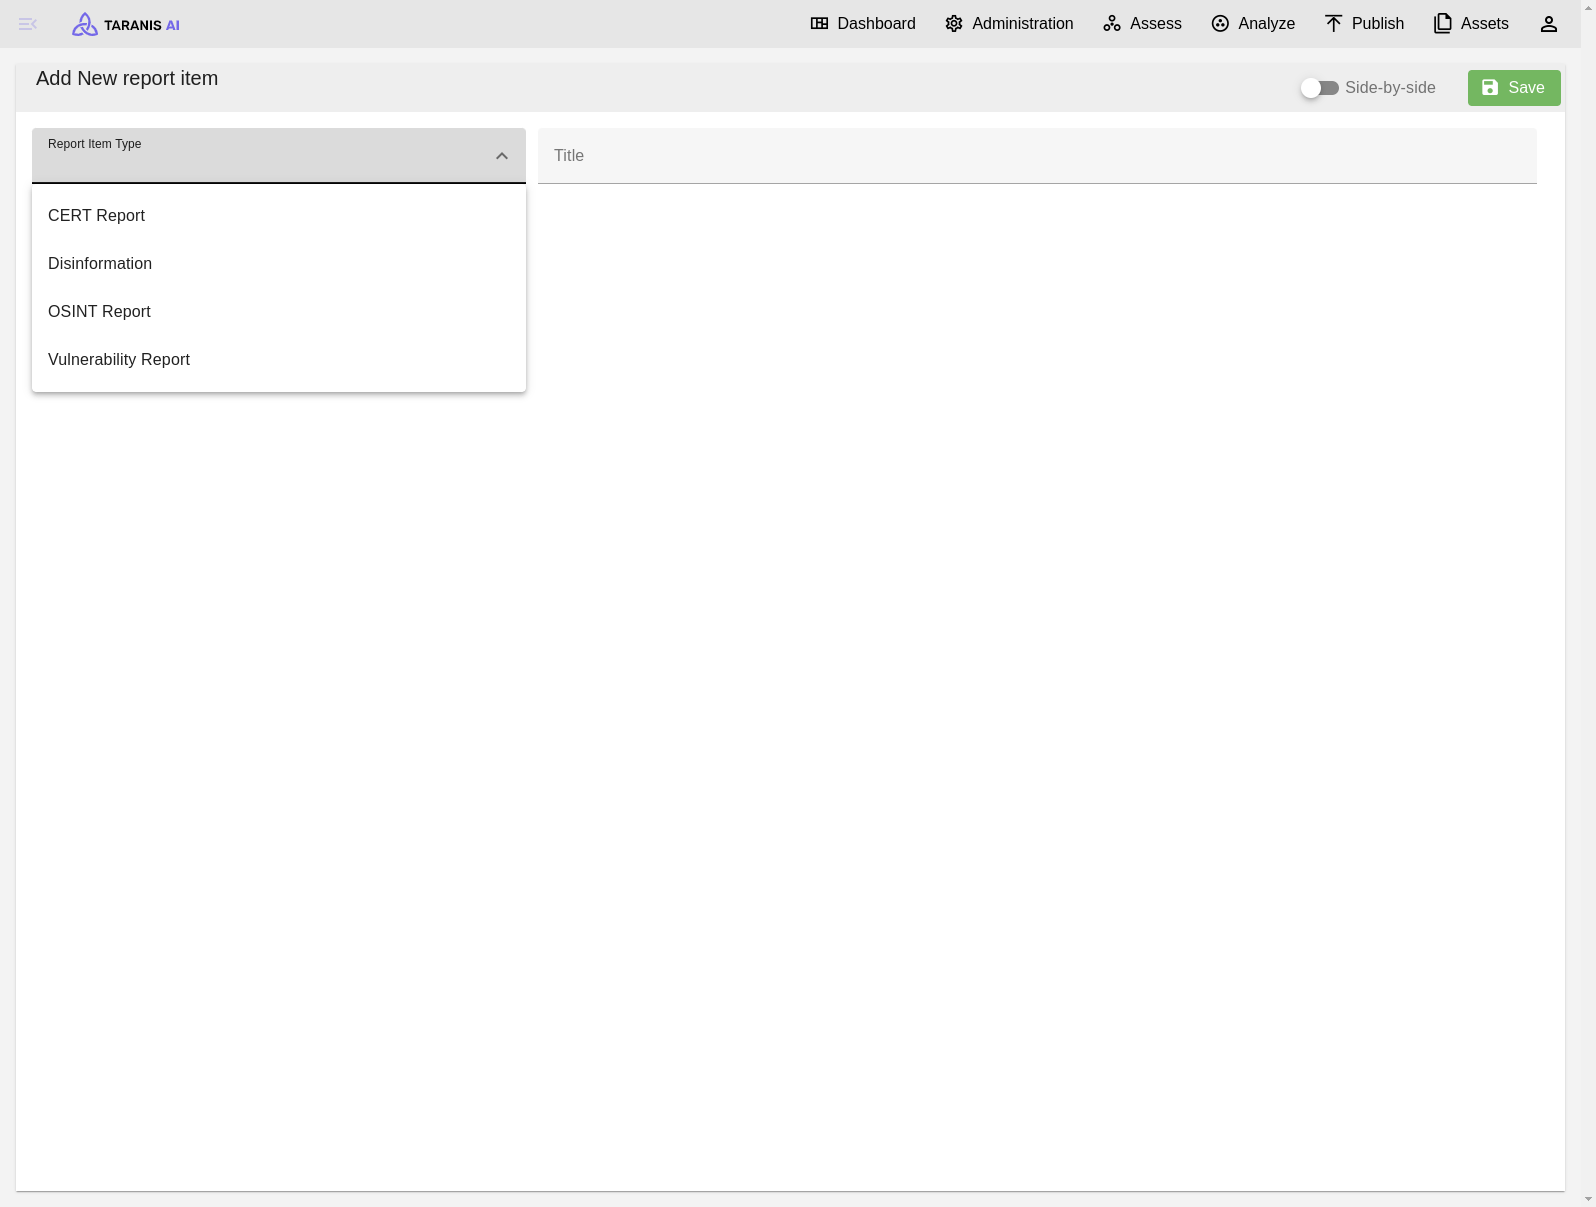
Add new report item
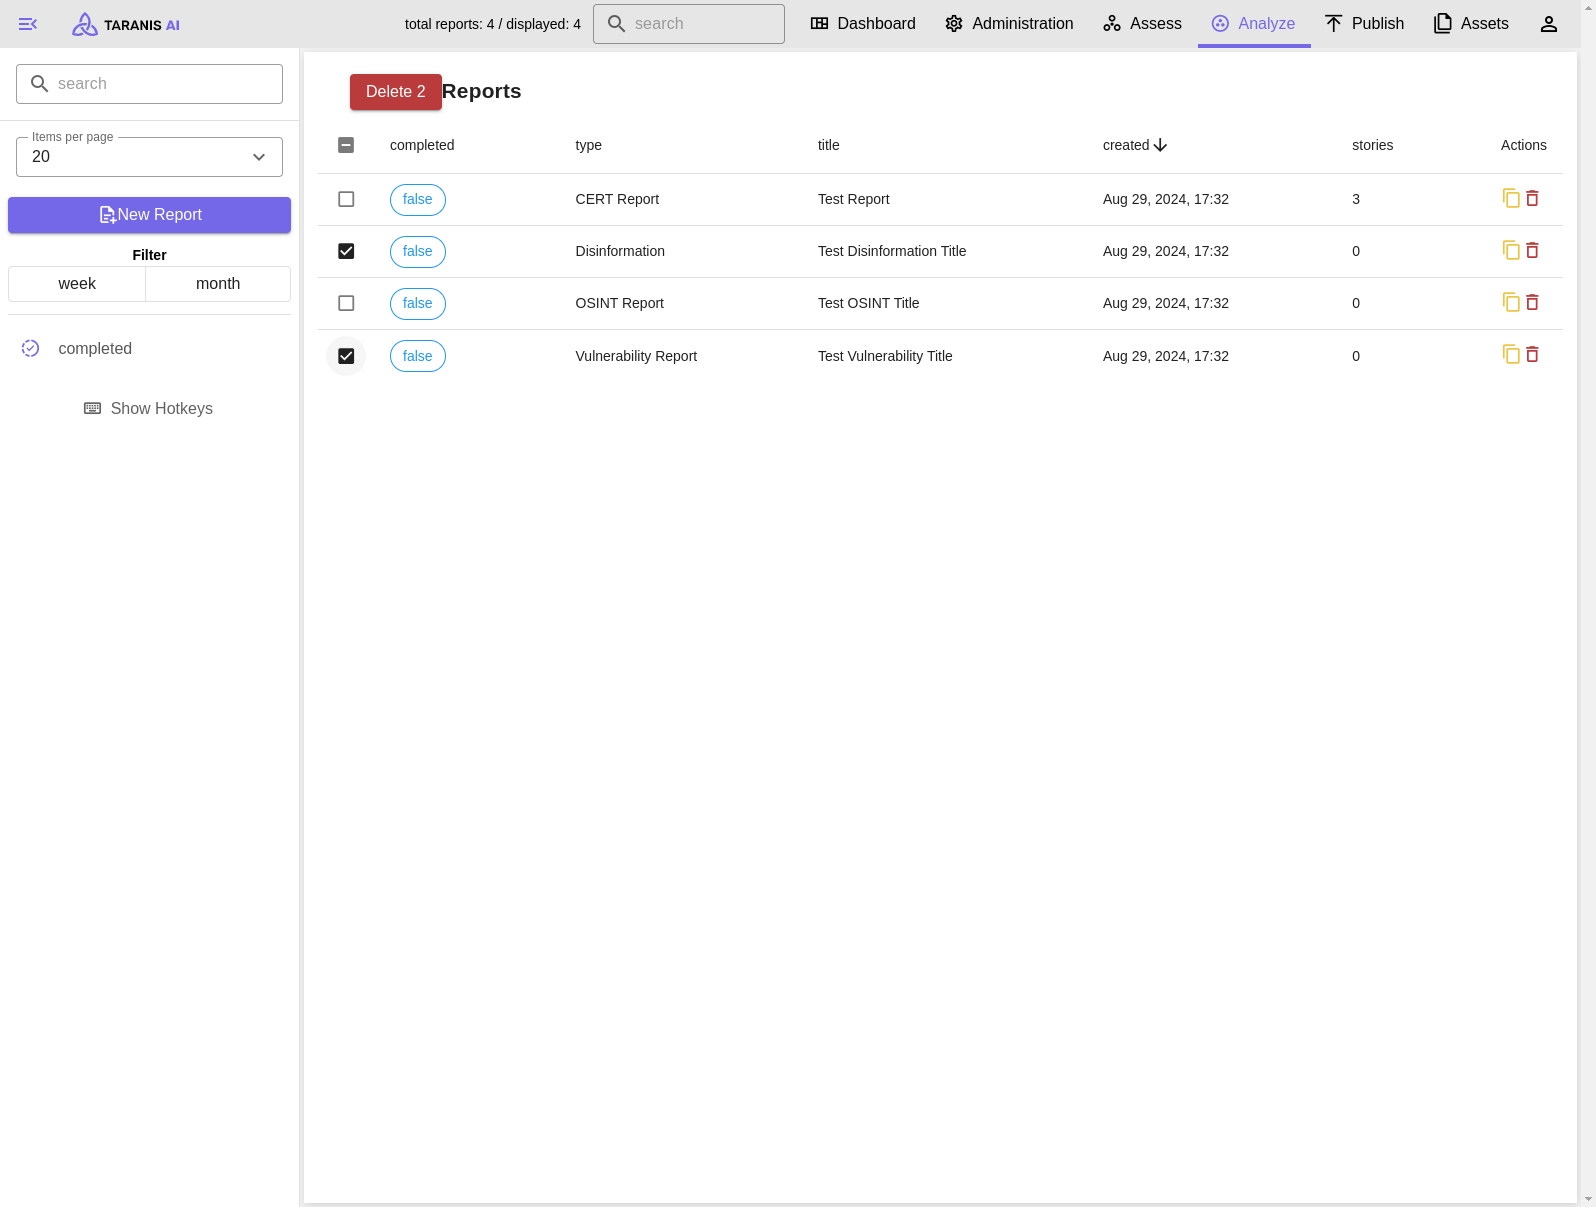
Deleting multiple reports at once
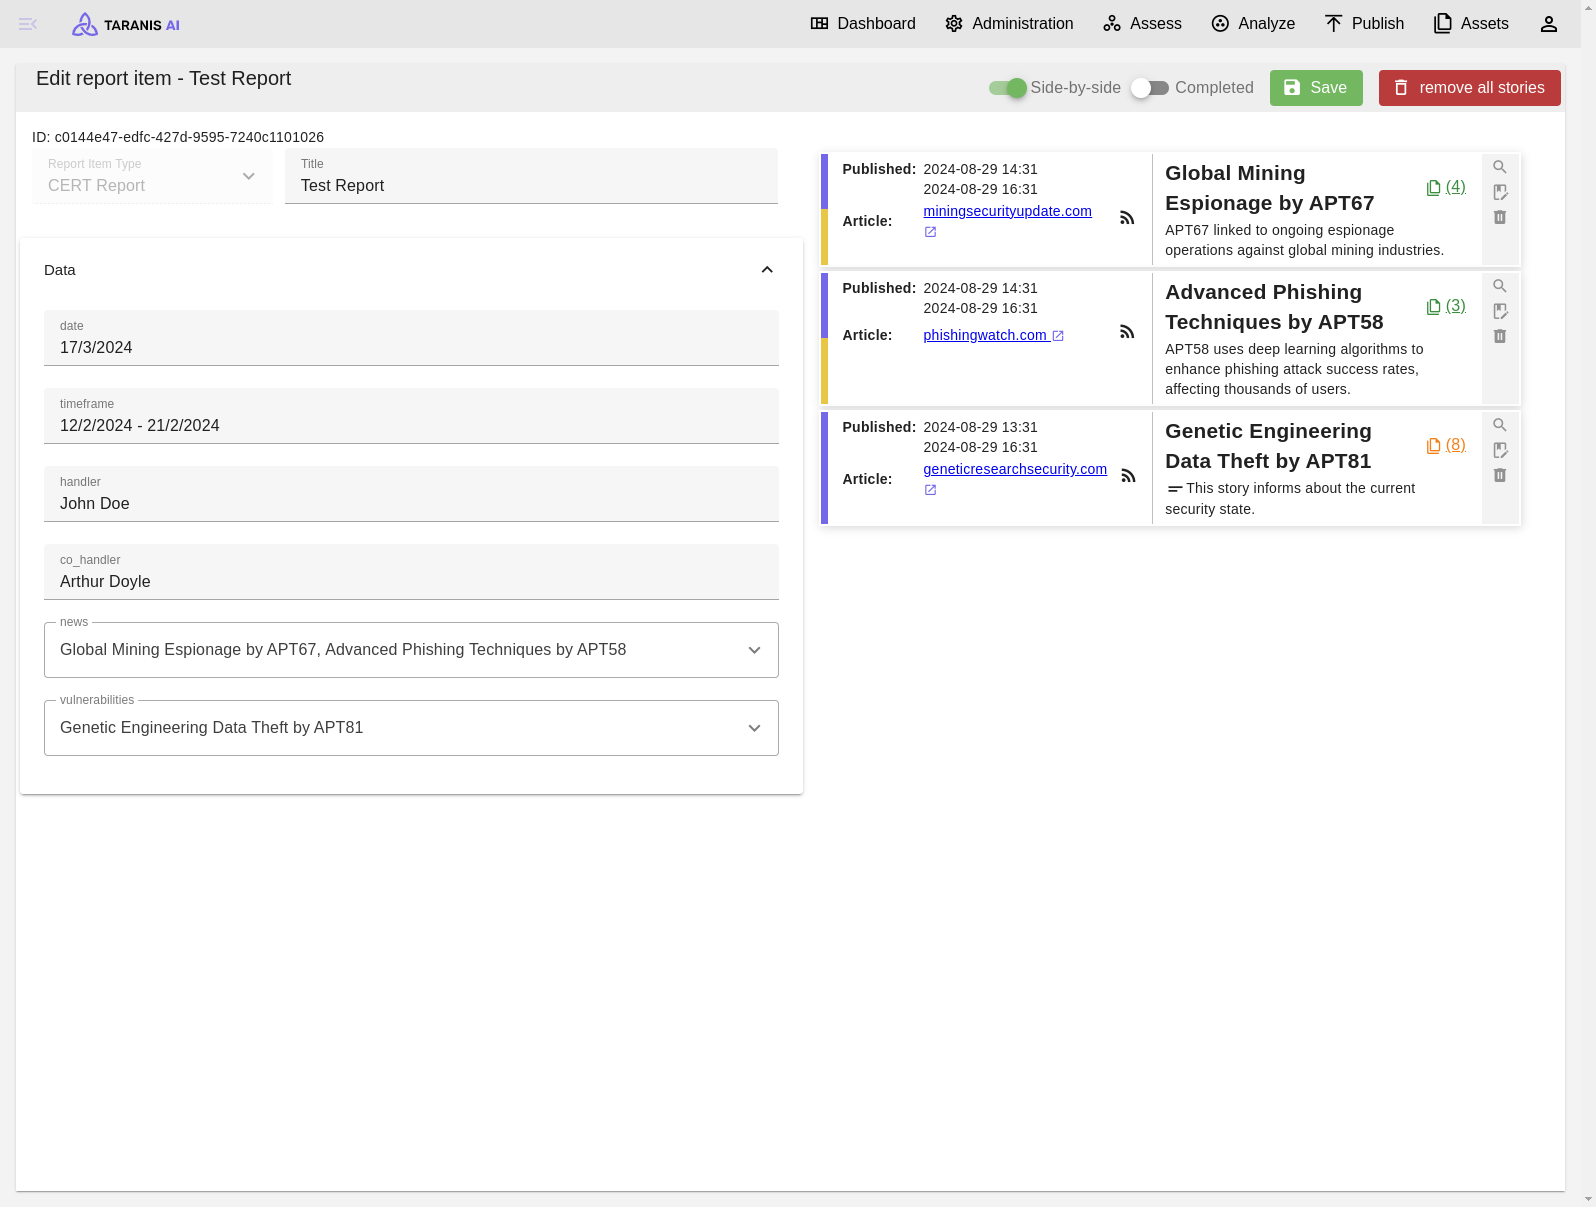
Report item view
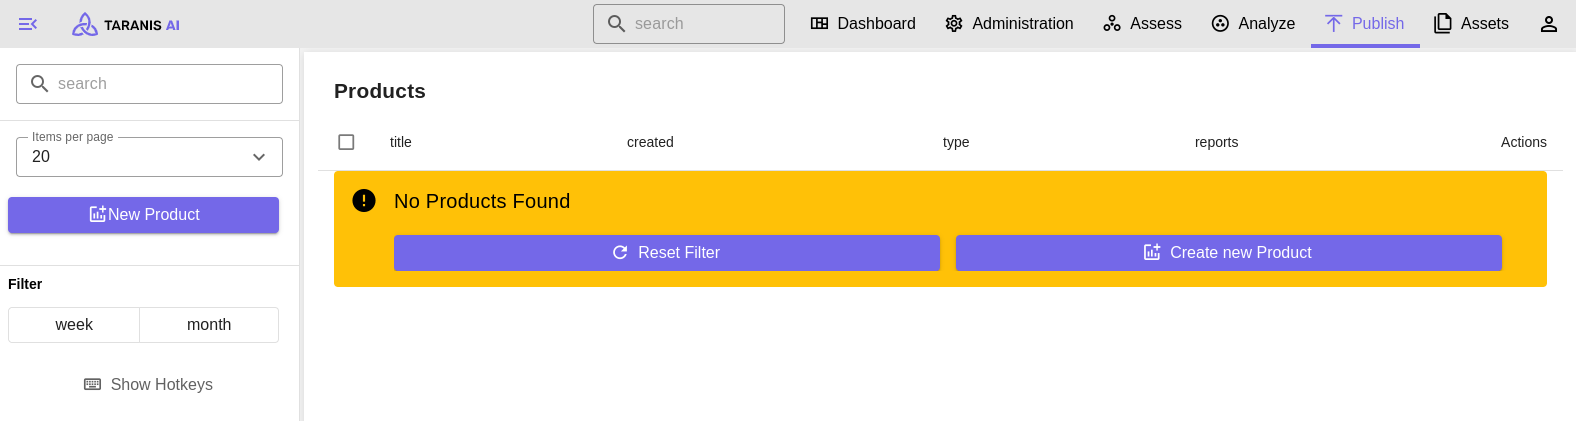
6 - Publish
The “Publish” section enables users to manage and display their products. These products allow users to render their reports into various formats such as HTML, JSON, PDF or plain text.
Functionalities
Publish manages Products. A Product combines one or more Reports with a Product Type, renders the result into a file format, and sends the rendered file to a configured Publisher.
Product setup
Select a Product Type.
Add supported Report Items.
Save the Product.
Render the Product.
Preview or download the rendered output.
Publish manually, or enable autopublish with a default Publisher.
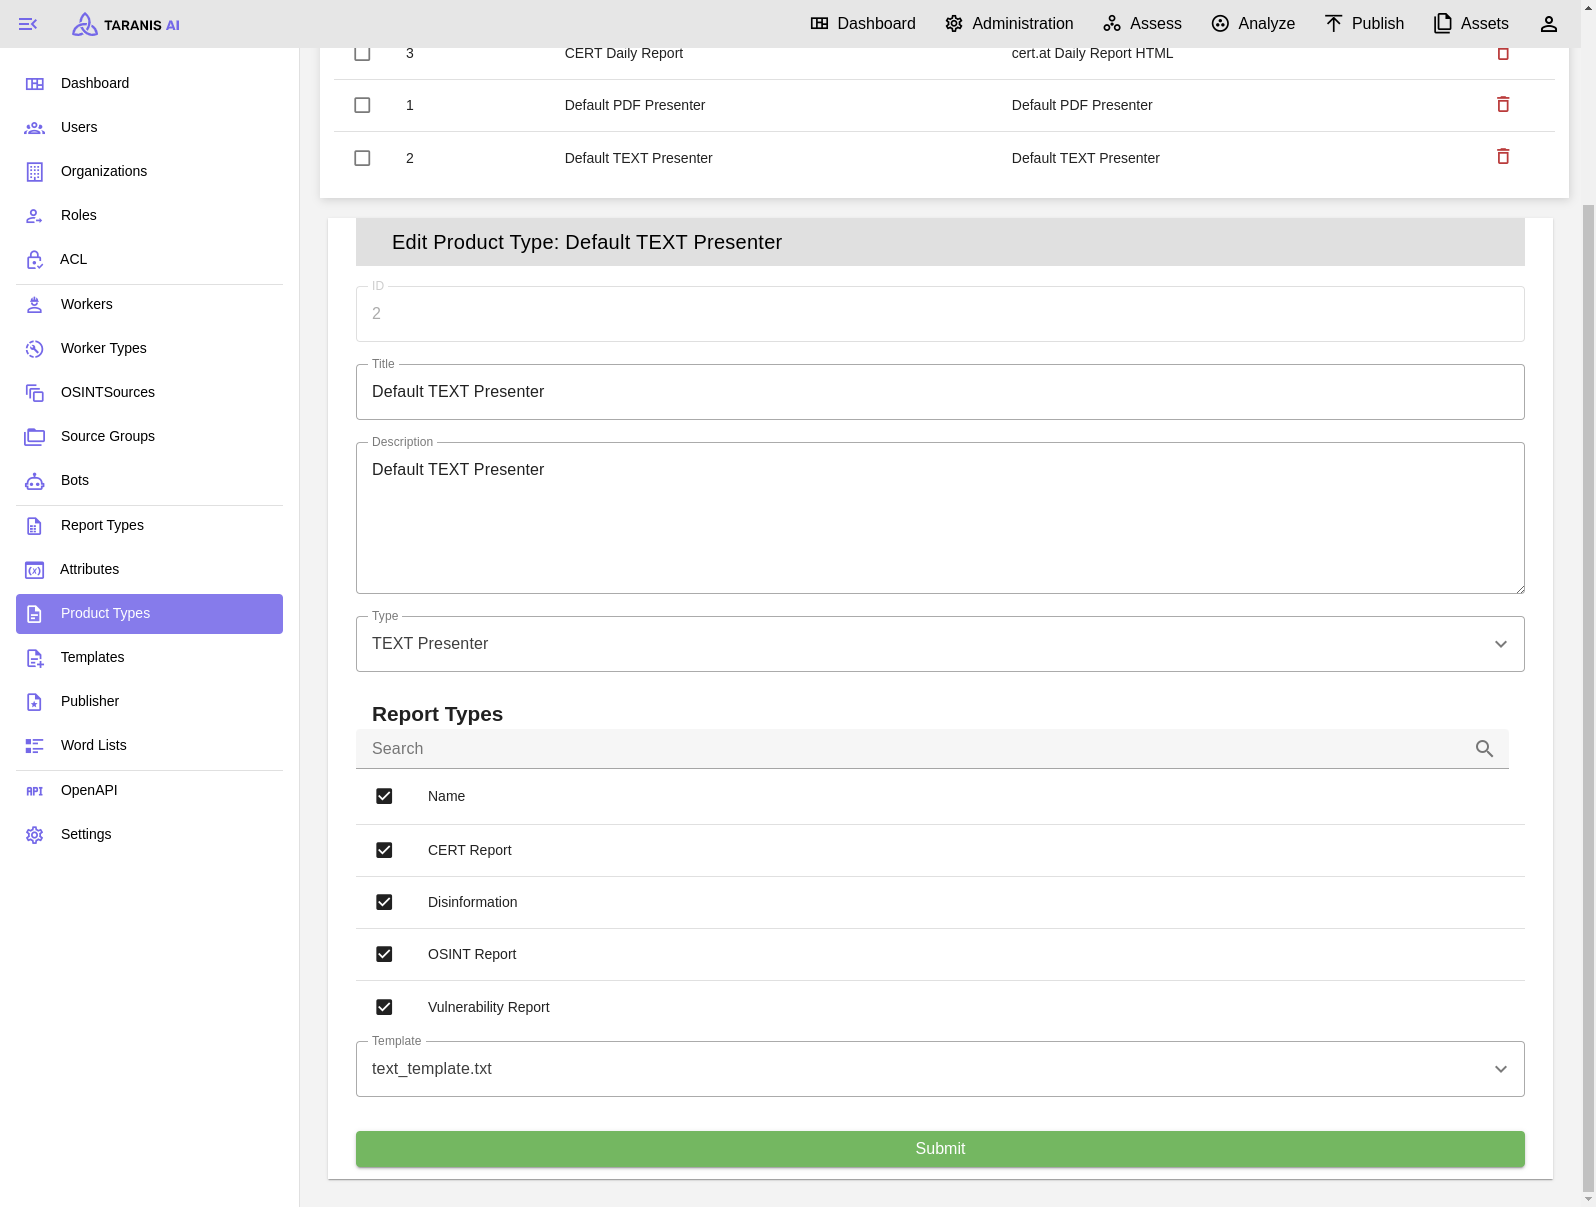
Product Types define the renderer, template, output format, and which Report Types are compatible. See Product Types.
Render and preview
Rendering is a worker-backed action. HTML, JSON, text, and PDF Products can be previewed in the Product view after rendering. Other formats can be downloaded after rendering.
If workers are down, the render job can still be queued but will not complete until a worker starts. See Background Jobs.
Publishing
Manual publishing sends the rendered Product to a selected Publisher. Autopublish requires a default Publisher; when enabled, Taranis AI can automatically render and publish matching Products during report/product workflows.
Supported Publishers and their parameters are documented in Publishers.
Filter
Search: Items can be filtered by string search
Items per page: Number of items displayed per page
Filter: Show items created today, this week, or this month
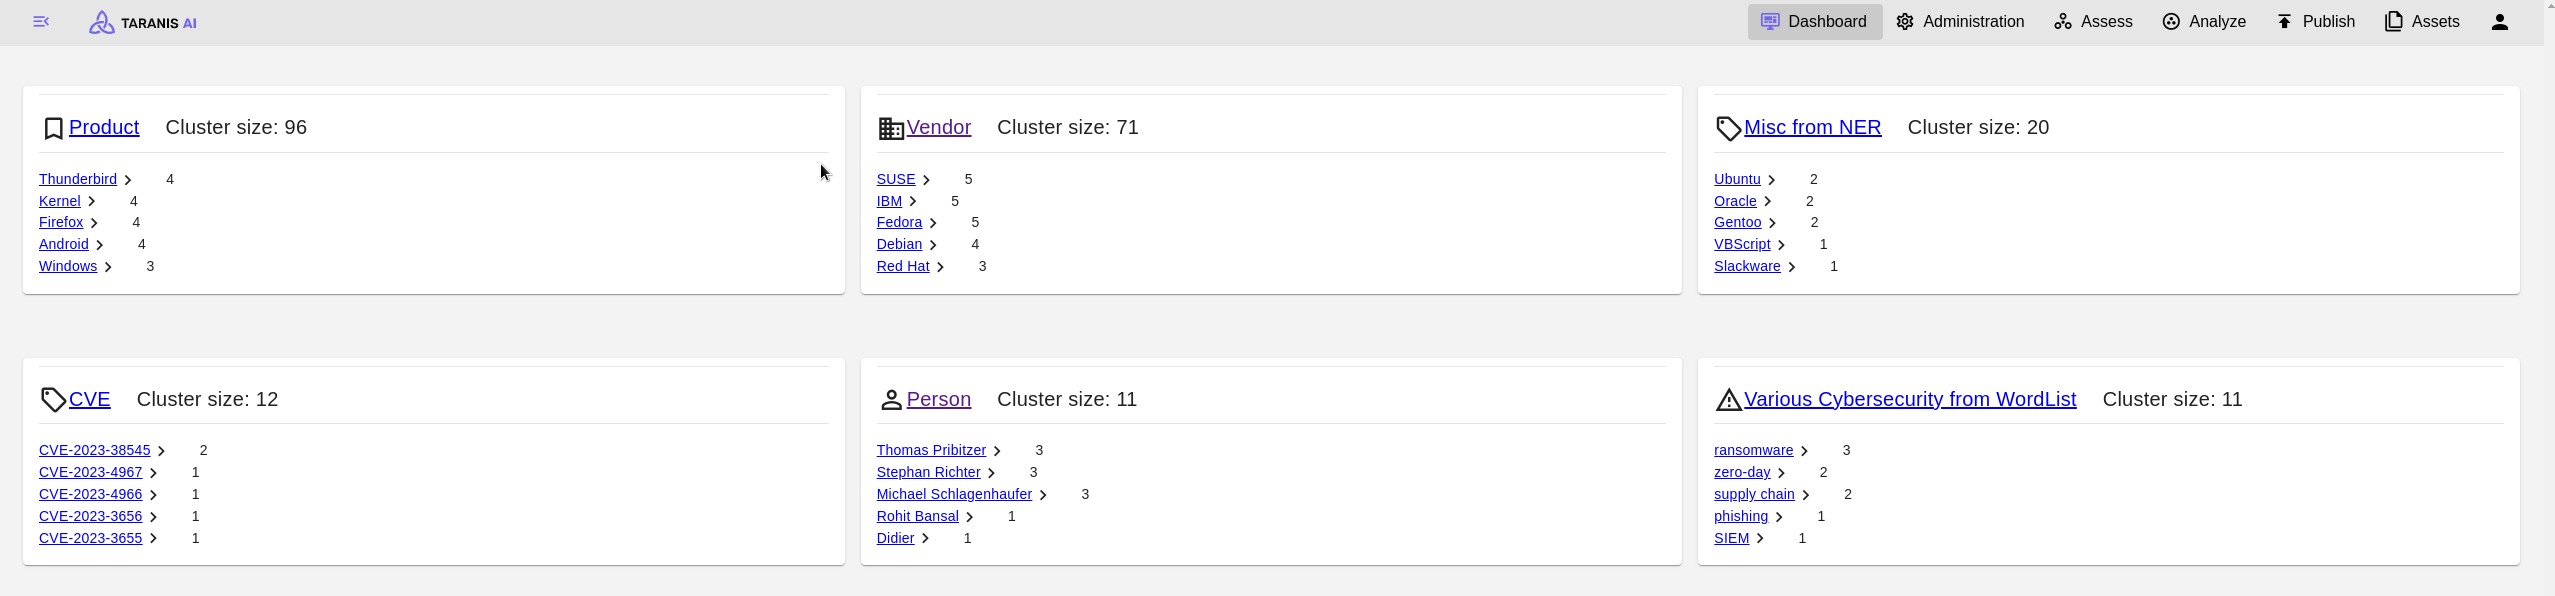
Review workflow statistics, open analyst queues, and explore recently active tags.
The Dashboard is the starting page after login. It brings together workflow statistics, recently active tags, and your saved Assess filters. Use it to check incoming information and choose a queue to work through.
Workflow cards
Select a card’s title to open the corresponding workspace.
Card
What it shows
Where it leads
Assess
Total News Items and Stories, plus News Items and Stories this week.
This week runs from Monday at 00:00 UTC through the current time. News Items are counted by publication date; Stories, Reports, and Products are counted by creation date. Future dates are excluded. For example, an older article collected today may increase the News Item total without increasing this week’s News Item count.
These are instance-wide statistics. An Assess filter or a user’s content permissions can produce a different count in the destination workspace. The Publish count includes all Products; it does not indicate how many have been published or are ready to publish. Dashboard statistics are cached for 30 seconds, so recent changes may take a short time to appear when reloading.
Start analyst review
The Start analyst review button on the Assess card opens a guided workflow through Stories, a Report, and a Product.
Choose an incomplete Report, or create one with a title and Report Type.
Review a snapshot of the current shift’s unread Stories, newest first. Configure End of shift in User settings for shift filtering.
Use Add to attach a Story to the Report, mark it read, and clear its important flag. Dismiss marks it read and clears important without adding it. Skip advances without changing the Story. The corresponding keyboard shortcuts are A, D, and S when focus is outside editable controls.
After the queue, complete the Report if needed and continue to Publish. If exactly one existing Product contains the Report, that Product opens; otherwise, a new Product opens with the Report preselected. Review and publish the Product using the normal publishing controls.
The Story queue is fixed when the review starts; Stories arriving later belong to a subsequent review. The guided workflow does not publish automatically.
The button requires Assess access and update permissions, Analyze access/create/update permissions, and Publish access/create permissions. See User management if it is missing.
Recently active tags
Recently Active Tags groups tags by type, such as Country or Location. Select an individual tag to open Assess with that tag filter, or select the card’s heading to explore all tags of that type. The first three cards are visible initially; Show more reveals the rest.
The default activity window is seven days. A tag qualifies when it appears in a Story created within that window, but its displayed count includes matching Stories across all time. Each card lists up to five tags, ordered by their Story counts. Total stories sums those displayed tag counts, so a Story with several tags can contribute more than once.
Save recurring queues in Assess to make them available under Saved Filters on your Dashboard. For example, save unread important Stories, a language-specific queue, or a topic used during shift handover.
Select a saved filter’s title to open that Assess queue. Cards show the filter URL and a Default badge when applicable. The first three are visible initially; Show more reveals additional filters. This section appears once you have saved a filter.
Delete removes the saved filter from your profile after confirmation, including its Assess shortcut. It does not delete Stories. Create or update filters and choose a default through the Assess Saved filters dialog. See Filter Lists and Saved Filters.
External signals
An optional PizzINT / DOUGHCON card displays an external signal under External Signals. It is disabled by default and can be enabled per user through Edit Dashboard. See PizzINT / DOUGHCON for its fields and freshness indicators.
Conflict resolution
Open Connectors to choose Story Conflicts or News Item Conflicts. The Conflict Resolution guide explains how to compare incoming MISP changes and choose a resolution.
Administration
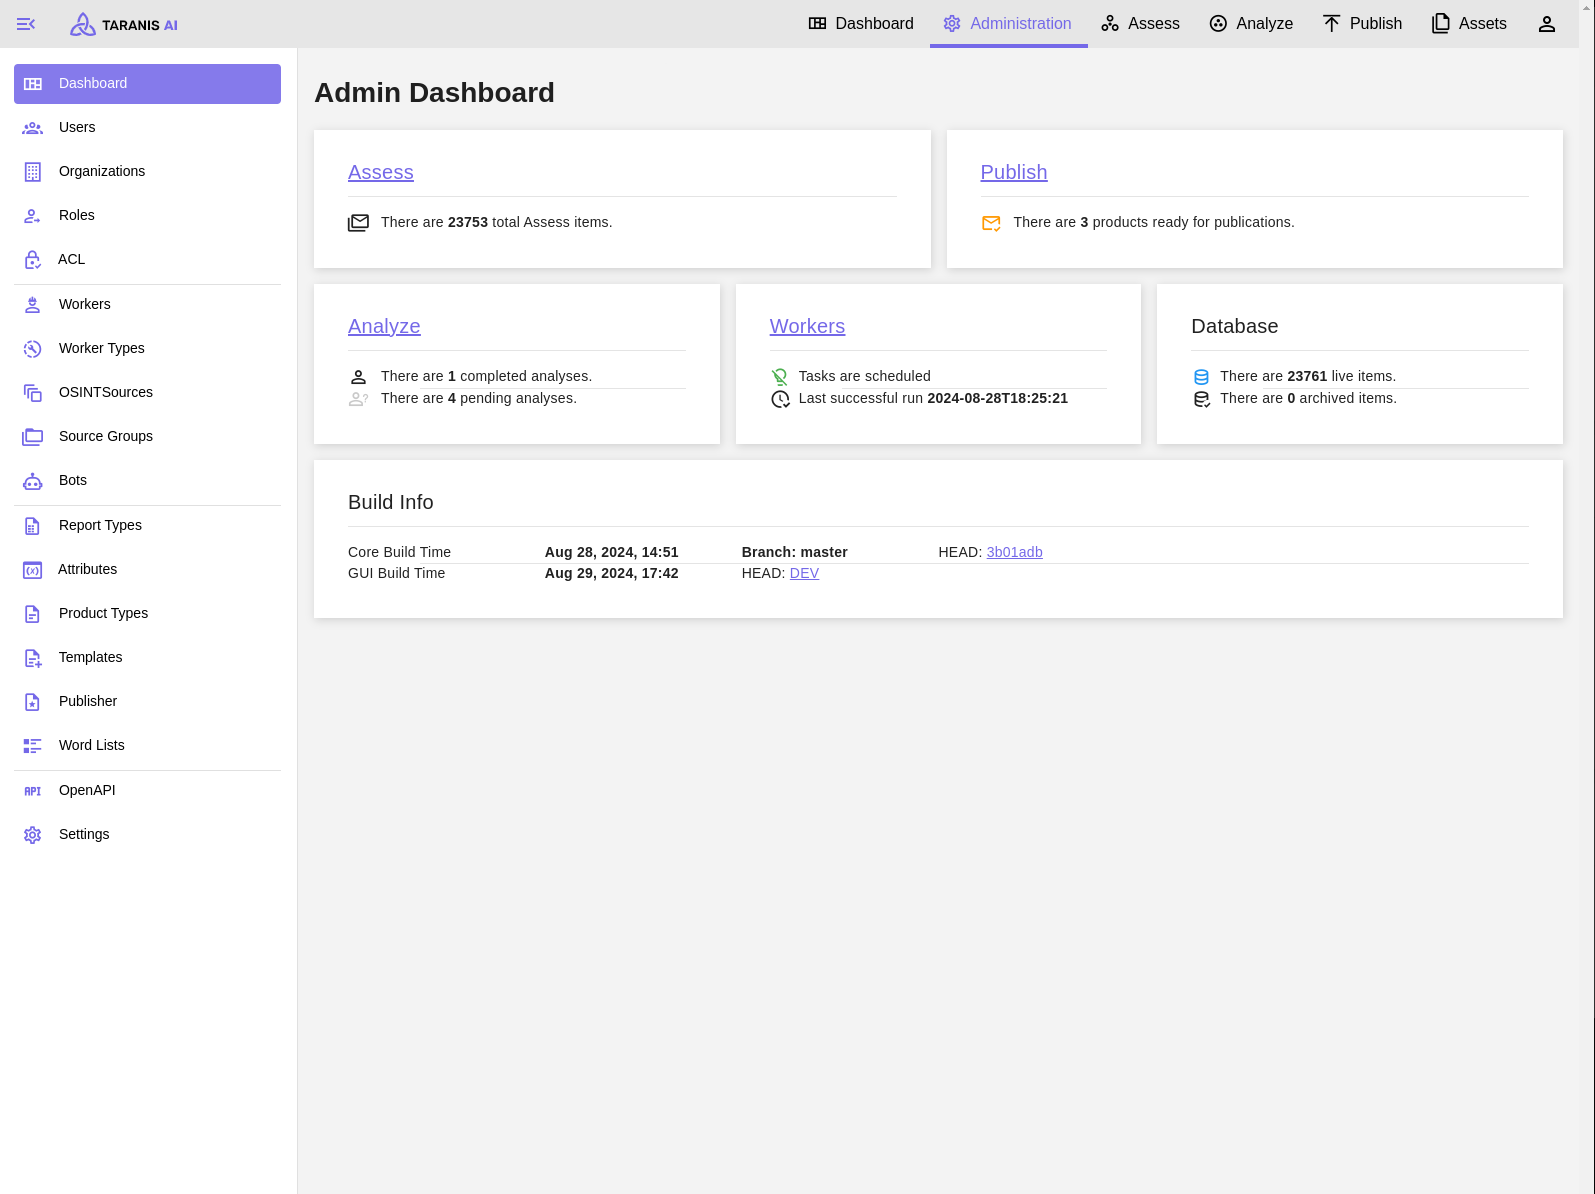
Users with administration privileges also have an Admin Dashboard with queue information, release details, system health, and task outcomes.
7.1 - Tags and Dashboard Settings
Explore tag clusters and customize your Dashboard, including the optional PizzINT signal.
Explore a tag type
Select a Recently Active Tags card heading to open its tag table. Name identifies the tag and Size shows its matching Story count. Sort by either column, use the pagination controls to browse the list, and select a row to open Assess with that tag filter.
The table lists tags across all time for the selected type. The Dashboard’s activity window only determines which tags appear on its overview cards; it is not carried into the table or the linked Assess view.
For Country and Location, the detail view also includes a geographic bubble map. Bubble size represents the matching Story count. The map uses the current table page and interprets names as countries, so arbitrary city or place names may not appear.
Edit Dashboard
Select Edit Dashboard at the top of the Dashboard. These settings belong to your user profile. Choose Update Dashboard Settings to save and return to the Dashboard.
Setting
Default
Effect
Activity Window Days
7
Include tags seen in Stories created within this many days. Set 0 to include all activity. Counts still cover all matching Stories.
Show Trending Clusters
On
Show or hide Recently Active Tags.
Select tags
No selection
Limit cards to selected tag types. Leave empty to include all available types. Despite the label, the choices are types such as Country or Location, rather than individual tag values.
Show Charts in Dashboard
On
Stores a chart preference. Currently, the Country/Location map renders independently of this switch, so switching it off does not hide that map.
Show PizzINT / DOUGHCON
Off
Load the PizzINT card under External Signals.
If no recently active tags appear, check that Show Trending Clusters is enabled, then widen the activity window or clear the tag-type selection. Cards need tagged Stories matching those settings.
PizzINT / DOUGHCON
The PizzINT card loads separately after the main Dashboard, so the external request does not delay the workflow cards. It displays:
DOUGHCON level and its readiness description.
Smoothed index, on a scale of 0–100.
Observed, the observation time in your configured timezone.
Stale and Fetched, when showing an older result after a refresh problem or an upstream stale response.
The About DOUGHCON information button explains the signal, lists all five levels, and attributes the data to PizzINT.watch. The card describes an indicator based on sustained, simultaneous unusual activity at multiple pizza locations.
Level
Description shown in the card
1
Maximum Readiness
2
Next Step to Maximum Readiness
3
Increase in Force Readiness
4
Increased Intelligence Watch
5
Lowest State of Readiness
Results are cached for ten minutes. If refreshing fails, a last successful result can be retained for up to one hour and displayed as Stale. When no usable result exists, the card shows PizzINT data unavailable. This is a current-status display; it does not collect Stories or maintain a signal history.
As the card’s information panel states, this signal is for informational and educational use. Correlation does not imply causation.
7.2 - Conflict Resolution
Compare incoming MISP changes and resolve Story and News Item conflicts.
Conflict resolution is an experimental feature for reviewing incoming MISP changes that cannot be applied automatically because the local content has also changed.
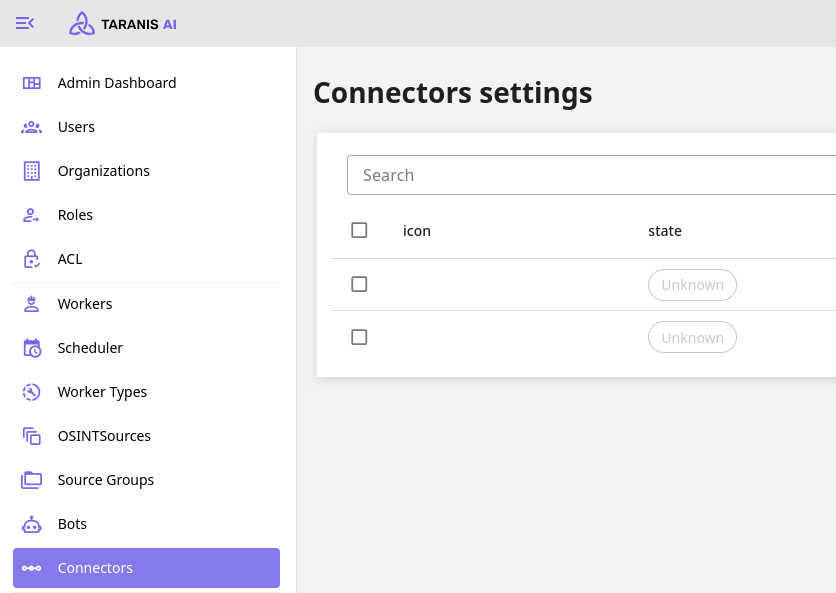
Select Connectors from the Dashboard or Admin Dashboard to open Conflict Overview, then choose Story Conflicts or News Item Conflicts. Resolving conflicts requires Assess update permission. For connector setup and sharing, see Connectors.
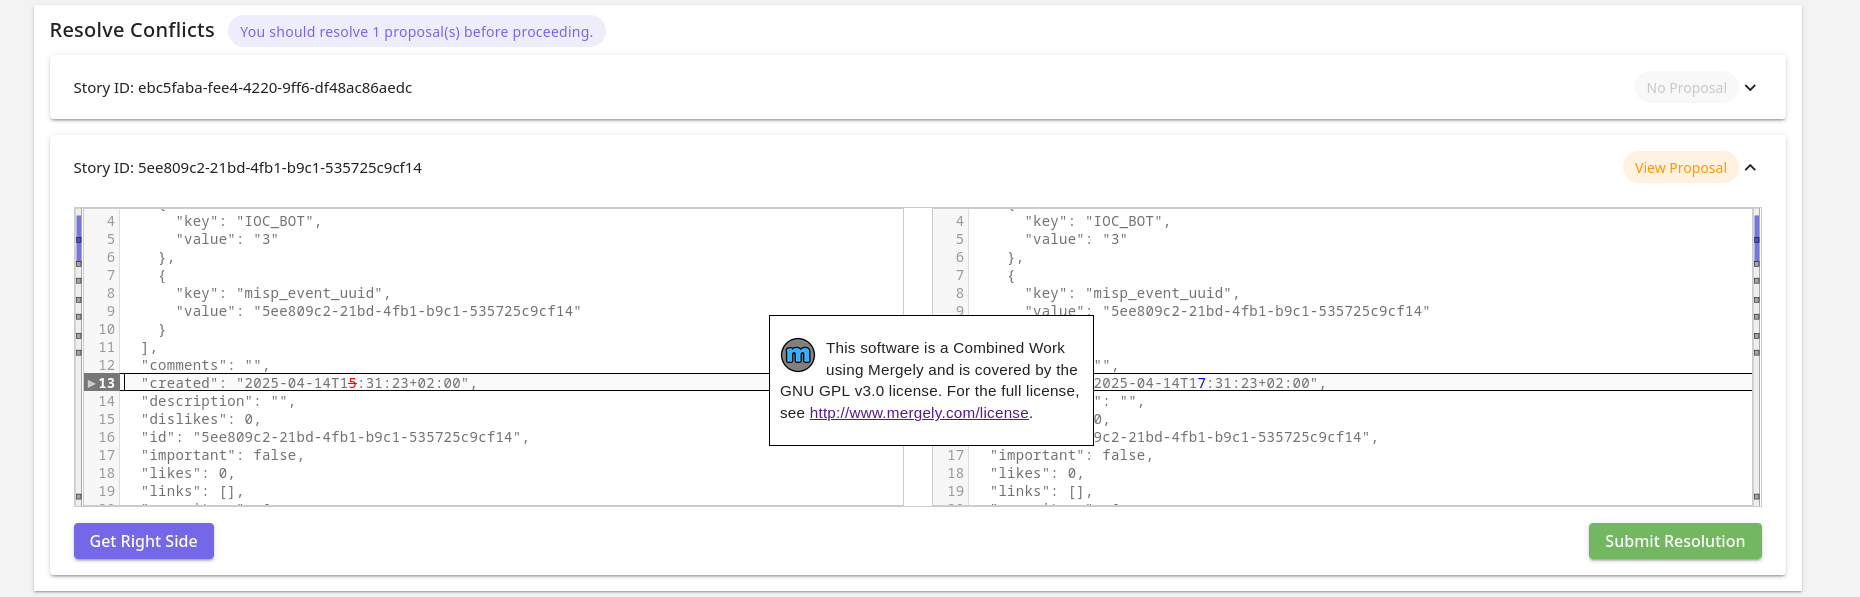
Story conflicts
A Story conflict occurs when the same Story has changed both locally and in MISP, preventing a clean update.
Expand a Story’s card to compare its existing and incoming content in the merge editor. Review the proposed changes, prepare the resolved content, and select Submit Resolution. The card also indicates whether MISP proposals are present.
The example below shows an incoming Story with a removed News Item and changes to comments and description.
News Item conflicts
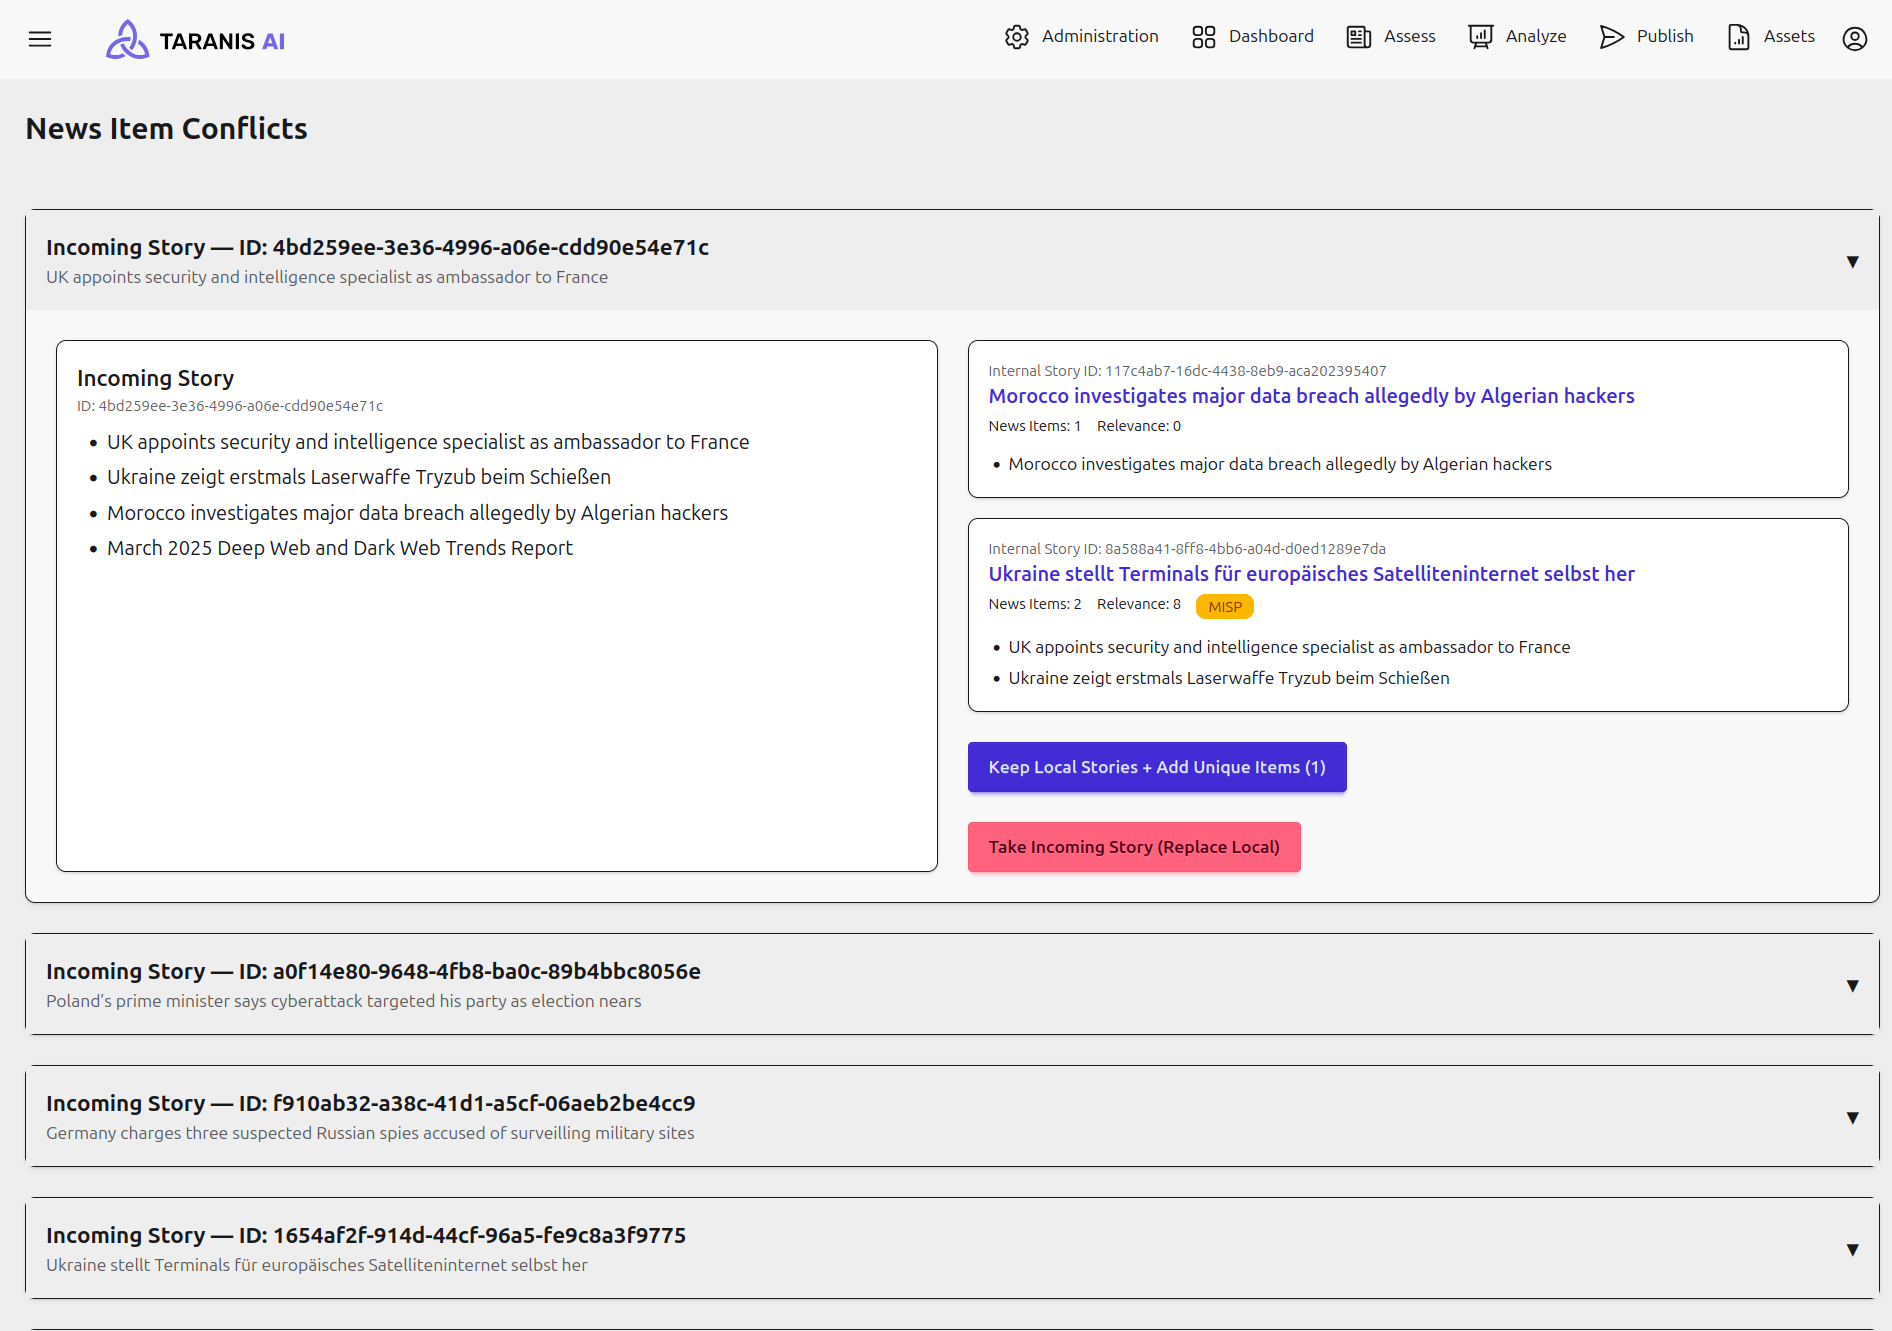
News Item conflicts occur when incoming and local Stories contain divergent News Items and local changes prevent an automatic update. Conflicts are grouped by incoming Story.
Expand a card to compare the incoming News Items with the existing local Stories. Local Story links open their details for inspection. Choose one of the following resolutions:
Action
Result
Keep Local Stories + Add Unique Items
Keeps local Stories unchanged and ingests incoming News Items that are not already present separately. The button shows the number of unique items and is disabled if there are none or no local Stories remain.
Take Incoming Story (Replace Local)
Ungroups the affected local Stories and ingests the incoming Story as supplied. Review the local grouping and content before selecting this option.
Conflicts are held in temporary memory. Run a fresh MISP collection before resolving them so the comparison reflects current incoming data; treat the conflict list as a working queue rather than a permanent history.
7.3 - Admin Dashboard
Inspect scheduled work, component versions, system health, and task outcomes.
The Admin Dashboard is available in Administration to users with the corresponding privileges. It includes the Assess, Analyze, Publish, and Connectors statistics described in the Dashboard overview, followed by operational cards.
Queue
The Queue card shows the number of scheduled tasks and the collection time of the most recent News Item. Select its heading to open the scheduler, where you can inspect:
Scheduled Jobs: work configured or registered to run later.
Active Jobs: work currently in progress.
Queue Failures: jobs held in the RQ failed-job registry.
Execution History: recorded task outcomes and statistics.
The scheduled count includes managed schedules and housekeeping jobs; it is not the number of tasks currently running. Auto-refresh: 10s is off by default. When enabled, it refreshes queue cards and the selected Scheduled Jobs, Active Jobs, or Queue Failures tab every ten seconds. Execution History does not poll.
Release Info lists Core and Frontend separately. Each shows its build date and, when provided by the build, a release tag or commit and branch. Missing build information is shown as Unavailable. Use these details when checking which versions are running or reporting a problem.
System Health
System Health reports Healthy or Degraded, with individual up, down, or n/a badges for:
Database: database availability.
Pre-seeded: initialization data readiness.
Redis: queue broker availability.
Workers: worker availability.
For example, Redis can be up while Workers are down: jobs may be accepted but remain unprocessed until workers are available. Follow the health-check guidance to investigate a degraded state.
Task Status
Task Status shows success, warning, and failure counts, plus a total and success-rate bar. Counts use the latest persisted outcome for each worker identity, so repeated runs of the same source or bot do not continually increase the totals.
Warnings contribute to the total but are separate from successes and failures. The success rate counts only full successes. Use Execution History for recorded outcomes and Queue Failures for jobs currently held as failed in the queue system.
8 - User settings
Any user has the ability to change various settings and can log in/out from the application.
User details
Username and user’s organization are displayed.
Change user settings
Split view: Show Assess and story details side by side.
Compact view: Use condensed spacing for tables and lists.
Show charts: Display dashboard visualizations when available.
Dark theme: Follows system or browser settings.
Infinite scroll: Automatically load more results near the bottom of a list.
Advanced story edit options: Expose extra Story Edit actions such as AI assisted summary, title, and sentiment actions.
Language: Switch interface language. Currently only English is available; a German translation is currently experimental.
Timezone: Choose how local times are displayed, or use the browser timezone.
End of shift: Used by Assess filtering and workflow planning.
Live updates: Enable Server-Sent Events so the UI can react to changes without a manual refresh.
Onboarding tours
Completed onboarding tours are tracked per user. They can be reset from user settings so they are shown again.
Password
Database-auth users can change their password from user settings. Keep passwords unique and do not reuse credentials from other systems.
Keyboard shortcuts
The settings page lists the available keyboard shortcuts. They are currently static and cannot be customized per user. Common Assess shortcuts include adding selected Stories to a report and bookmarking selected Stories.
9 - Administration
Administration section and general workflow
These options are accessible only via users with respective administration privileges. (See User management)
See Admin Dashboard for workflow statistics, queue navigation, release information, system health, and task outcomes.
Screenshots
Administration dashboard showing statistics and all its functionalities (sidebar)
9.1 - User Management
Users, Organizations and Roles can be managed by admin users in the Administration tab.
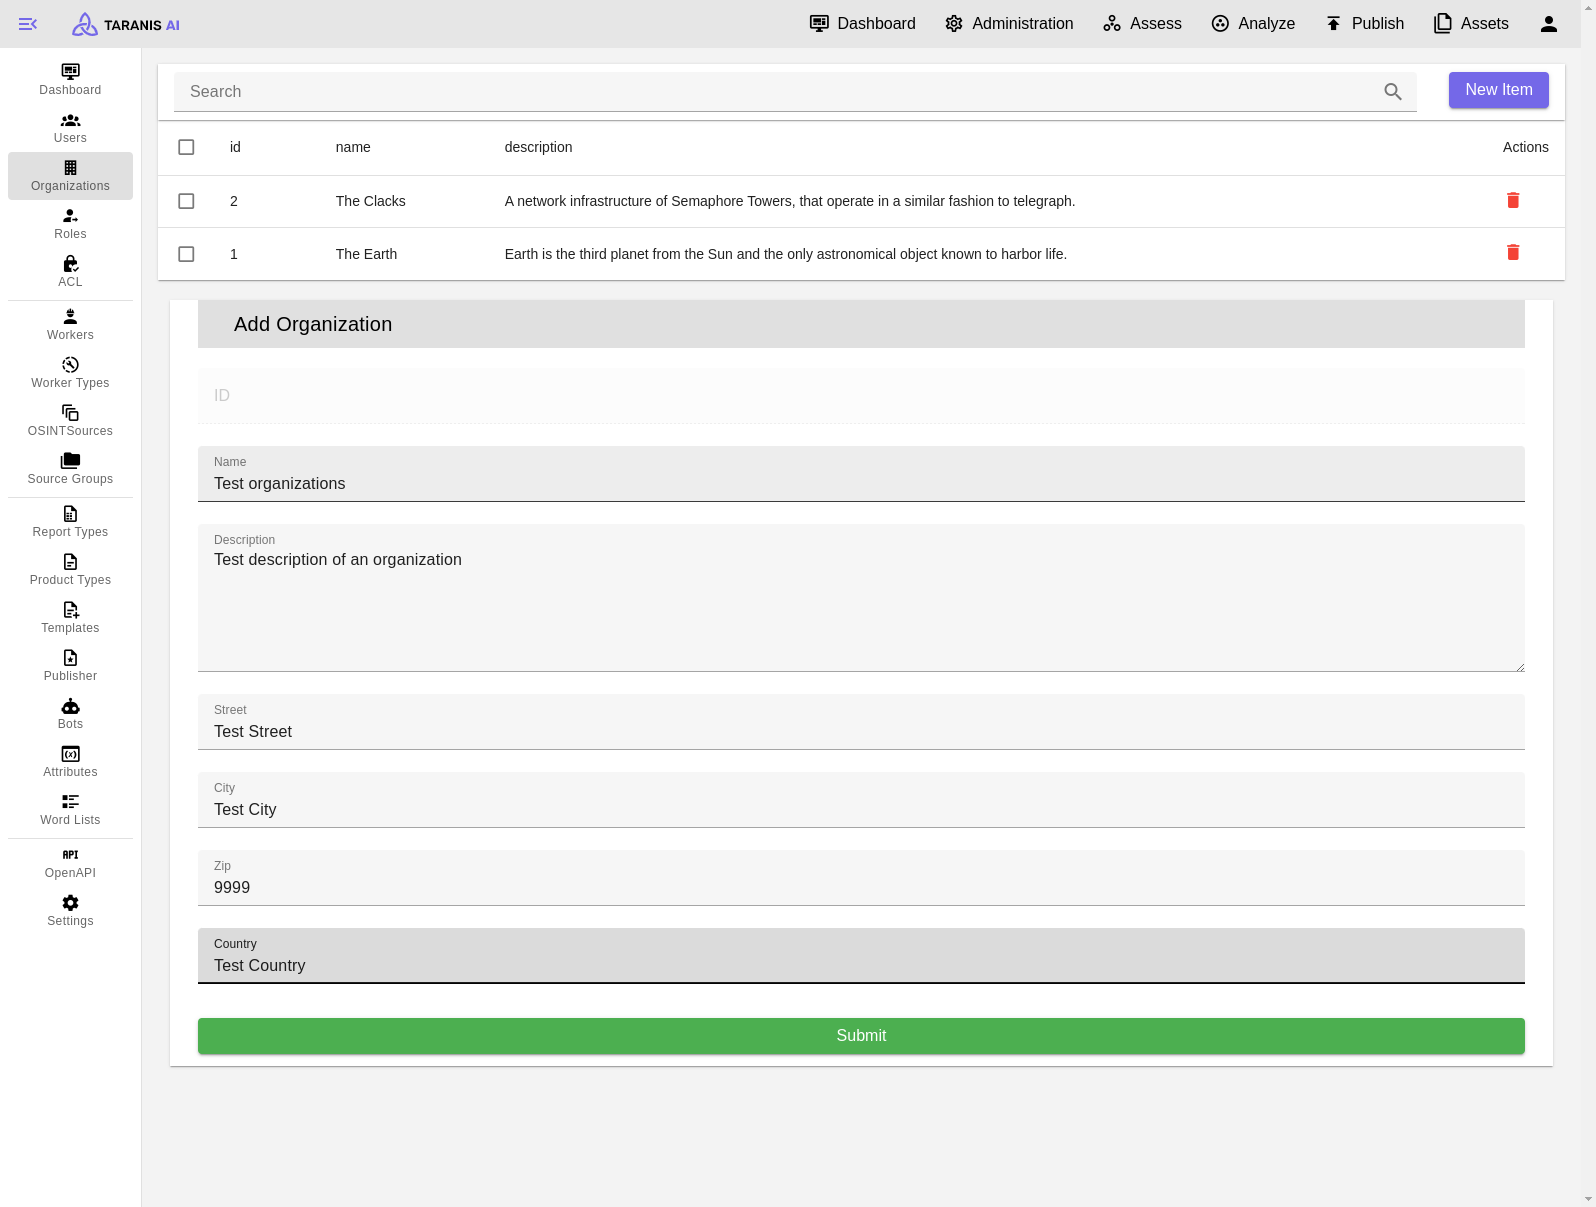
Organizations
Organizations can be added with following parameters defining them: name, description, address.
Roles
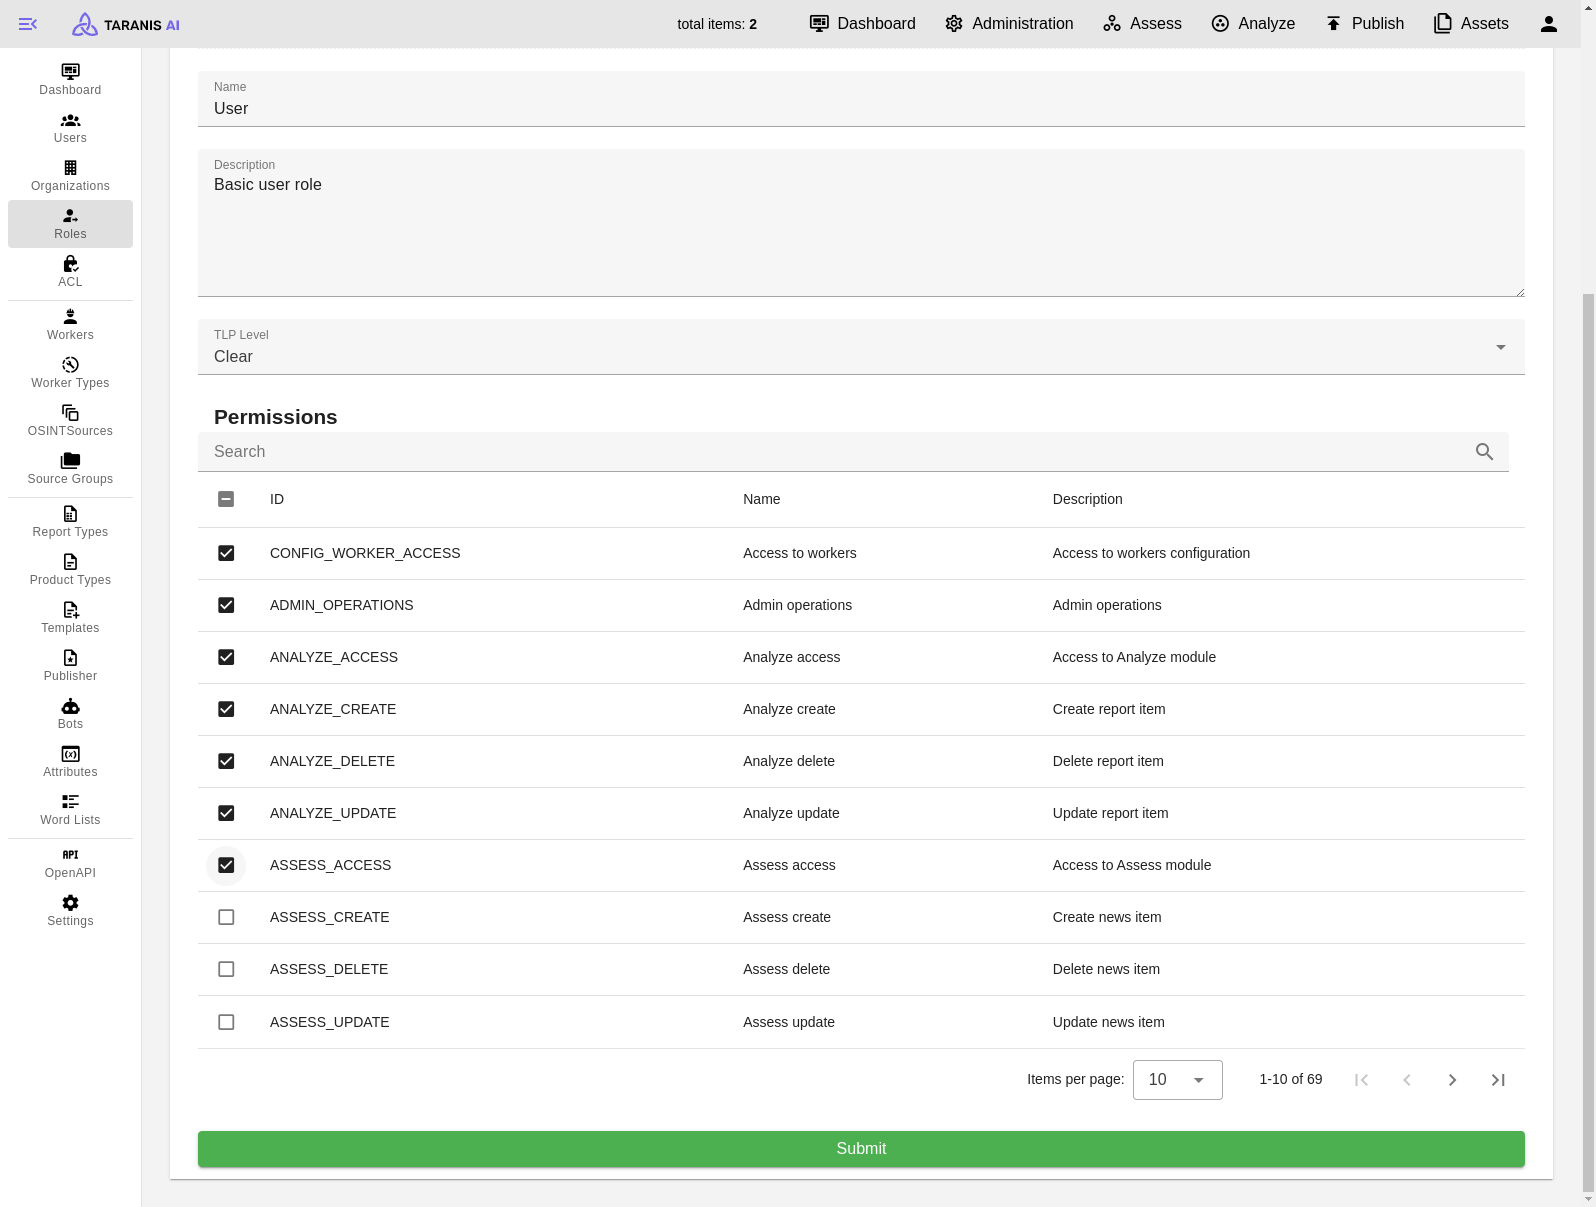
Define roles with permissions. Roles are then assigned to users to control access to administration, Assess, Analyze, Publish, connector, and worker features.
Access-control lists (ACLs) restrict user-facing content and reference data. A user can be granted access to a source directly or through an ACL on one of its source groups; a source-group wildcard grants access to all sources, including ungrouped sources. ADMIN_OPERATIONS bypasses these ACL checks, but does not bypass TLP restrictions. Administration and configuration access is controlled by the relevant CONFIG_* permissions.
Users
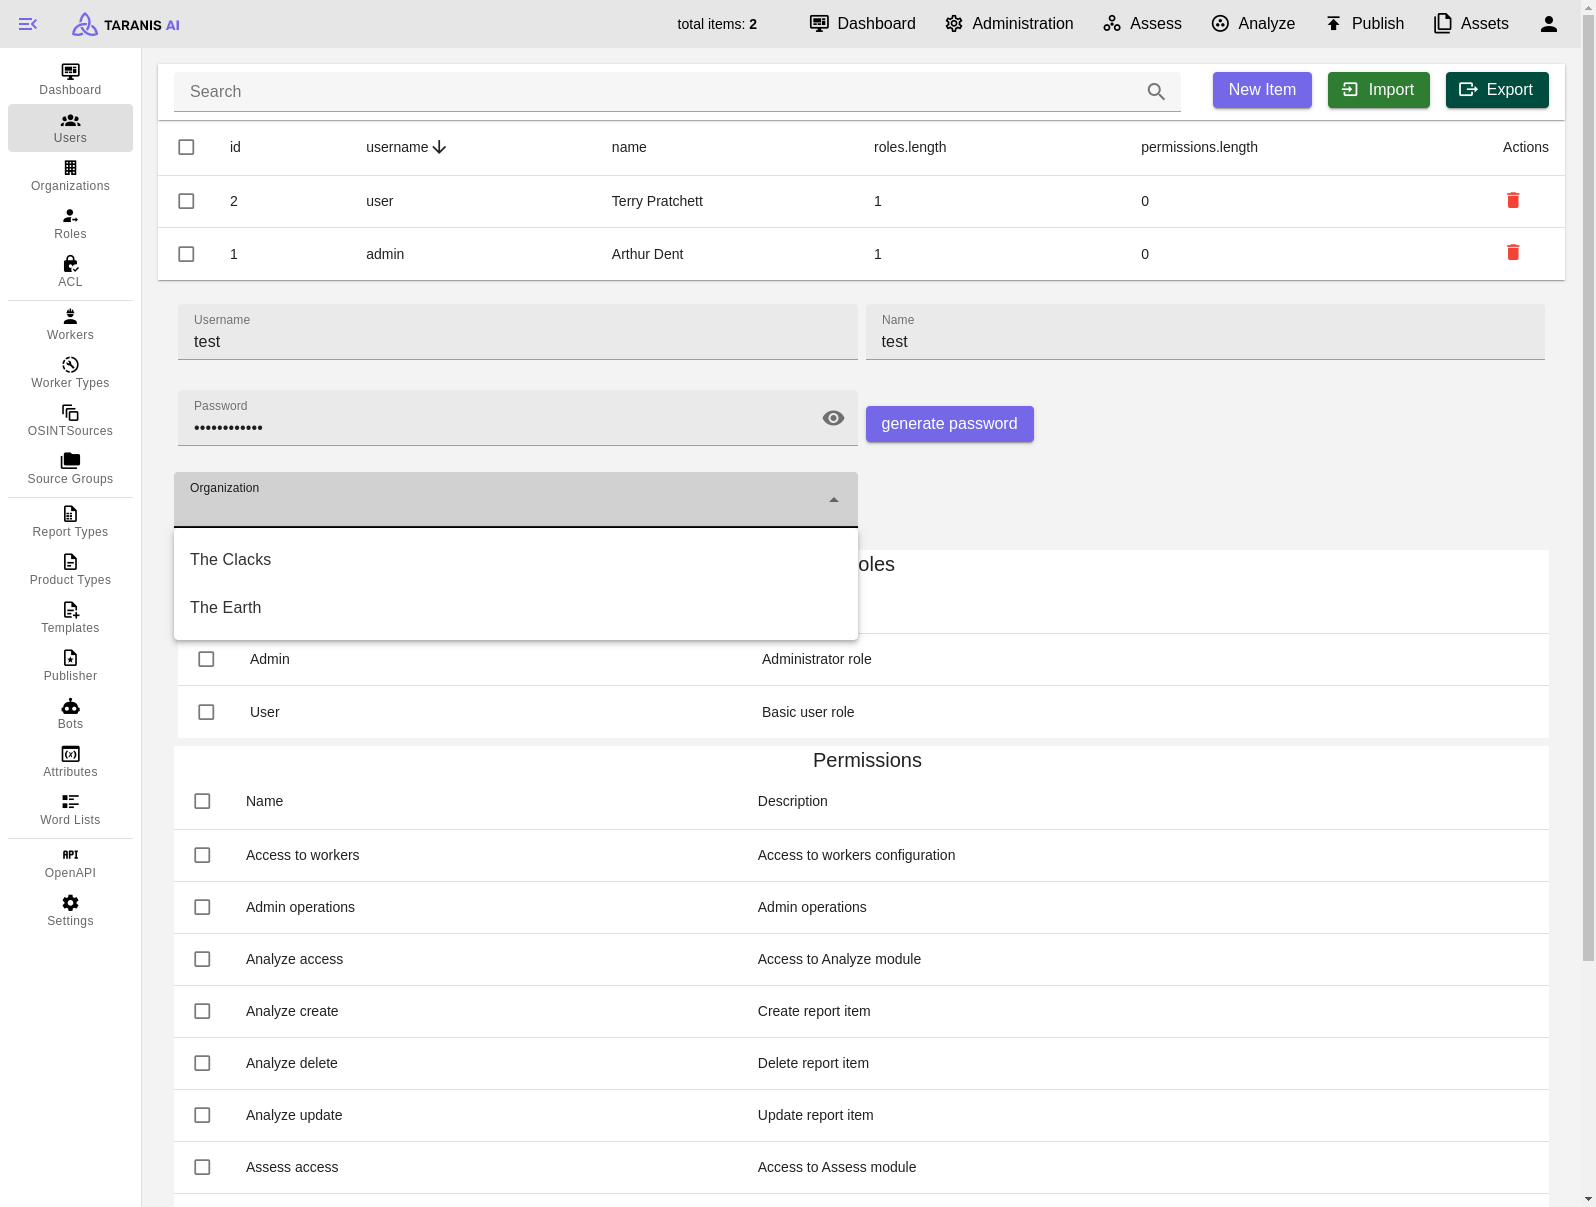
Manage users and assign them roles and an organization.
The user table supports JSON import and export:
Export downloads users_export.json. If users are selected, only those users are exported; otherwise all users are exported.
The export format is version: 1 with a data list containing user names and usernames.
Passwords are never exported.
Import accepts the exported JSON format, then assigns the selected organization and selected roles to every imported user.
Existing usernames are skipped and reported in a warning instead of failing the whole import.
Imported users without a password stay passwordless. Use this for externally authenticated users, or set a local password afterwards.
Operational CLI
Operators can repair existing database-auth users from inside the core container with taranis-cli.
docker exec -it core taranis-cli set-roles user Admin
kubectl exec -it deploy/core -- taranis-cli set-roles user Admin User
set-roles accepts exact role names or role IDs. It replaces the full role list; include every role the user should keep. Prefer the password prompt or --password-stdin so passwords do not land in shell history.
Import/Export: Sources can be imported and exported as JSON
CRUD: Sources can be created, updated and deleted. For each source a collector, feed URL and the content location can be defined among other things.
To get started there is list of RSS sources we worked with: Initial setup
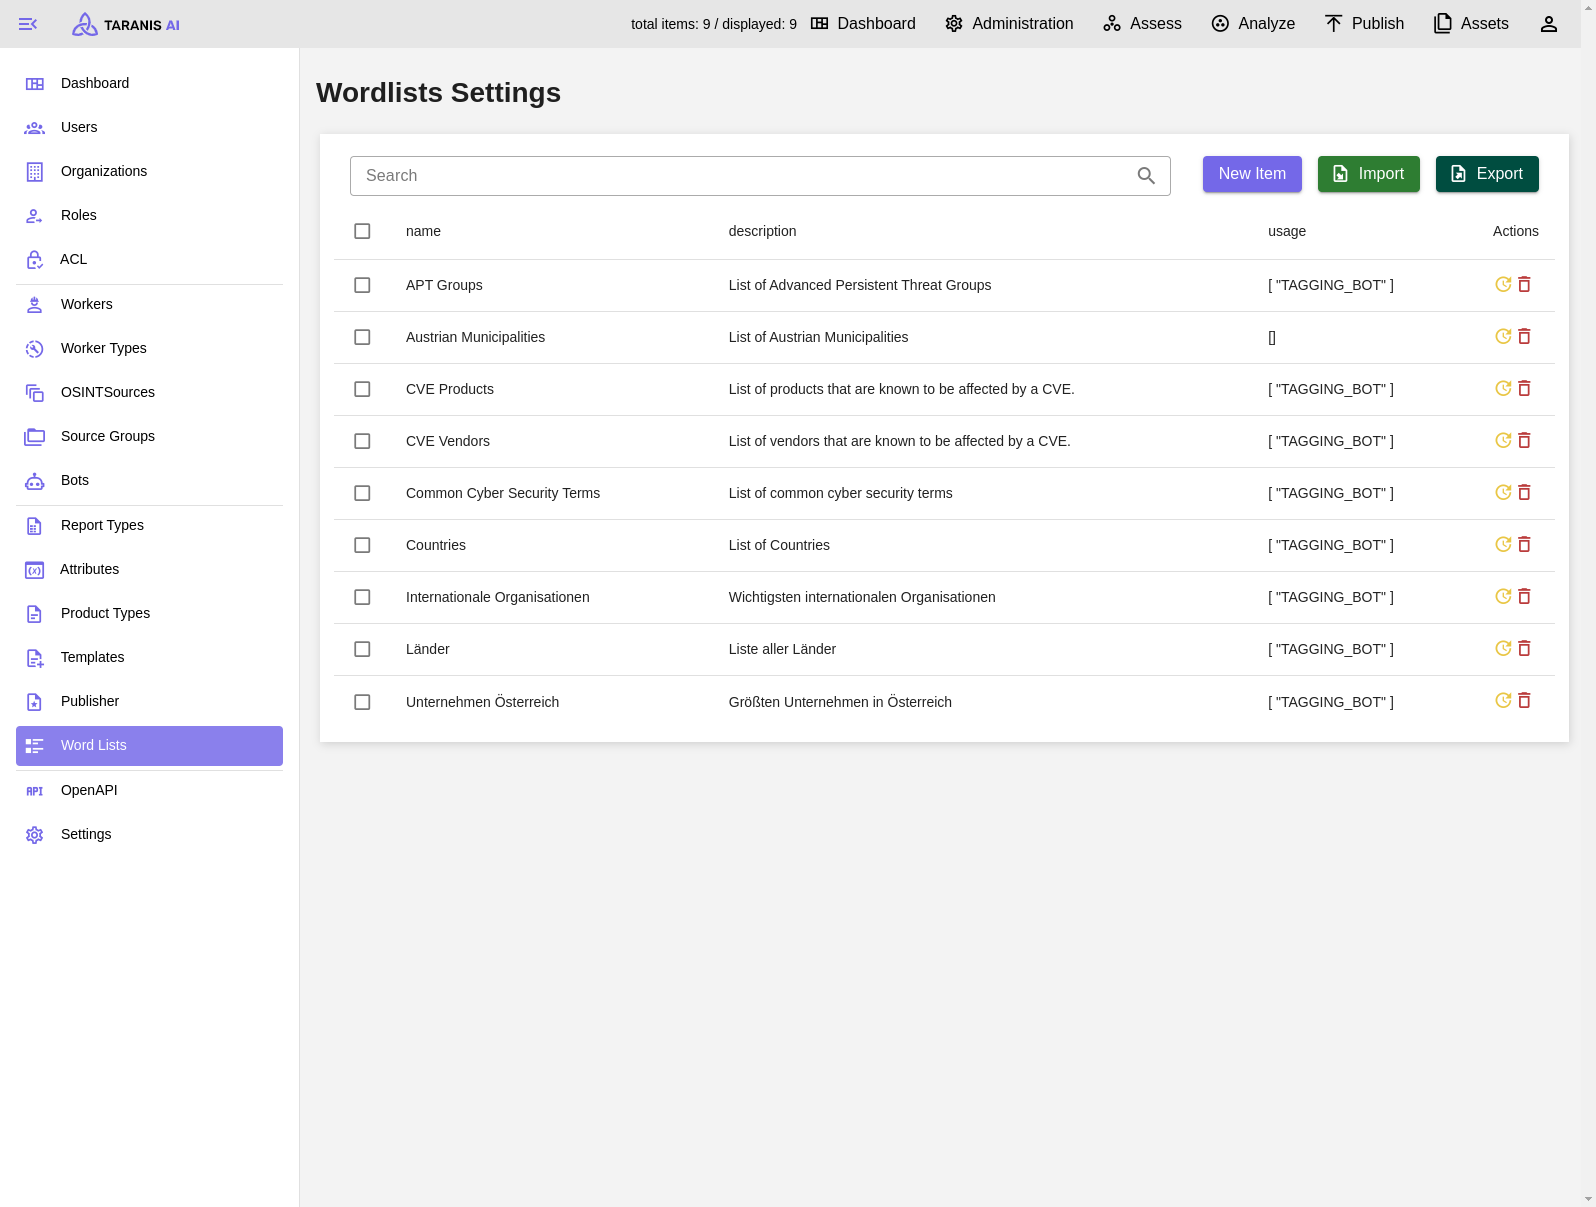
2. Add word lists
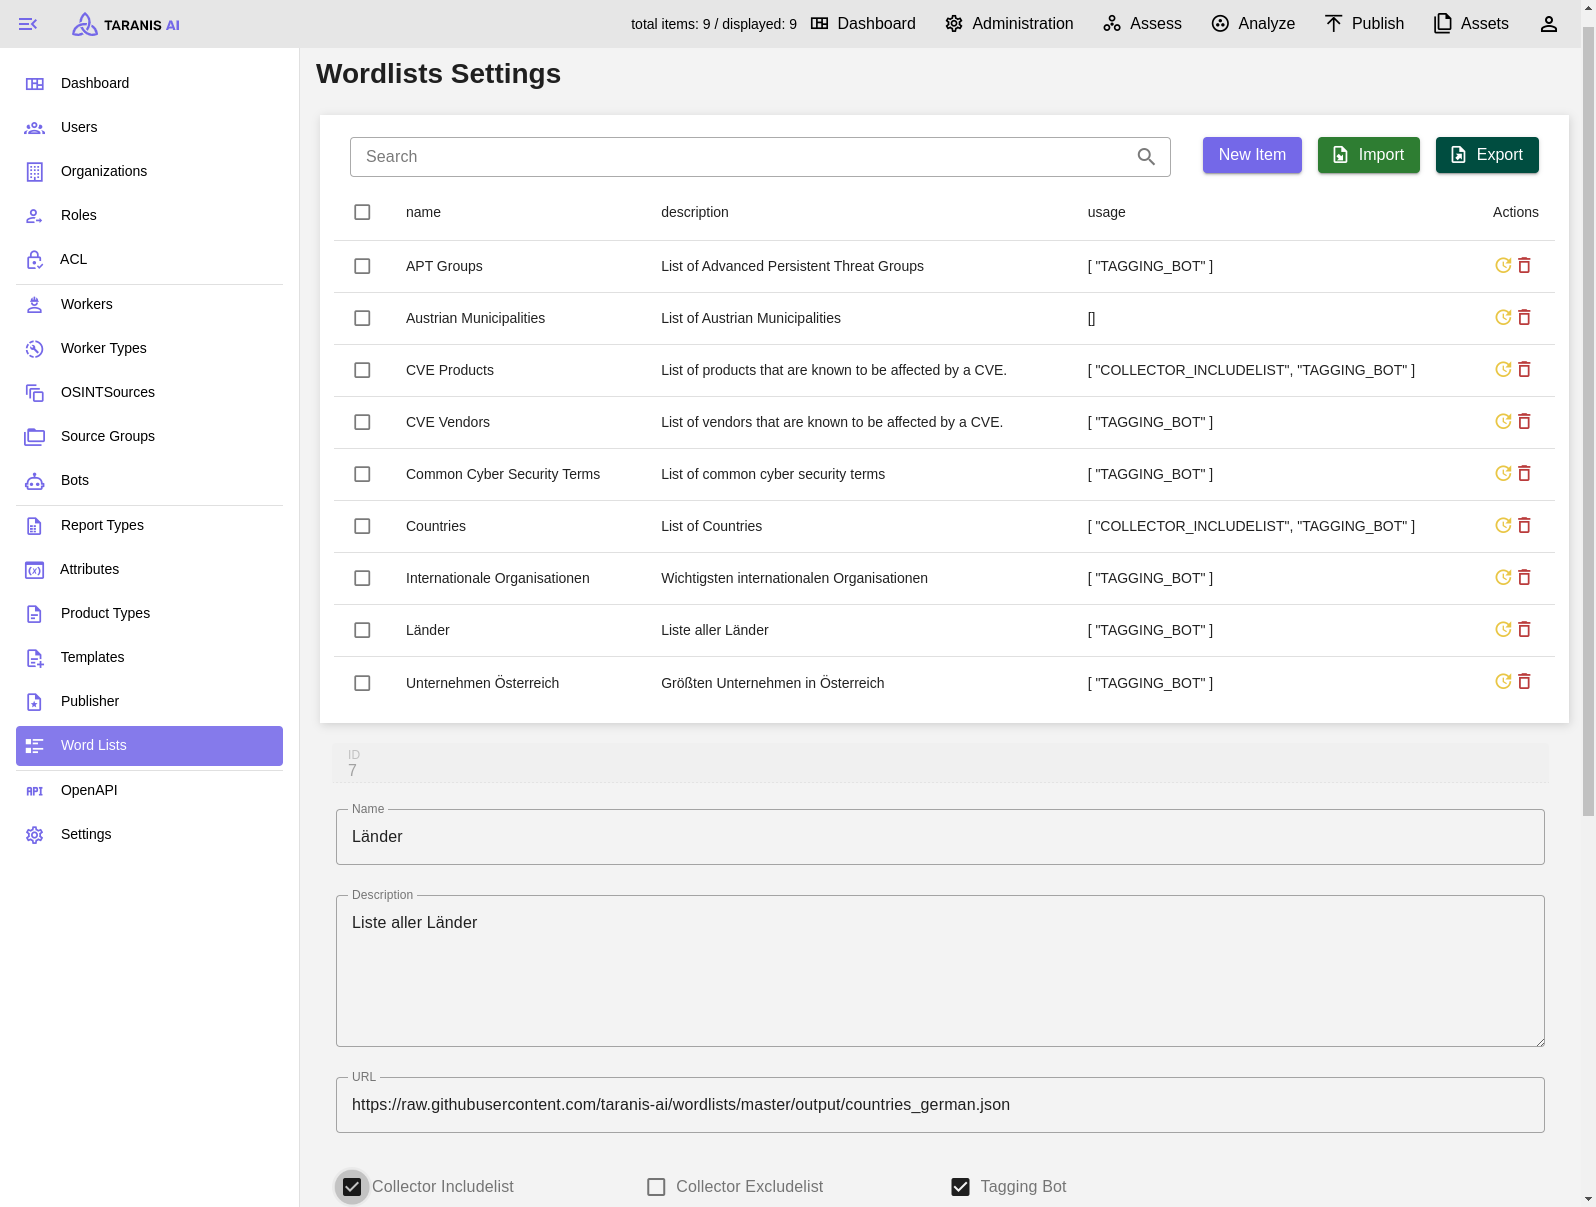
Import/Export: Word lists can be imported and exported as json
CRUD: Word lists can be created, updated and deleted.
3. Adapt word list’s functionality
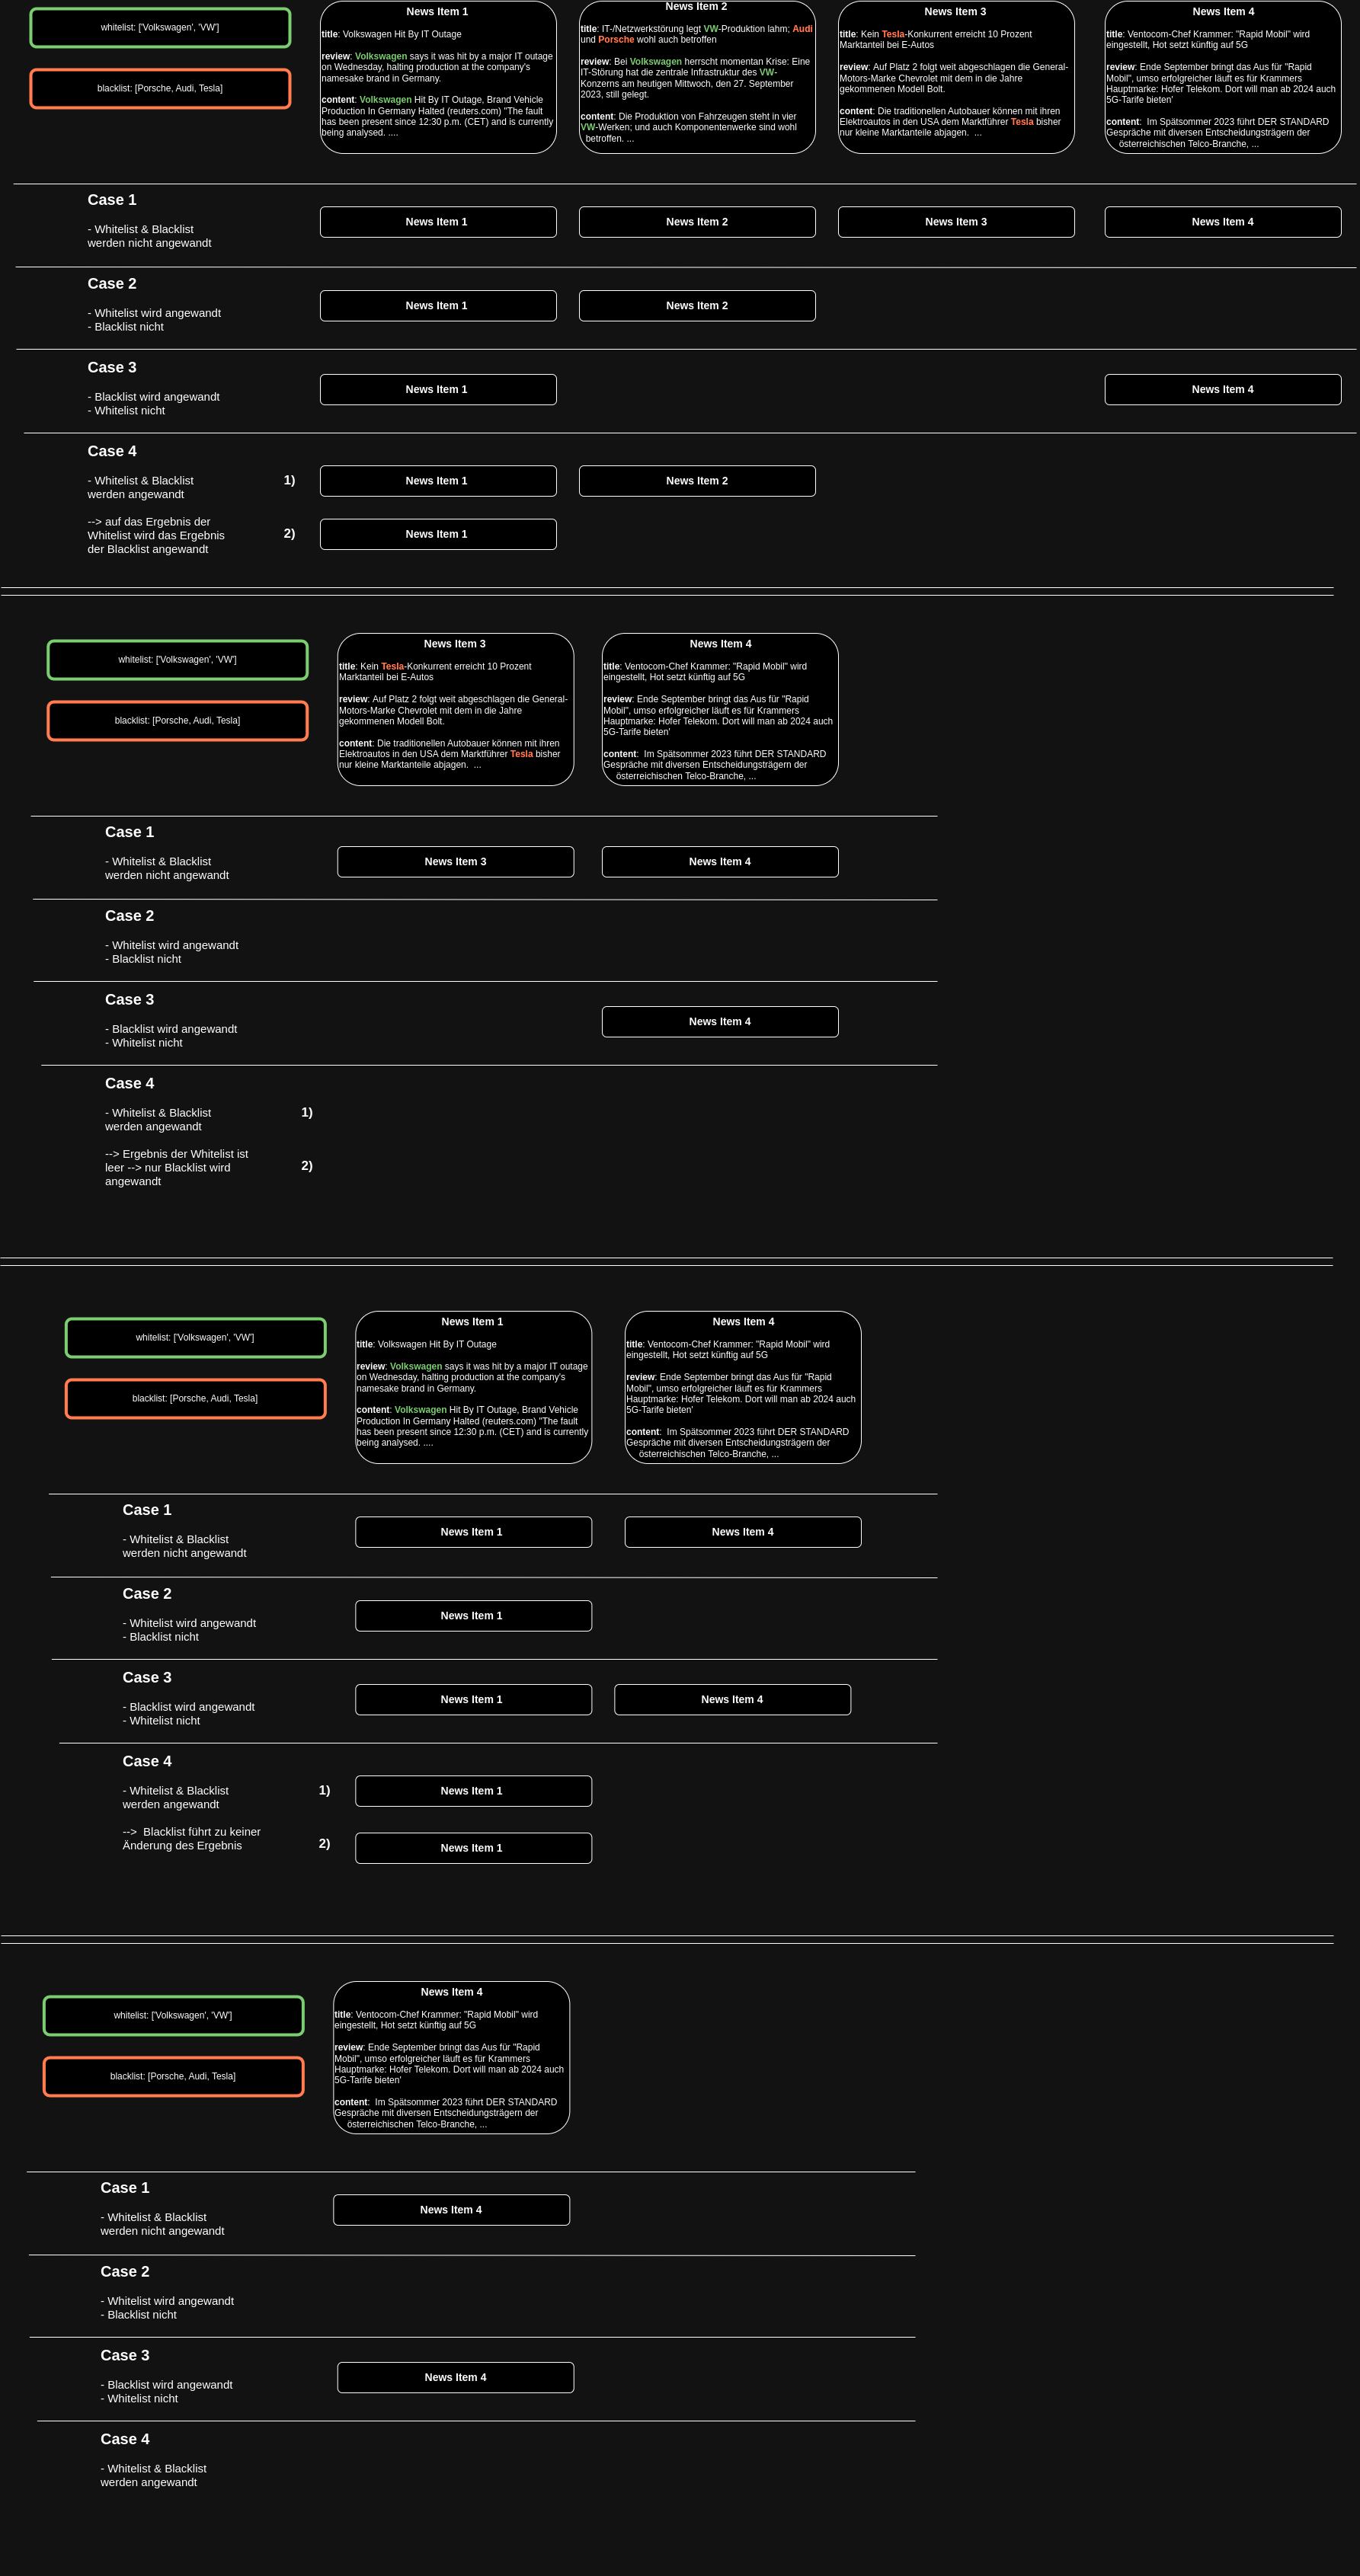
Word lists can have the following functionalities (displayed under “usage”):
Collector Includelist: Collected news items using words of this word list will be accepted
Collector Excludelist: Collected news items using words of this word list will not be accepted
Tagging Bot: Collected news items will be tagged with words from these word lists
Collector Includelist & Tagging Bot: A word list can be used for tagging and include listing
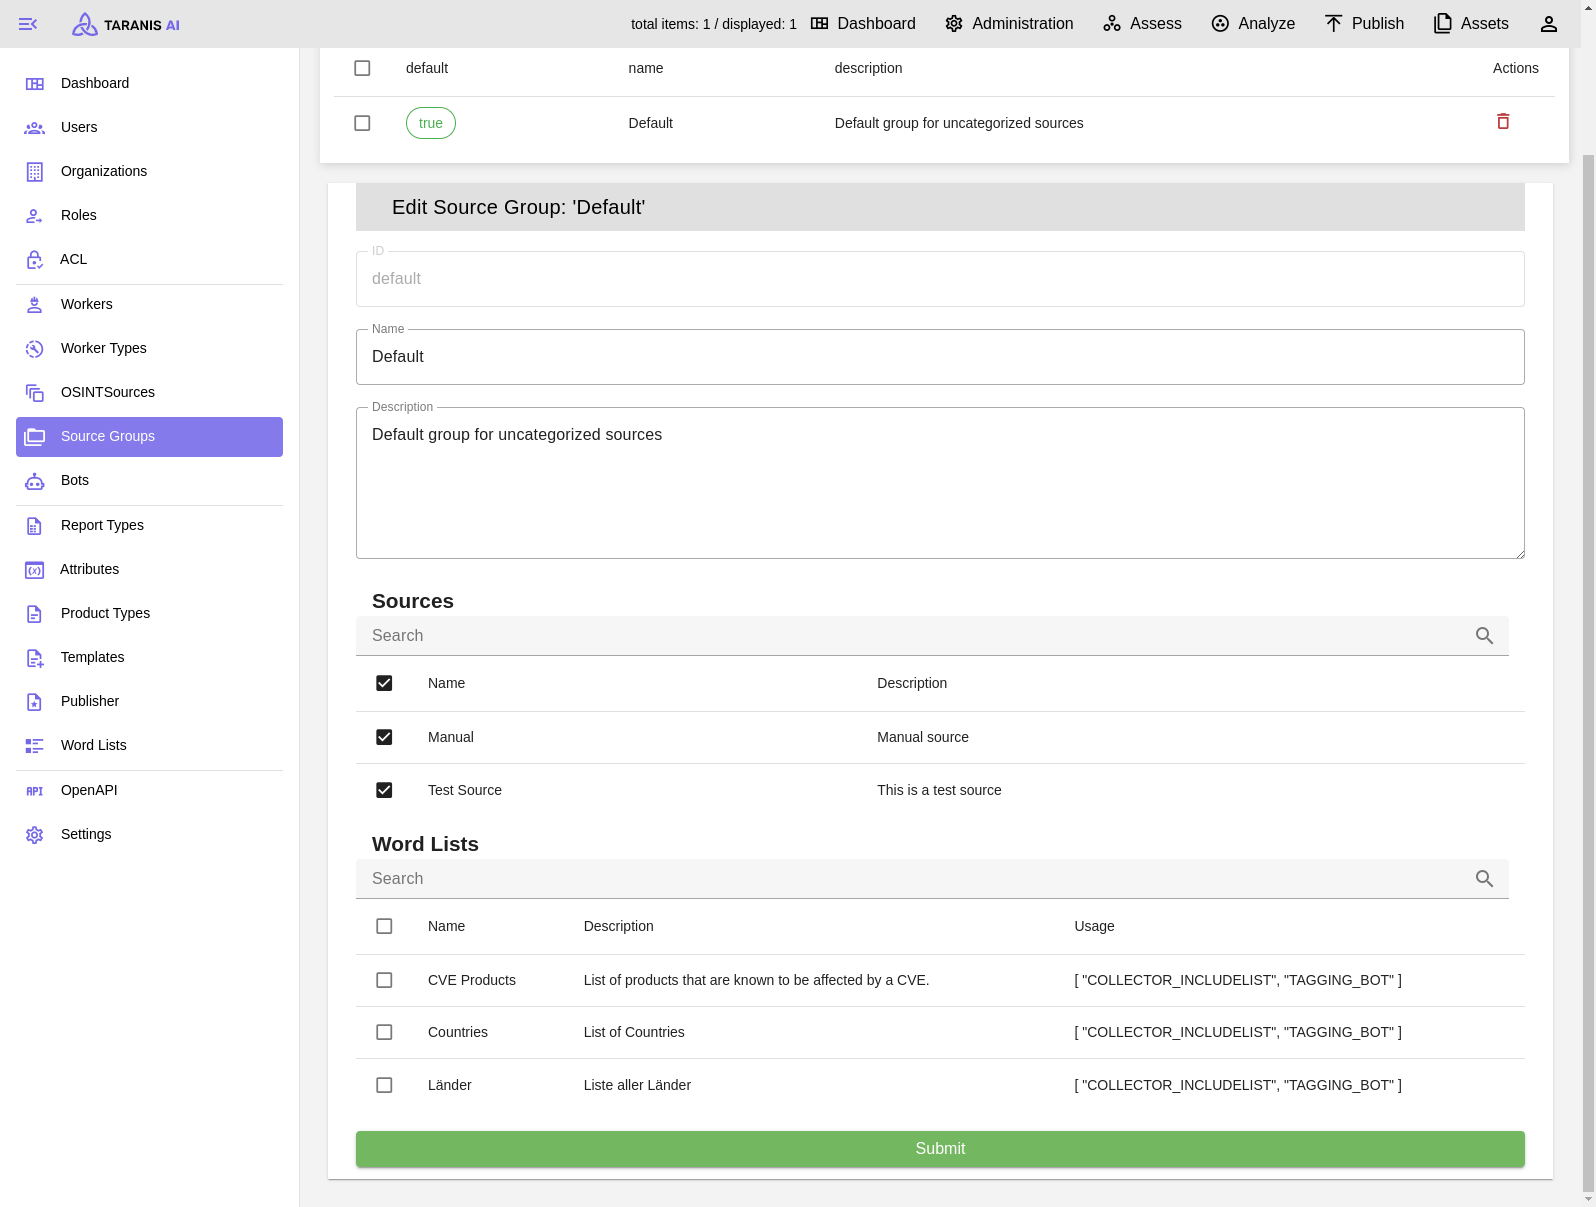
4. Enable include/exclude list filtering
To activate include or exclude lists, they need to be added to the default source group.
It has to be mentioned, that this include/exclude filtering happens during the news item collection. Therefore, only filtered news items will be stored in the database and displayed in “Assess”.
5. Bot selection
After the collection, it is possible to adapt news items.
Common bots include:
Wordlist Bot: Tags News Items by wordlist.
IOC Bot: Finds indicators of compromise in News Items.
NLP Bot: Tags News Items via named entity recognition.
Story Clustering Bot: Groups related Stories.
Summary Bot: Summarizes Stories and can generate Story titles.
Sentiment Analysis Bot: Adds sentiment attributes to News Items.
Cybersecurity Classifier Bot: Classifies whether content is cybersecurity related.
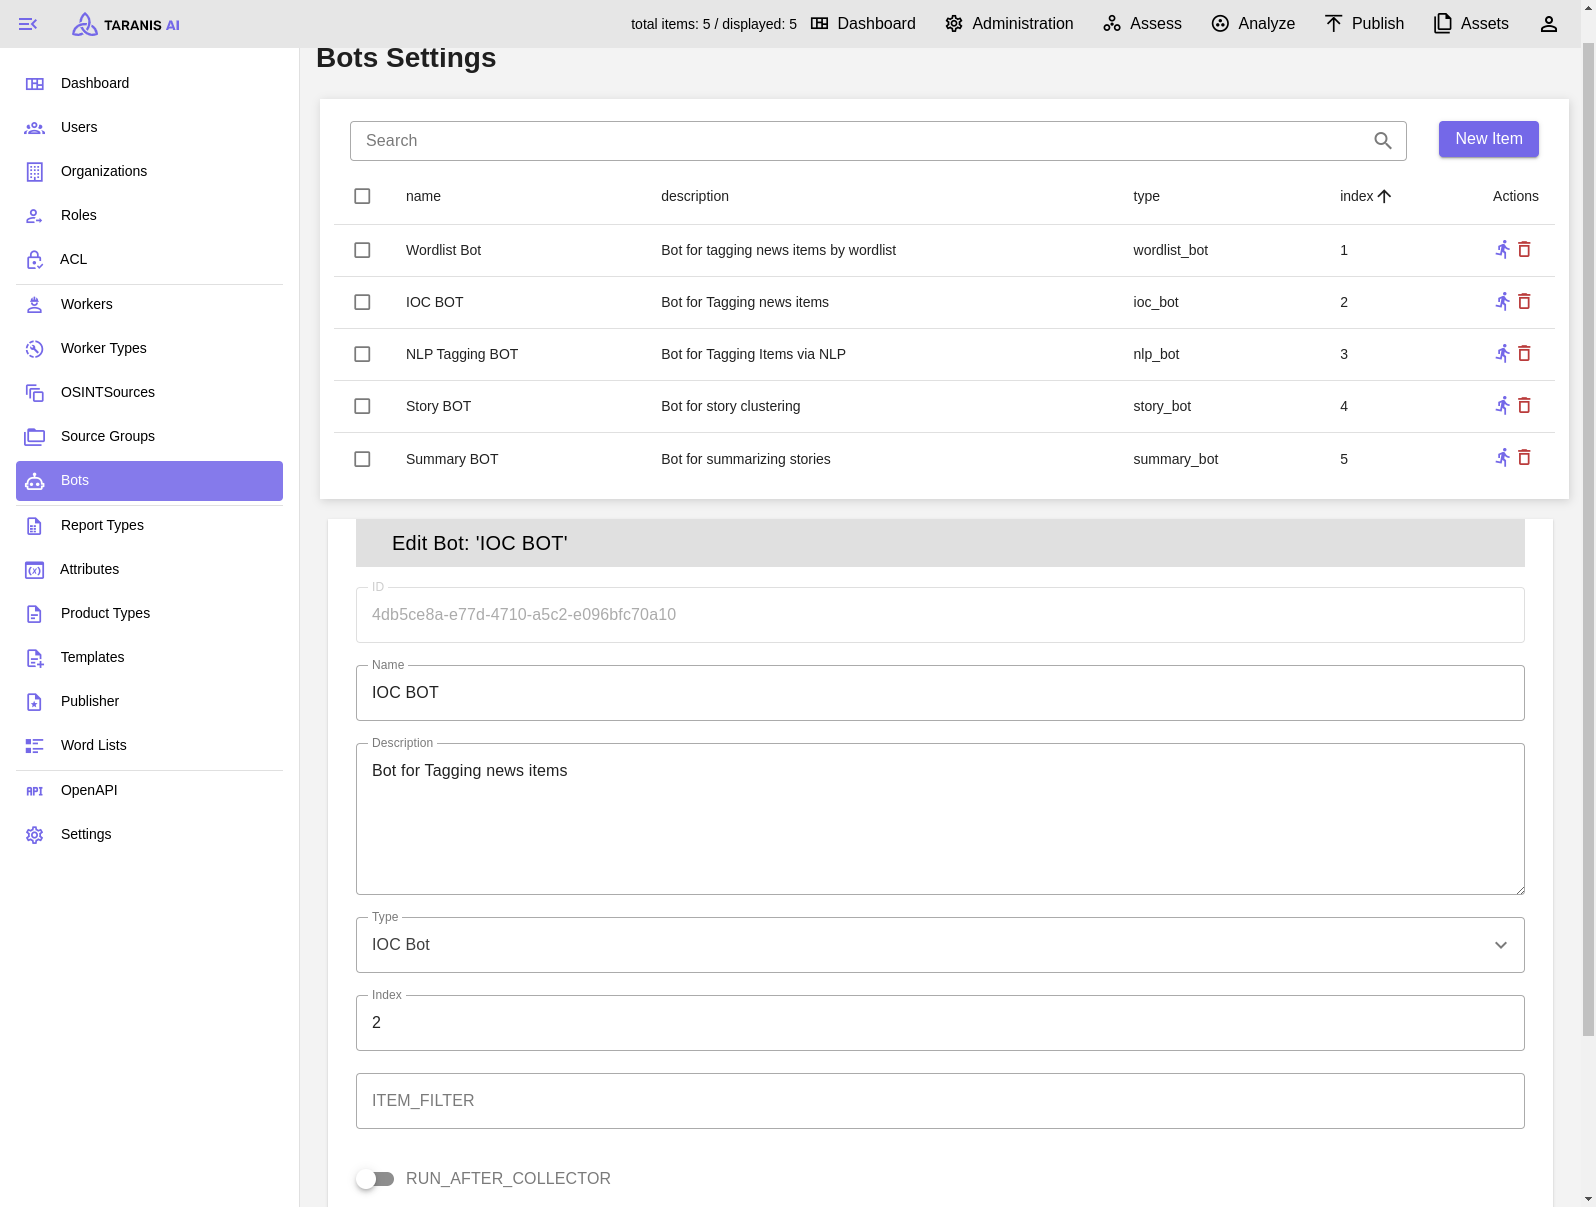
CRUD: Bots can be created, updated and deleted.
Index: Decides the order of bots
RUN_AFTER_COLLECTOR: Indicates if bot is active after collection
LLM-backed bots can use the optional LLM Bot Service. Full bot configuration is documented in Bots.
The optional IntelOwl Bot enriches indicators extracted by the IOC Bot. Configure IntelOwl and keep the IOC Bot before it in the run order; see IntelOwl enrichment.
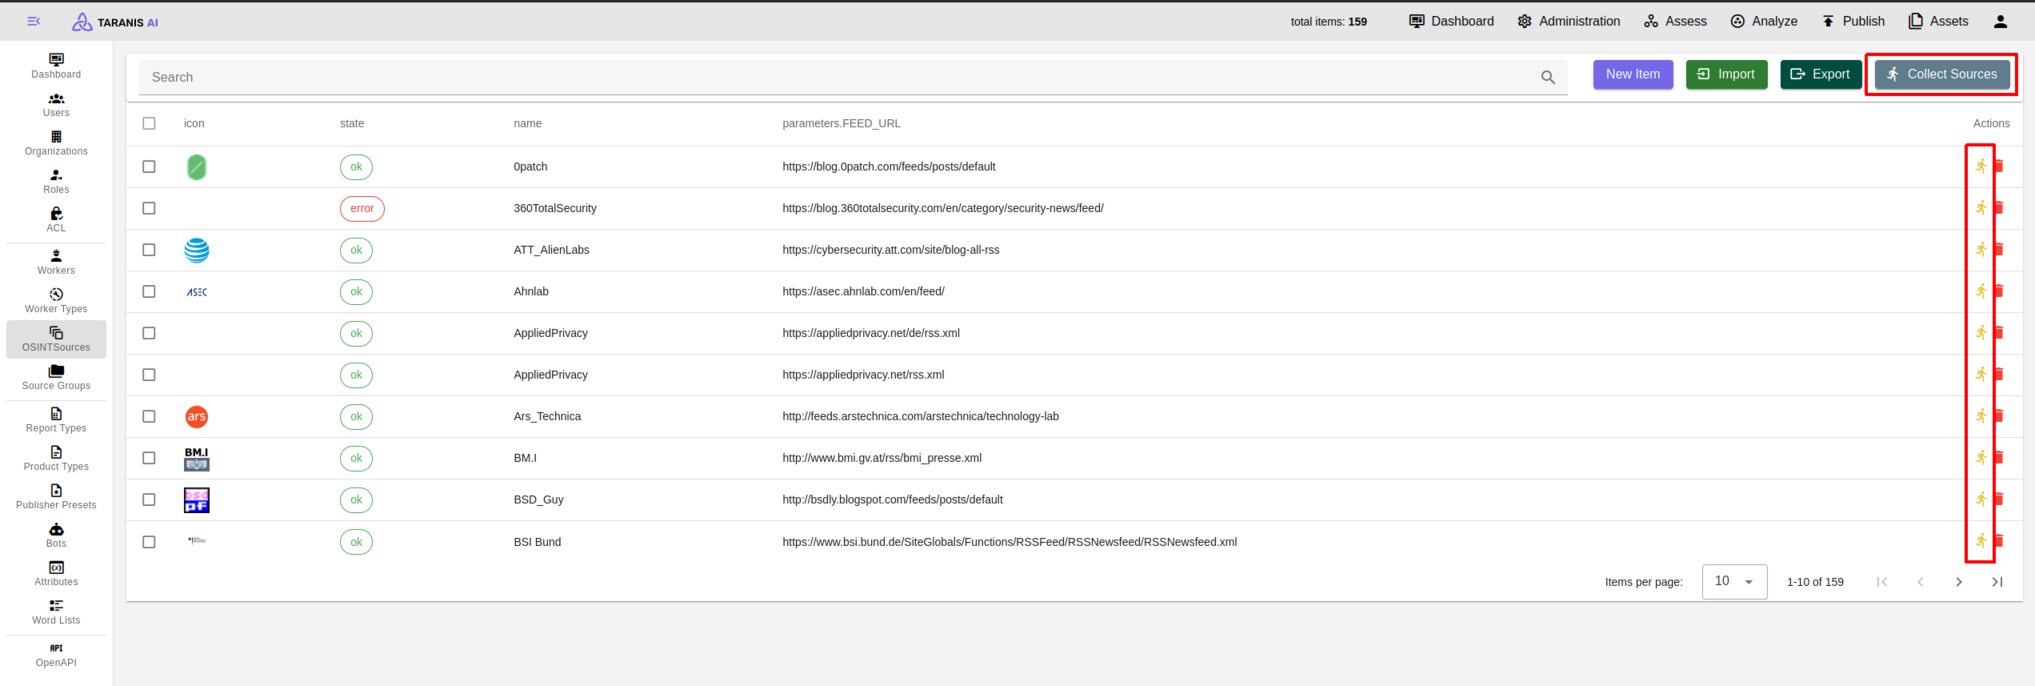
6. Collect Sources
After all settings are made, sources can be collected.
Either collect all sources by clicking on the “collect sources” button, or collect single sources.
9.3 - OSINT Sources
Configure, preview, import, export, and collect OSINT sources.
Functionalities
OSINT Sources define where collectors gather data from. Administrators can:
Create and edit sources.
Enable or disable scheduled collection.
Assign a source rank and icon.
Preview collector output before ingesting it into Assess.
Use Source Rank to prioritize or classify sources for analyst workflows. Upload an icon when source identity should be visible on Story and News Item cards.
Preview a source
Use Preview from the source editor or table actions to run the collector without storing the result in Assess. Preview results are shown as Story cards. If a preview fails, use Retrigger preview after adjusting the source configuration.
Preview is especially useful for RSS, Simple Web, and RT sources where XPath, headers, proxies, or content extraction settings may need tuning.
Enable and disable sources
The source state button controls whether the source is active for scheduled collection. Disabling a source unschedules its Redis/RQ cron job; enabling it schedules the source again when it has a refresh interval.
Import sources
Select Import and choose the source JSON file. Imports support current exports and legacy source JSON formats.
Export sources
Select Export to download a JSON file. If sources are selected, only those sources are exported; otherwise all visible sources are exported.
Collect from sources
Use Collect to collect one source, or Collect All to collect all enabled sources. Collection is worker-backed; if the job is queued but does not run, verify worker health in Background Jobs.
9.4 - Report Types
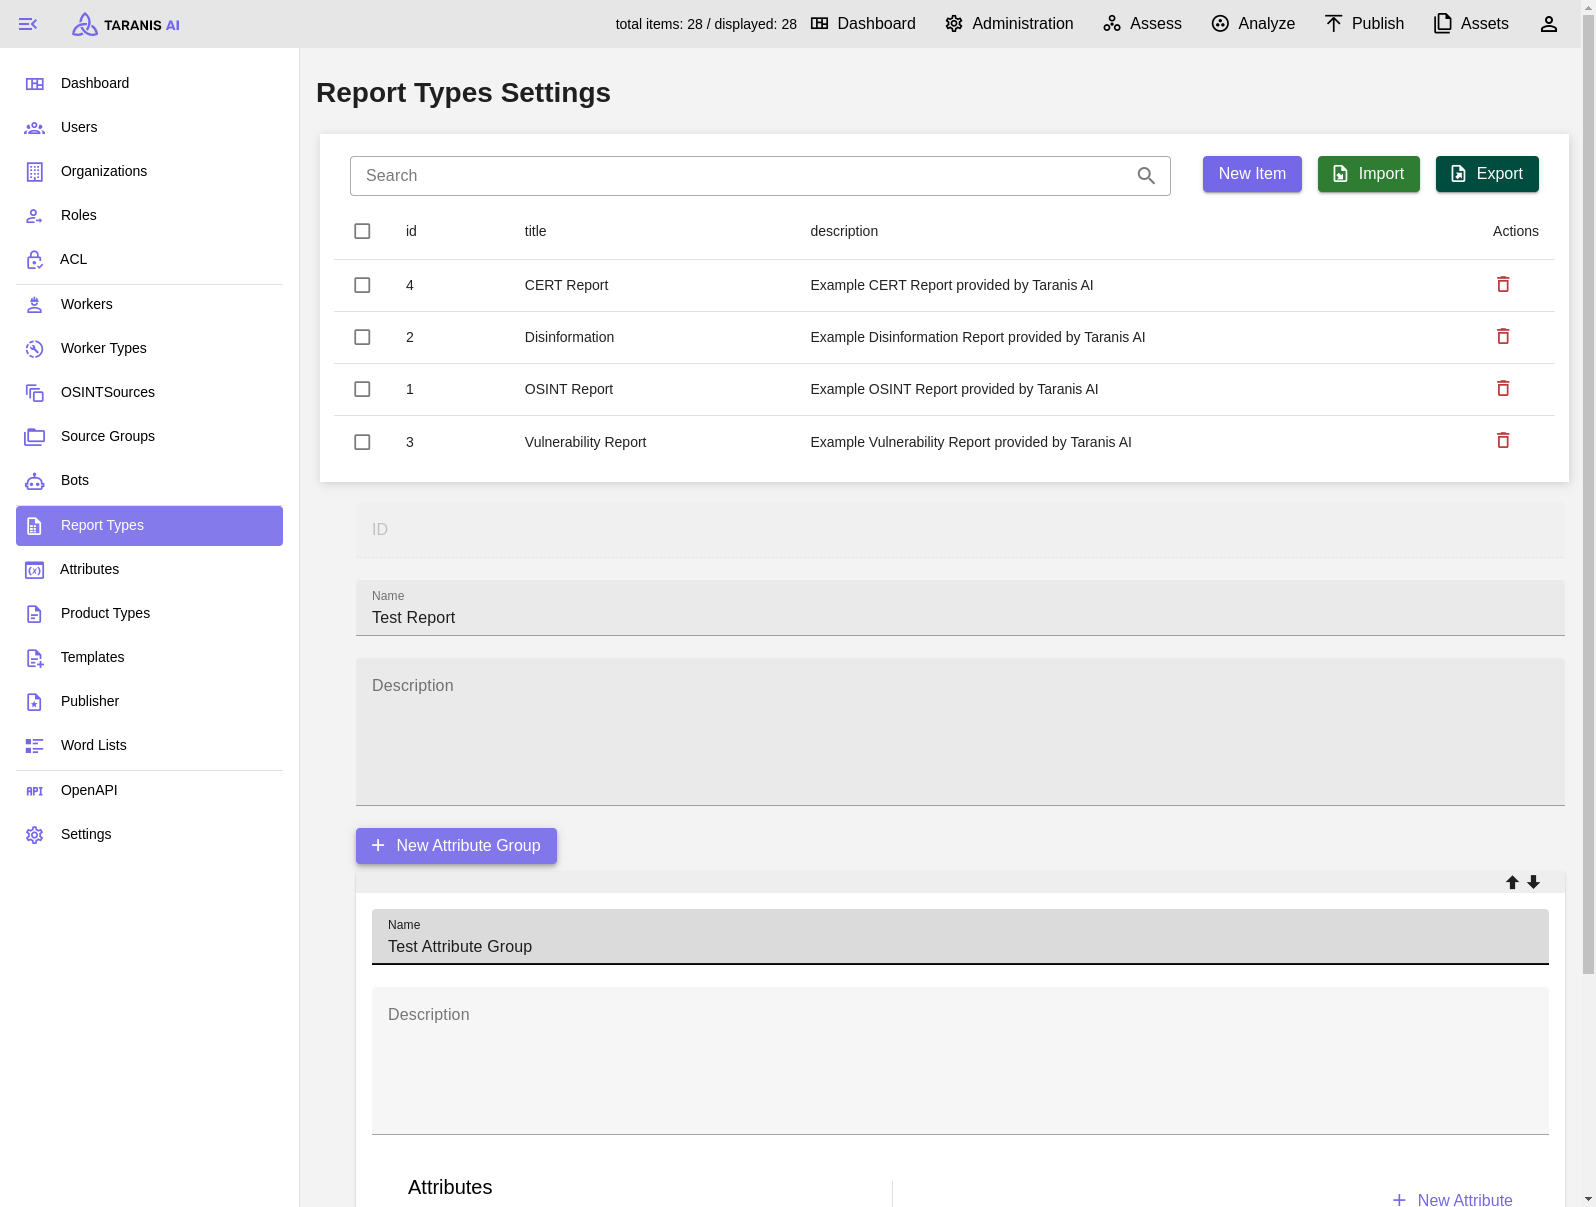
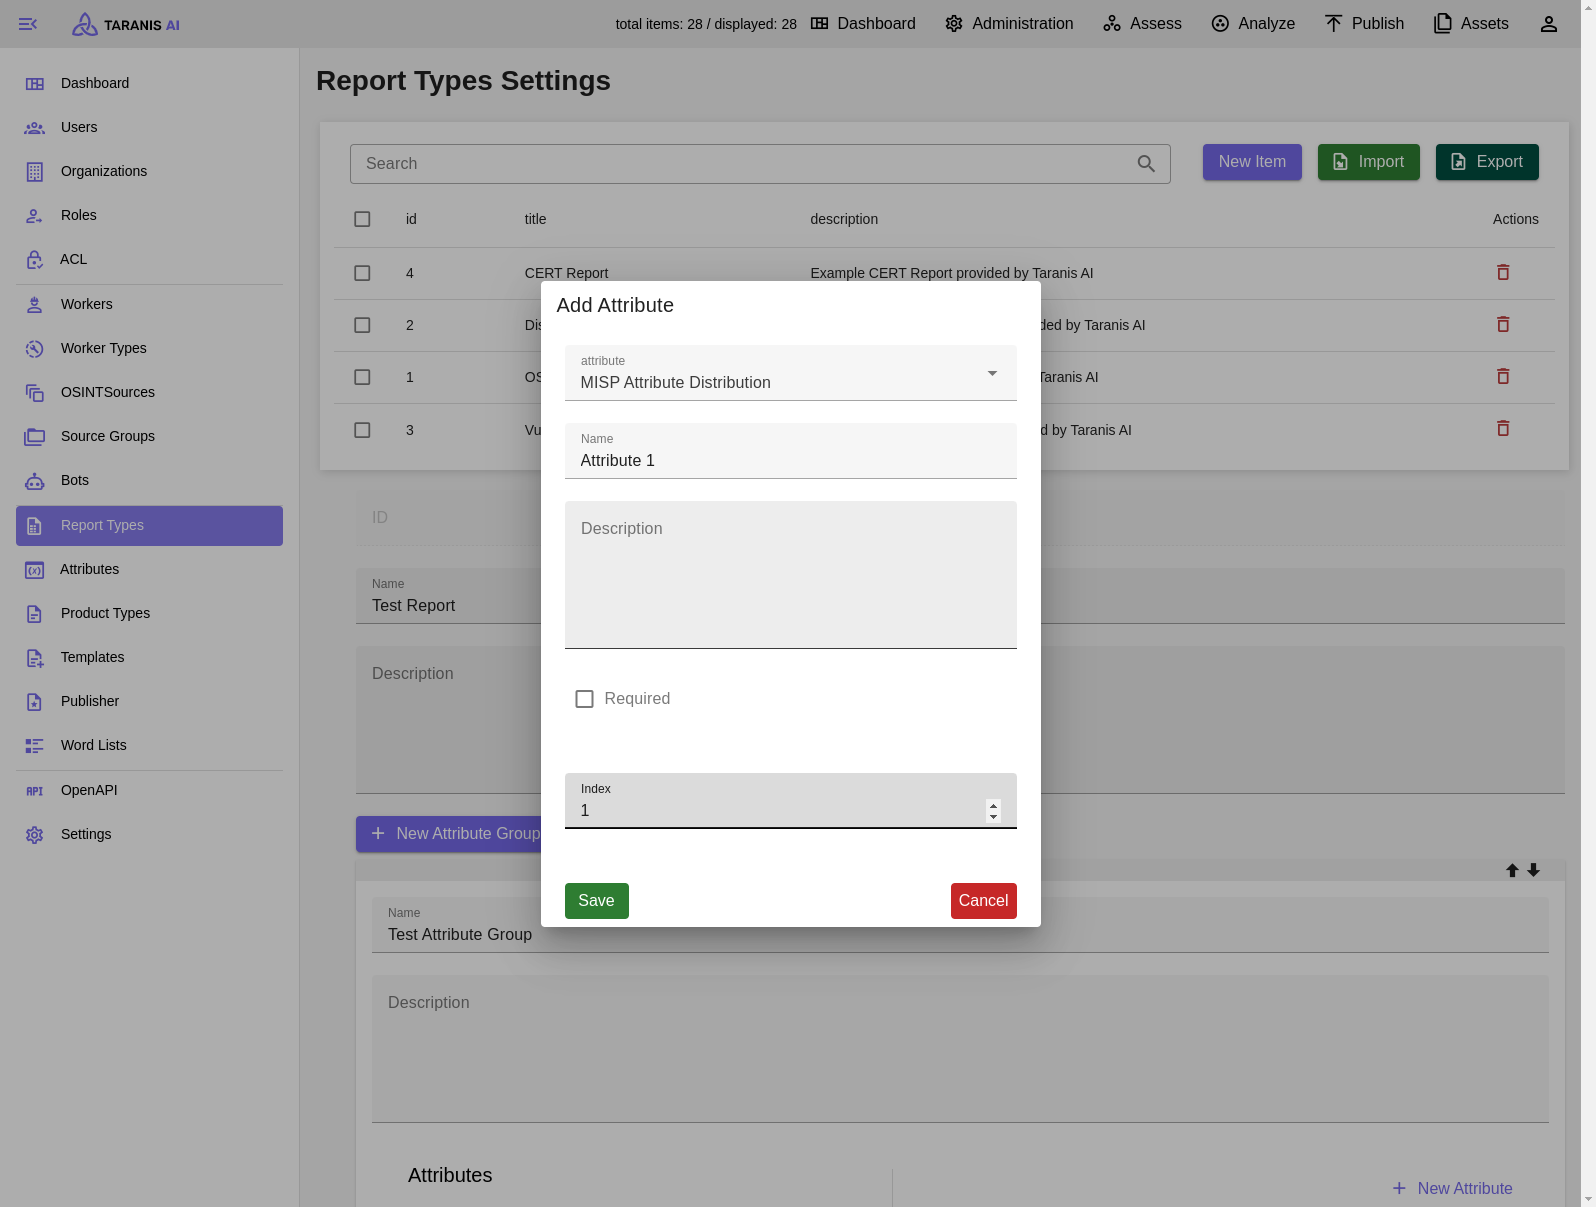
Admin users can manage report types (in the Administration tab). Each report type can have different attribute groups. To those groups various attributes (Text Area, Date, TLP, CPE, etc.) can be added. Attributes can be managed in Administration/Attributes.
When creating new Reports, one of the created report types have to be selected (see Analyze).
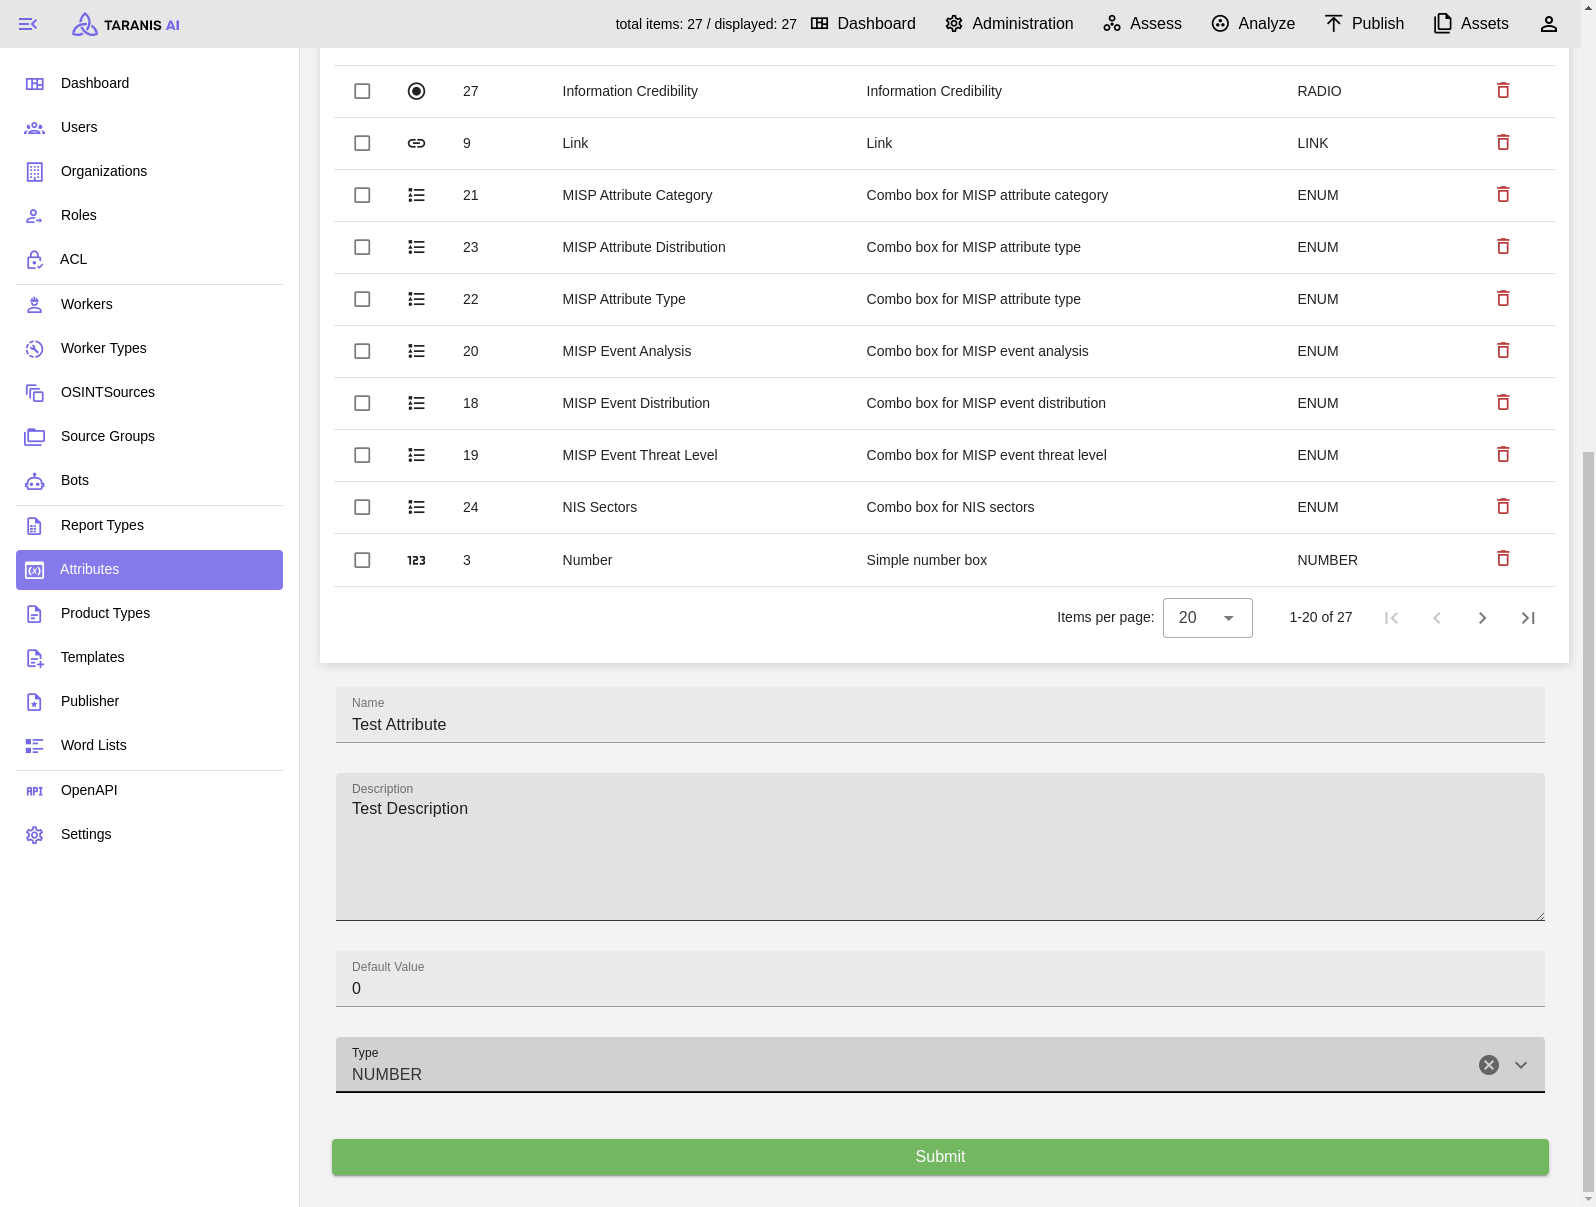
Attributes
Desired attributes need to be created first. Then they can be managed by the admin user. Besides name, description and default value also type, validator and validator parameter can be set.
Report Types - CRUD
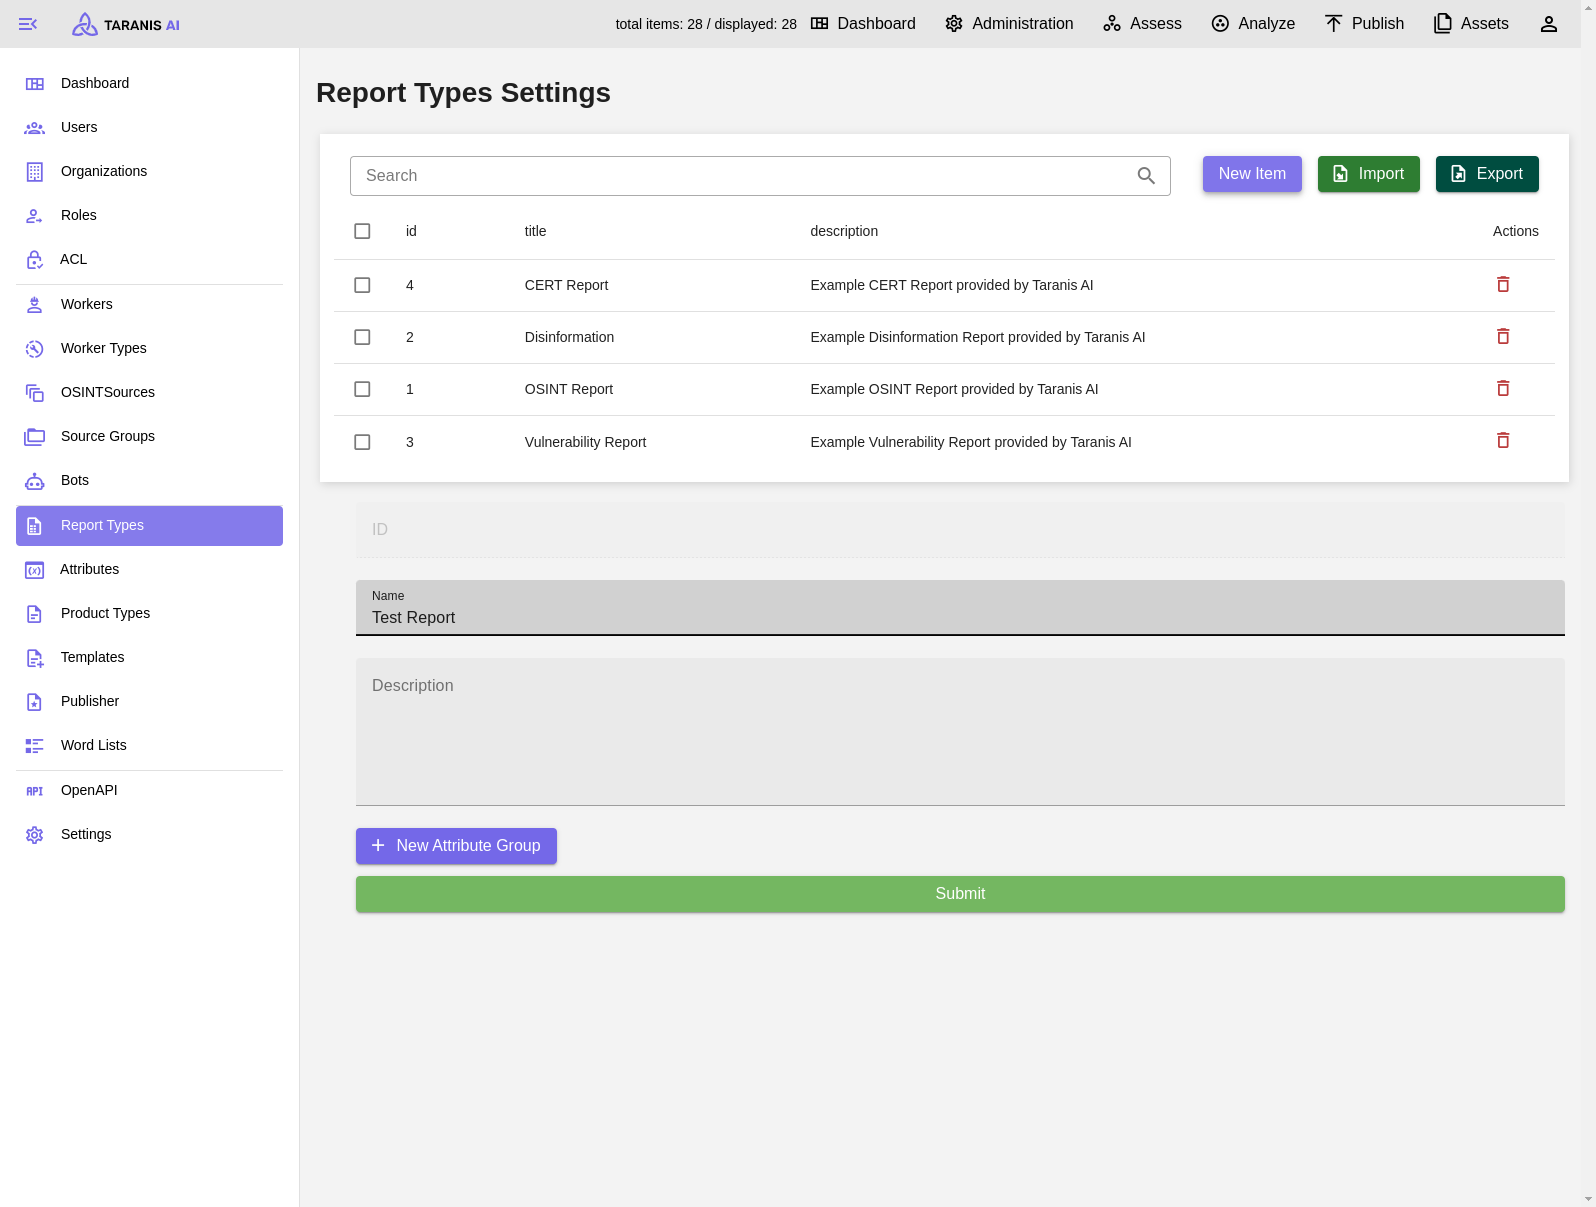
Create: Report types can be created (“New item”). After adding a new attribute group, different attributes can be added to this group.
Read & Update: Report types (including their attribute groups) can be updated by clicking on them in the list. Their update will not affect Reports, which already use the Report Type
Delete: One or multiple reports can be deleted at once.
Screenshots
Add new Attribute
Report Types - Create new Report Type
Report Types - Add new Attribute Group
Report Types - Select new Attribute from list
9.5 - Bots
Bots enrich collected Stories and News Items in the background.
Bots run as worker jobs. They can be triggered manually, scheduled with REFRESH_INTERVAL, or run after collection when RUN_AFTER_COLLECTOR is enabled.
Available bots
Bot
Purpose
Analyst Bot
Adds configured attributes based on regular expression matches.
Grouping Bot
Groups News Items by regular expression matches.
Tagging Bot
Adds tags based on regular expression matches.
Wordlist Bot
Tags News Items with configured word lists.
IOC Bot
Detects indicators of compromise in News Items.
NLP Bot
Sends text to an NLP endpoint for named entity tags.
Story Clustering Bot
Sends Stories to a clustering endpoint and groups related items.
Summary Bot
Generates Story summaries and, optionally, Story titles.
Sentiment Analysis Bot
Adds sentiment attributes to News Items.
Cybersecurity Classifier Bot
Classifies whether Story content is cybersecurity related.
Execution order when multiple bots run after collection.
RUN_AFTER_COLLECTOR
Runs the bot after collector jobs.
RUN_AFTER_BOTS
Optional configured bot instances that must finish before this bot runs.
REFRESH_INTERVAL
Cron-like schedule, for example 0 */8 * * *.
REQUESTS_TIMEOUT
HTTP timeout for calls to external bot services.
BOT_API_KEY
API key sent to external bot services when needed.
Scheduled bots are handled by Redis/RQ. See Background Jobs for worker and scheduler health checks.
Use the bot run-order editor instead of entering RUN_AFTER_BOTS manually. Bot dependencies refer to configured bot instances, not bot types. The IntelOwl Bot depends on the IOC Bot so it can enrich extracted indicators.
LLM-backed bots
The optional LLM Bot Service can serve several bot endpoints.
Bot
Worker default
Per-bot override
Typical llm-bot endpoint
Summary Bot
SUMMARY_API_ENDPOINT
SUMMARY_ENDPOINT
http://llm-bot:8000/summarize
Summary Bot title generation
none
TITLE_ENDPOINT
http://llm-bot:8000/title
NLP Bot
NLP_API_ENDPOINT
BOT_ENDPOINT
http://llm-bot:8000/ner
Story Clustering Bot
STORY_API_ENDPOINT
BOT_ENDPOINT
http://llm-bot:8000/cluster
Sentiment Analysis Bot
SENTIMENT_ANALYSIS_API_ENDPOINT
BOT_ENDPOINT
http://llm-bot:8000/sentiment
Per-bot endpoint fields take precedence over worker environment defaults. After upgrading from older standalone bot services, update LLM-backed bot parameters that still point to summary_bot, nlp_bot, story_bot, or sentiment_analysis_bot. If you keep the Cybersecurity Classifier Bot, make sure its configured classifier endpoint is still deployed.
The Summary Bot only updates Story titles when TITLE_ENDPOINT is configured and the Story contains more than one News Item.
Sentiment output
The Sentiment Analysis Bot writes these News Item attributes:
sentiment_score
sentiment_category
The Story Edit advanced view displays the sentiment status when these attributes are present.
IntelOwl enrichment
The IntelOwl enrichment guide covers required analyzers, bot configuration, and viewing CTI results.
9.6 - Collectors
Collectors are used to gather data from various sources.
The administration view now allows users to use the Preview feature to see the result of the configuration without the items being processed further for the Assess view.
This feature is available for RSS, Simple Web, RT, and Mastodon collectors.
RSS Collector
RSS Collector enables Taranis AI to collect data from a user-defined RSS feed (See RSS feeds details).
Required fields:
FEED_URL
Optional fields:
USER_AGENT
PROXY_SERVER
USE_GLOBAL_PROXY (ignore anything set in the PROXY_SERVER field, use what is currently set as a default in Settings; learn more in section Settings)
ADDITIONAL_HEADERS [accepts a valid json] (can be used to add additional headers, not all headers work as expected)
CONTENT_LOCATION (selects which field from the RSS entry should be used as the item content, for example description or content:encoded; when the collector uses content from the RSS entry, it first checks the field named here; if that field is empty or missing, it falls back through content, content:encoded, summary, and description)
USE_FEED_CONTENT (controls whether the collector uses content from the RSS entry itself or fetches the linked article page; if this is enabled, the collector uses RSS entry content; if it is disabled, the collector fetches the linked article page; if it is not set, a non-empty CONTENT_LOCATION effectively enables using RSS entry content)
XPATH (optional XPath expression used to limit the extracted content to a specific element; if USE_FEED_CONTENT is enabled, XPath is applied to the HTML content taken from the RSS entry; if the XPath does not match, the collector keeps the original RSS entry content; if USE_FEED_CONTENT is disabled, XPath is applied to the fetched article page; if the XPath does not match there, the collector does not fall back to another extraction method and the content may be empty)
The simplest way to use this collector is to use the WEB_URL field only.
By using only the WEB_URL field, Taranis-AI autonomously determines the content to be collected. Even though it is mostly reliable,
sometimes it is not perfect.
Advanced configuration
When content cannot be reliably collected using the Basic configuration, adding the attribute XPATH
(See tutorial how to find it), can be useful.
It is crucial to specify the XPath of the precise element containing the desired data.
RSS alternative for Mastodon feeds
The native Mastodon Collector is the preferred option because it supports authenticated timelines, account lookup, pagination, and collection cursors. The RSS Collector remains available as a simpler alternative for public hashtag or account feeds exposed by an instance.
To collect a Mastodon RSS feed, follow these steps:
Finding the Mastodon RSS Feed URL:
Hashtag Feed: Add .rss to the hashtag URL. For example, to collect posts tagged with #cybersecurity:
https://mastodon.social/tags/cybersecurity.rss
User Feed: Similarly, add .rss to the user’s profile URL. Example:
https://mastodon.social/@username.rss
Creating a New RSS Source with Required Parameters:
When creating the new RSS source, configure it with the following parameters. Here’s an example of how to fill out the fields:
FEED_URL: Enter the RSS feed URL for the Mastodon hashtag or user (e.g., https://mastodon.social/tags/cybersecurity.rss).
CONTENT_LOCATION Set this to "summary" to specify the main content location within each RSS entry.
REFRESH_INTERVAL Set the refresh interval in crontab-like style, see Bots - refresh_interval.
DIGEST_SPLITTING is set to "false" since we’re not splitting entries into multiple items.
The important setting is “PROXY_SERVER” in the OSINT Source you want to crawl.
RT Collector
RT Collector enables Taranis AI to collect data from a user-defined Request Tracker instance.
RT Collector collects tickets, translates all ticket attachments into individual News Items. A ticket is represented via a Story. It also collects ticket Custom Fields and saves it as key-value pairs represented with Story attributes, visible whilst Story editing. On each collector execution an update to existing Stories occurs, so editing the Story values in Taranis AI is not recommended and handling it more like read-only items is better.
Required fields:
BASE_URL: Base URL of the RT instance (e.g. http://localhost).
RT_TOKEN: User token for the RT instance.
Optional fields:
SEARCH_QUERY: query to use for filtering tickets (e.g. owner=‘user1’). It is possible to check this manually by: http://<rt_address>/REST/2.0/tickets?query=owner=‘user1’
FIELDS_TO_INCLUDE: case-sensitive, comma-separated values; example: Email, IP; if not set, all ticket custom fields are ingested
ADDITIONAL_HEADERS
TLP_LEVEL
USER_AGENT
PROXY_SERVER
USE_GLOBAL_PROXY
MISP Collector
Until the definitions of our MISP Objects are not officially part of the MISP platform, feel free to import them manually (see MISP Objects). This allows to edit the information of News Items and Story data directly in the MISP instance without Taranis AI.
MISP Collector enables Taranis AI to collect MISP events.
Required fields:
URL: Base URL to the MISP instance (e.g. https://localhost)
SSL_CHECK: if enabled, the SSL certificate will be validated
SHARING_GROUP_ID: set to the ID of a sharing group, if only one sharing group should be collected (see Create and manage Sharing Groups).
REQUEST_TIMEOUT
USER_AGENT
PROXY_SERVER
USE_GLOBAL_PROXY
ADDITIONAL_HEADERS
REFRESH_INTERVAL
How MISP Collector works
Essentially it works exactly like other collectors with one exception: conflicts. Given the nature of the collaborative environment of MISP events (they can be changed in the MISP platform by the owning organisation and secondary organisations can submit change requests using the MISP proposals). Due to that, there will likely occur conflicts when attempting to update existing Stories that were, in the meantime, internally modified.
Generally, conflicts occur the moment, a Story is modified internally, and has not been pushed to MISP immediately. Therefore, it is recommended to always try to keep Stories in sync with the MISP events. To update them in MISP with the Story (see Connectors).
Digest Splitting
Digest Splitting is a feature that allows the user to split all available URLs in the located element into individual News Items.
The Digest Splitting Limit is the maximum number of URLs that will be split into individual News Items. If the limit is reached, the remaining URLs are dropped.
The Digest Splitting Limit is set to 30 News Items by default but can be adjusted by the administrator. Useful in case of timeouts during collection of too many News Items.
Browser Mode
Collectors will fail if the web page content is only available with JavaScript. In that case it is possible to turn on the Browser Mode. All requests will have JavaScript enabled, therefore, it is slower and can use more resources.
9.6.1 - Mastodon Collector
Collect Mastodon hashtag, home, and account timelines through the Mastodon API.
The Mastodon Collector imports posts from a Mastodon instance through scheduled API polling. It supports hashtag timelines, the access-token owner’s home timeline, and public posts from a specific account.
Use the native collector when you need authenticated access, reliable pagination, or collection progress across runs. For simple public feeds, the RSS alternative may be sufficient.
Timeline modes
Timeline
Collected posts
Target field
Access token
Recommended scopes
hashtag
Posts visible in the configured instance’s hashtag timeline
HASHTAG
Optional only when the instance permits anonymous hashtag access
read:statuses when a token is required
home
The token owner’s home timeline
None
Required
profile and read:statuses
account
Posts from a public account known to the configured instance
ACCOUNT
Required
read:accounts and read:statuses
Mastodon instances decide whether anonymous hashtag access is allowed. A hashtag can therefore work without a token on one instance and require authentication on another. The instance’s federation state, moderation policy, and knowledge of remote accounts also determine which posts are available; an instance is not a complete index of the Fediverse.
Five-field cron schedule. If empty, the global collector interval applies. See collector scheduling.
The global Collector Entry Limit in Administration → Settings limits the number of posts processed during each run.
Example: #curl on chaos.social
Parameter
Value
INSTANCE_URL
https://chaos.social
TIMELINE
hashtag
HASHTAG
curl
ACCESS_TOKEN
A token created on chaos.social with read:statuses
If the token field is empty and the instance restricts anonymous hashtag access, collection fails with the actionable access-token-required message described under Troubleshooting.
Create a Mastodon access token
Mastodon’s web interface places access-token management under Development, not under the normal account or privacy settings. The token must be created on the instance configured in INSTANCE_URL; a token from another instance will not work.
Sign in to the Mastodon instance used by the source.
Open Preferences → Development. The direct URL is normally https://INSTANCE/settings/applications. For example, use chaos.social Development for https://chaos.social.
Select New application.
Enter an application name such as Taranis AI.
Leave Application website empty unless your organization wants to identify the deployment.
Leave the default redirect URI urn:ietf:wg:oauth:2.0:oob. Taranis does not use an interactive OAuth redirect.
Select only the scopes needed for the configured timeline:
Hashtag: read:statuses.
Home: profile and read:statuses.
Account: read:accounts and read:statuses.
Submit the application.
Open the created application and copy Your access token. Do not copy the client secret instead.
Paste the token into the Taranis source’s ACCESS_TOKEN field and save the source.
Some Mastodon versions preselect profile on the new-application form. Clear it for hashtag or account collection when it is not listed above. For one application used by all three modes, select profile, read:accounts, and read:statuses. Do not select write, follow, push, or any admin scope. On Mastodon versions older than 4.3, use read:accounts instead of profile for home-timeline collection.
Mastodon’s developer documentation describes user tokens, granular scopes, and the full OAuth authorization flow. The Development page is the shortest setup path for a Taranis administrator who controls the Mastodon account.
Token security
Treat the access token like a password. Do not paste it into tickets, chat, screenshots, shell history, or logs.
Prefer a dedicated organizational Mastodon account rather than a personal account for production collection.
Grant only the scopes listed for the selected timeline. The collector never needs write or administrator access.
Taranis masks the stored secret after saving. Revealing or replacing it is an audited administrator action.
If a token may have leaked, delete or revoke the Mastodon application, create a replacement, and update the Taranis source.
Collection behavior
The collector polls Mastodon’s REST API; it does not open a long-lived streaming connection and does not update Mastodon timeline markers.
On the first successful run, Taranis imports the newest posts up to the global Collector Entry Limit. Later runs request posts newer than the saved cursor. The cursor is stored with the latest collector task result and advances only after the collected News Items are published successfully. A failed Mastodon request or failed publication does not advance it.
Cursor state is intentionally best-effort. Deleting task history, retaining no task result for an inactive source, or restoring a database without recent task results can remove it. The next run then starts again from the newest posts. Core deduplication makes replay safe, but posts older than the entry limit may be skipped after such a reset.
Changing the instance, timeline mode, hashtag, token owner, or target account establishes a new timeline identity and starts a new cursor. Preview ignores the cursor and never changes collection progress.
Mapping and deduplication
Each Mastodon post becomes a News Item.
Boosts are stored as the original post and deduplicate through the original post URL.
Replies and boosts visible in the selected timeline are retained.
A content warning becomes the title when present; otherwise Taranis derives the title from the post content.
Media descriptions provide content when a post has no text.
The source account, author, publication time, language, post URL, and plain-text content are retained when supplied by Mastodon.
See Mastodon’s Status entity for the upstream response fields.
Troubleshooting
Access token required
Message:This Mastodon instance requires an access token to collect hashtags
The instance does not permit the combined hashtag feed to be read anonymously. Create a token with read:statuses, add it to the source, and preview again. This is expected on instances that expose local hashtag posts publicly but require authentication for remote posts.
The token was created on exactly the same instance as INSTANCE_URL.
The token was copied from Your access token, not Client secret.
The application has the scopes required for the selected mode.
The application or token has not been revoked.
The Mastodon account is still active and permitted to use the timeline.
Timeline or account not found
Enter a hashtag without a URL. A leading # is optional.
Enter an account as user@example.social, not as a profile URL.
Confirm that the account is visible to and known by the instance in INSTANCE_URL.
Open the hashtag or account from the instance’s own web interface to confirm that it exists there.
Rate limit exceeded
Increase REFRESH_INTERVAL or the global collector interval. Mastodon applies rate limits per account and IP address; see the Mastodon rate-limit documentation.
Instance unavailable
Check DNS, TLS certificates, firewall rules, the configured proxy, and whether the instance API is reachable from the collector worker. INSTANCE_URL must be the instance origin, not a profile, hashtag, or API URL.
No new statuses
This is a normal not-modified result. It means the timeline contains no posts newer than the saved cursor, or all returned posts already exist in Taranis.
The MISP connector is currently in an experimental stage. Please submit issues when you discover any problems or need support with its usage.
Until the definitions of our MISP Objects are not officially part of the MISP platform, feel free to import them manually (see MISP Objects). This enables you to edit the objects of News Items and Story data directly in you MISP instances without Taranis AI.
MISP Connector enables Taranis AI to push Stories to MISP in the representation of MISP Events.
The created events contain automatically an Event Report based on the Story content (currently it encompasses the Story description and Story summary, if you feel the Event Report would benefit extending with more information, please open a feature request for it here).
First the user with administrative privileges needs to make sure, the permissions connected to Connectors usage are assigned appropriately, by default, they are not assigned to any user, not even the admins themselves. Then the Connector needs to be setup in the Admin section under the Connectors tab.
Explanation of individual permissions:
Connector user access - ability to share a story to a Connector
Config connector access - ability to access admin Connector configuration
Config connector create - ability to create a Connector
Config connector delete - ability to delete a Connector
Config connector update - ability to update a Connector configuration
Required parameters:
URL: Base URL to the MISP instance (e.g. https://localhost)
ORGANISATION_ID: ID of your organisation, usually starts with ID=1 (It is very important that this value is correct, otherwise the tool will not work properly!)
Optional parameters:
SSL_CHECK: if enabled, the SSL certificate will be validated
SHARING_GROUP_ID: set to the ID of a sharing group, if you want to collect only one sharing group (see Create and manage Sharing Groups)
To send a story to MISP, use the button “Share to Connector” in Story options in Assess. When an update to the Story is later on made, it is recommended to share the change immediately, you need to do this manually like the first time.
Before a Story is pushed repeatedly to update the MISP event, it is important to check if any proposals are pending in the MISP event, as it would override the original content of it and would make it difficult to resolve the proposals correctly.
When a Story is collected, that is not owned by your configured organisation, it is possible to update it in Taranis AI and by using the same “Share to Connector” button in the Story options a proposal to the event is created. Then the owning organisation should review this proposal, and approve or reject the changes.
9.8 - Publishers
Publishers allow handling created products.
Supported options
Publishers send rendered Products to external systems.
Keep API keys, passwords, app secrets, and private keys in protected configuration. Do not reuse personal credentials for shared publishers.
Email Publisher
The Email Publisher allows sending out Products.
Fields:
SMTP_SERVER_ADDRESS*: Address of the SMTP server.
SMTP_SERVER_PORT*: Port of the SMTP server.
SERVER_TLS: Enable/Disable TLS.
EMAIL_USERNAME: Login username for the SMTP server.
EMAIL_PASSWORD: Login password for the SMTP server.
EMAIL_SENDER*: Sender of the email for message envelope.
EMAIL_RECIPIENT*: Email address of the recipient for message envelope. It is possible to use only one email recipient.
EMAIL_SUBJECT: Subject of the email.
Note: The EMAIL_SENDER and EMAIL_RECIPIENT parameters are used to construct the message envelope used by the transport agents. Message headers are not modified by these parameters in any way.
Required fields are marked with a *.
General usage
Once the publisher is created, it becomes available in the “Publish” section of each product.
To send out a product via email, the product must be “Rendered” first. To render a product, use the option available in the product’s view.
Kafka Publisher
The Kafka Publisher sends each rendered Product as a JSON message to the configured topic.
Message key: the generated product file name.
Message body: object_name, mime_type, and data.
KAFKA_SECURITY_PROTOCOL defaults to PLAINTEXT.
Supported security protocols are PLAINTEXT and SASL_PLAINTEXT.
When KAFKA_SECURITY_PROTOCOL is SASL_PLAINTEXT, set KAFKA_SASL_MECHANISM, KAFKA_SASL_USERNAME, and KAFKA_SASL_PASSWORD.
KAFKA_ACKS defaults to all.
KAFKA_RETRIES defaults to 3.
KAFKA_SEND_TIMEOUT defaults to 30 seconds.
TAXII Publisher
The TAXII Publisher pushes STIX bundle objects to a TAXII 2.1 collection. The rendered Product must be valid JSON with type: bundle and a non-empty objects list.
Set AUTH_TYPE to basic with USERNAME and PASSWORD, or to bearer with API_TOKEN. Configure either TAXII_API_ROOT_URL directly or TAXII_DISCOVERY_URL so Taranis AI can discover the API root.
S3 Publisher
The S3 Publisher uploads the rendered Product to S3-compatible object storage. If the configured bucket does not exist, Taranis AI creates it before uploading.
9.9 - IntelOwl Enrichment
Configure IntelOwl enrichment for indicators of compromise.
Taranis AI can send indicators of compromise (IOCs) to an IntelOwl instance through the disabled-by-default IntelOwl Bot. IntelOwl configuration errors, such as disabled or unconfigured analyzers, are reported by IntelOwl and are not worker-connectivity failures.
Prerequisites
Deploy IntelOwl using its supported installation method and wait for its first-run migrations to finish.
Create a dedicated IntelOwl API token for Taranis AI.
Enable and configure at least one supported analyzer for every IOC type you intend to enrich.
In Taranis AI, enable IOC Bot and IntelOwl Bot. Keep IOC Bot before IntelOwl Bot in the bot run order.
Configure the IntelOwl Bot with:
Setting
Purpose
INTEL_OWL_URL
IntelOwl URL reachable from the worker container or pod.
INTEL_OWL_API_KEY
Dedicated IntelOwl API token.
INTEL_OWL_TLS_VERIFY
Keep enabled except for a local self-signed test instance.
INTEL_OWL_TLP
TLP shared with IntelOwl; normally CLEAR.
INTEL_OWL_POLL_TIMEOUT_SECONDS
Maximum wait for IntelOwl processing; defaults to 1800 seconds.
Supported analyzers
Taranis AI supports the following IntelOwl analyzers for each IOC type. Configure at least one listed analyzer for each type you want to process.
If IntelOwl reports that no analyzer can run, enable a listed analyzer and configure its required provider credentials. Check the job detail for the missing analyzer or credential.
View enrichment results
You can view enrichment results for matching IOCs in the CTI dialogs for News Items, Stories, Reports, and Assets. Your normal permissions and TLP visibility still apply.
Security
Use a dedicated token and store it in protected configuration. Do not put IntelOwl or provider credentials in logs, screenshots, commits, or shared configuration files. Use HTTPS with TLS verification outside local development, and enable email analyzers only when the IntelOwl instance is approved to receive email-address IOCs.
Product Types facilitate the publication of products capable of aggregating multiple report items.
Prebuilt Product Types
CERT Daily Report
Default HTML Presenter
Default MISP Presenter
Default PDF Presenter
Default TEXT Presenter
Editing Product Types
All crucial fields are editable, with the most important being Type, Template, and Report Types.
Type: It’s the responsibility of the administrator to ensure the selected type is compatible with the subsequently provided template.
Template: Users can select from prebuilt templates or add new ones.
Report Types: This field determines which types of reports can be added to the products.
Template paths are validated before use. A Product Type cannot render a Report Type unless that Report Type is associated with the Product Type.
Create new Product Types
While there are several prebuilt product types available, users also have the option to create their own product types using custom templates.
It can be beneficial to create custom Product Types to meet desired results with the publishers.
Example of creating a simple new template using Jinja2
This is an example to render arbitrary values and loop over attributes.
Create a new file with a unique name in src/core/core/static/presenter_templates.
Write a custom template:
TITLE:{{data.report_items[0].get('title')|default('No title provided',true)}}<br>DATECREATED:{{data.report_items[0].get('created')|default('Not available',true)}}<br>LASTUPDATED:{{data.report_items[0].get('last_updated')|default('Not available',true)}}<br>{%forname,attributeindata.report_items[0].get('attributes').items()%}{{name}}:{{attribute}}<br>{%endfor%}
If one is interested in creating own templates, it is a good to start to render the object {{ data }} first, to understand how to parse the object properly.
Select the new template in the Product Type.
Render a test Product before using the Product Type in production.
It is also possible to copy src/core/core/static/presenter_templates/<new-custom-template.txt> to a dynamic folder src/core/taranis_data/presenter_templates so a restart is not necessary.
Advanced behaviour
If needed, templates can be utilized for more complex renderings by leveraging custom attributes.
Currently, this functionality is demonstrated in the text_template.txt file, where the attribute omission of type “Omit Keys” allows for the exclusion of unnecessary attributes from publication. To employ this feature, the administrator simply needs to add this attribute to the relevant report type. Then, within a specific report (Analyze View), they can specify the attributes to omit by listing them as comma-separated strings.
It is essential to ensure that the “Name” used for the report type attribute matches exactly with the key used in the template.
9.11 - Settings
The settings section enables the administrator to make global changes.
Learn more about what TLP version 2.0 is under first.org/tlp/.
Default value: Clear
Options: Green, Amber, Amber+Strict, Red
All newly collected items by Collectors use this default TLP value. When this setting is changed, it does not affect the items that are already present in Assess section.
This setting can be overridden for each collector with the TLP_LEVEL field.
Default Collector Proxy
When a default collector proxy is set, it can then be used in the collectors by enabling the switch USE_GLOBAL_PROXY.
The following matrix of the states applies
🟢 Per-source proxy set: A proxy is set or not for a collector.
🔵 Default proxy set: A default proxy is set or not in global settings.
USE_GLOBAL_PROXY: In the collector (OSINT Source) settings, the switch USE_GLOBAL_PROXY is enabled.
Result: The resulting state.
#
Per-source proxy
Default proxy
USE_GLOBAL_PROXY
Result
1
❌
❌
false
⚪ No proxy
2
✅
❌
false
🟢 Per-source proxy
3
❌
✅
false
⚪ No proxy
4
✅
✅
false
🟢 Per-source proxy
5
❌
❌
true
⚪ No proxy
6
✅
❌
true
⚪ No proxy(global forced; default missing)
7
❌
✅
true
🔵 Default proxy
8
✅
✅
true
🔵 Default proxy
Default Collector Interval
This value is used for REFRESH_INTERVAL for all collectors (OSINT Sources) when this field is left unset individually for all collectors. The syntax is the same as REFRESH_INTERVAL in bot settings.
Export options
Open Export Stories to download an instance-wide JSON array, optionally limited by Story creation date. This requires ADMIN_OPERATIONS and does not apply Assess content ACL filtering.
All Stories: Story IDs and creation dates, plus News Item IDs, titles, and content.
All Stories With Metadata: Also includes Story metadata and attributes, and detailed News Items with attributes and tags.
Enter From and To in your profile timezone, shown beside the form. Both bounds are inclusive. Blank bounds are optional; From alone ends at the current time. Future dates, reversed ranges, and ambiguous or nonexistent local times are rejected.
Import Stories
Upload an Assess or Admin Story export using Import Stories. Both minimal and metadata exports are accepted without manually stripping metadata for compatibility. This is the same importer used by Assess → Create manual news item → Create from file, and the import API requires ASSESS_CREATE.
Stories are the primary transfer format; existing standalone News Item JSON is also accepted. Imports do not merge or overwrite existing content: duplicate IDs or News Item hashes fail the whole batch. These exports are content transfers, not database backups.
See Story import and export for the workflow matrix, accepted formats, source handling, and transfer limits.
Danger Zone
Clear all Worker Queues: Delete all messages from all worker queues. This action cannot be undone.
Delete all Tags: Delete all tags from all Stories in the system. This action cannot be undone.
Chat uses a provider configured in Administration > Settings > Chat. This section appears only when Chat is enabled in the deployment. See Chat deployment to enable it first.
Configure the provider
Expand Chat, enter the connection settings, and select Save Chat Settings. Saved changes apply to the next message without restarting the application.
Setting
What to enter
API format
Responses (the default) or Chat Completions, matching the provider and model. Both require function calling.
Provider base URL
The provider’s API base URL, for example https://provider.example/v1. Omit /responses and /chat/completions; Taranis appends the endpoint for the selected format.
Model
The model identifier expected by the provider. Leave blank only if the provider supplies a default.
API key
A key for the configured provider, or blank for a provider that requires no authentication.
Provider timeout (seconds)
Timeout for provider response reads. Default: 120; minimum: 1. This is separate from the overall turn deadline.
Maximum stories per answer
Maximum number of Story summaries supplied for an answer. Default: 5; allowed range: 1–20. This does not limit the total matching count or the results available in Assess.
Existing settings retain Responses unless an administrator changes the API format. The Configured badge indicates that a base URL is saved; verify the connection by sending a message in Chat.
The API key field never displays a saved key. Leave it blank to keep the existing key. To remove it, select Remove saved API key and save. Updating other fields does not require re-entering the key.
Chat has its own provider configuration. The deployment variables used by LLM Bot Service do not configure Chat.
Verify setup
Open Chat and confirm that the setup warning is gone.
Ask a general question to check that the provider returns an answer.
Ask for Stories on a topic present in your collection. Confirm that the answer includes View N matching stories in Assess, and open that link to check the filters and results.
Reopen the conversation from the history sidebar to check persistence.
If a request fails, check that the selected API format and model support function calling, that core can reach the base URL, and that the credentials are valid. See Chat troubleshooting for user-visible errors and deployment requirements for Redis and timeout checks.
Privacy and storage
Core sends the provider the current prompt, up to the latest 10 saved messages, the analyst-visible filter catalog, and accessible references to recent results. For search answers, it also sends up to the configured number of bounded Story summaries, including Story IDs, titles, and creation times. Searches enforce the analyst’s source ACL and TLP restrictions.
Choose a provider and transport appropriate for this data. Responses requests set store: false; Chat Completions requests omit that option. The provider may still apply its own retention or abuse-monitoring policy.
Taranis stores conversations and answers in its database until the owner deletes them. Search metadata stores filters, the total count, and selected Story IDs; it does not store a separate copy of raw News Item content. Generated answers can themselves contain Story information.
Provider API keys are stored in the application database and omitted from serialized settings responses. Protect database access and backups. Disabling Chat preserves conversation history; it does not delete it.
9.13 - OpenAPI
The admin user can access the Taranis API through Swagger UI. Swagger UI displays OpenAPI specifications as an interactive API documentation.
User Stories as seen from the perspective of an analyst
10.1 - User Stories [Admin]
User Stories as seen from the perspective of an Taranis AI Administrator.
Configure Sources
As an admin, I need to configure OSINT sources to be gathered for intelligence gathering purposes.
Word Lists
As an admin, I need the ability to utilize Word Lists for filtering news items during collection or enhancing them with a Bot. This includes the capability to import and export word lists and apply them based on their designated usage, such as adding tags with the word_list_bot.
Configure Report Types
As an admin, I need the ability to configure new report types.
Configure Users
As an admin, I need to manage user accounts by creating and deleting users, ensuring they have the necessary access for their tasks.
Configure ACLs and roles
As an admin, I need to configure Access Control Lists (ACLs) and roles to define permissions for each role. This allows me to effectively manage user permissions, control access to sensitive information, and maintain compliance with organizational policies and regulations.
10.2 - User Stories [Analyst]
User Stories as seen from the perspective of an analyst
Topics Dashboard [Dashboard]
As an analyst, I require access to a Topics Dashboard feature that displays the most important news topics. This dashboard should prioritize the most frequently occurring tags, offering a snapshot of the prevailing themes and subjects within the collected news items.
Assess Stories [Assess]
As an analsyt, I want to review all stories gathered in a fixed time period. I want to be able to set a stard and end date for items to be displayed. If I set these time limits I want to display Stories with pageing otherwise there will be an infintescroll representing the everchanging nature of stories.
Search, Filter and Sort [Assess]
As an analyst, I need the capability to search for news items by entering any text string. To provide a ranked list of results based on the relevance to the search query, enabling me to quickly and effectively identify the most pertinent articles for further analysis.
Vote on Story [Assess]
As an analyst, I want to mark news items as important by voting on them. To allow me to quickly identify and categorize significant articles for easy retrieval at a later time. Each Story includes buttons for down and up voting as well as for marking an story as important. Via a shortcut (ctrl+i) I can mark all selected stories as important.
Mark as read [Assess]
As an analyst, I want to mark news items as read to prevent myself and other anlyst from viewing the same story multiple times. Each Story contains a button to mark a story as read or unread if already marked as read. The same behaviour can be toggled via a shortcut (ctrl+space).
Tags [Assess]
As an analyst, I need the ability to filter news items based on tags, attributes, or important keywords. To allow me to quickly find relevant news items by applying a tag filter within the tool. The interface should provide an option to enter or select tags, and display the filtered results. In scenarios where no news items match the selected tags, it should result in an empty story list.
Create and edit News Item [Assess]
As an analyst, I need a feature that enables me to create news items, specifying details such as title, publish date, review, link, article content, and attributes. To maintain data integrity, the editing function will be disabled for any news item once it is included in a report. For ease of use, each news item has an edit button in the Asses view.
Manage Report [Analyze]
As an analyst, I want to create and edit reports directly within the Analyse view. I can create reports from predefined list of report types managed by an administrator. I can edit the metadata of this report, and add Stories to it. I can mark the report as “completed” to allow further processing and publishing.
Manage Product [Publish]
As an analyst, I require a feature to create reports directly within the Analyse view. I can create reports from predefined list of report types managed by an administrator. I can edit the metadata of this report, and add Stories to it. I can mark the report as “completed” to allow further processing and publishing.
Publish Product [Publish]
As an analyst, I want to publish the findings of a report. So they can be viewed outside of Taranis AI. I can choose only Reports that match my Product type. I can render a preview of the Product before sharing. I can choose the destination where to publish from a predefined list (publishers) managed by an administrator.
10.2.1 - Workflow [Analyst]
End to End ‘user flow’ for an analyst.
Upon logging in, the analyst is greeted by the Dashboard, which displays significant tags, statistics, and saved Assess filter shortcuts. This view sets the context for the analyst’s tasks ahead.
To enhance workflow efficiency, please review the available hotkeys.
Additionally, for simplified filtering, set the “End of Shift” time in the user settings. This feature allows the system to display only articles published since the last end of shift, ensuring you see content that hasn’t been reviewed yet.
Assess
To assess your items, go to the Assess section and set the time filter. Apply the “not read” and “not important” filters. Save this as a default filter if it is your normal review queue. Mark as read any items that have been read but are considered unimportant. Continue working through these items until all are marked as read, focusing only on checking summaries.
Next, set the filter to “not read” and “important”. Verify the importance of each item and mark it as read if not important. Check whether the item is part of an older report and determine if it still adds value. If not, remove the “important” tag and mark the item as read. If multiple items discuss the same topic, merge them.
Use Omnisearch for quick jumps, for example story: tag:ransomware read:false, report: weekly, or product: stix.
To update a summary manually or with AI, first click the “Edit Story” button. Then, edit the summary yourself or use the AI actions when advanced story edit options are enabled. Send important or sector-specific items via a connector or add them to the relevant reports. Optionally, vote Stories up or down and bookmark Stories that need follow-up.
Finally, remove the “important” tag and mark the item as read. For greater efficiency, consider using the time filter to focus on the most recent content.
Additional tasks during assess
During the review process in the Assess tab, the analyst has several tools at their disposal to optimize their workflow:
Voting on Stories:
The analyst can vote stories up or down and mark them as important using buttons or the shortcut (Ctrl+I). This helps highlight stories of particular relevance.
Mark as Read:
To maintain efficiency and avoid redundancy, the analyst can mark stories as read or unread using a button or the shortcut (Ctrl+Space).
Tags:
Tag filters can be applied to narrow down the selection to the most relevant articles, improving focus. If a story needs editing or creation, the analyst can do so directly within the Assess tab, where news items can be adjusted until they are locked into a report. This ensures the content remains fresh and accurate.
Bookmarks:
Bookmark collections are private per user. Use them for follow-up queues, handover topics, and Stories that should stay visible after they are marked read.
Version history:
Story version history can be used to inspect how a Story changed over time, especially after manual edits, grouping, ungrouping, bot updates, or connector synchronization.
Once all relevant stories are collected and reviewed, the analyst moves to the Analyze tab to finalize the report and mark it as completed. This step transitions the process from review to dissemination
Analyze
To analyze your items, go to the Analyze section and review the Report. Add Stories to the appropriate sections, save changes, inspect version history when needed, and mark the Report as completed when it is ready for publication.
Publish
Finally, the Publish tab is where the compiled Report becomes a Product ready for external consumption. The analyst chooses a Product Type, renders and reviews the final Product preview, then publishes manually or uses autopublish with a default Publisher.